Tutorial 4- Eureka 7
From this to 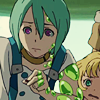
Difficulty: Easy
Program: Photoshop 7.0, but I'm almost 100% positive it will transfer over to PSP.
For dark images:
1. Take image, crop it, sharpen it, etc.
2. Duplicate base, set it to screen 100%. Note, you may not have to do this step if the image is light.
3. Make a new layer, fill with #000B1E, set layer to exclusion 100%.
4. Copy base, set to overlay 100%.
5. Make a new layer, fill with #FFF882, set to multiply 22%.
And you get:
And voila! You’re done! If you want to keep going, just add this step:
6. Make a new layer, fill with #A2FF82, set to saturation 39% and you get: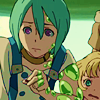
And if you still want to keep going:
7. Copy base, drag to top, desaturate, set to color dodge 76% and you get: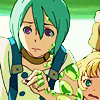
Note that the optional steps (6, 7) will make the image a little harsher.
For light(er) images:
1. Take image, crop it, sharpen, etc.
2. My image was a little dark, so I used levels and only moved the right one a little.
3. Make a new layer, fill it with #000B1E (that wasn't the exact one, but it was a dark blue around that), set to exclusion 100%.
4. Make a new layer, fill with #9A7994, saturation 22%.
5. Duplicate base, drag to top, set to overlay 85%.
6. Make a new layer, fill with #FFBBBB, set to saturation 100%.
7. Make a new layer, fill with #FFBBBB, set to color burn and play around with the opacity until it looks good. I set mine to 81%, but if I wasn’t feeling picky, 100% would have been fine.
You'll get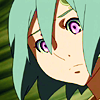
Other icons made using this tutorial:
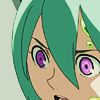

Credit for the screencaps belongs to: whoresque

Difficulty: Easy
Program: Photoshop 7.0, but I'm almost 100% positive it will transfer over to PSP.
For dark images:
1. Take image, crop it, sharpen it, etc.
2. Duplicate base, set it to screen 100%. Note, you may not have to do this step if the image is light.
3. Make a new layer, fill with #000B1E, set layer to exclusion 100%.
4. Copy base, set to overlay 100%.
5. Make a new layer, fill with #FFF882, set to multiply 22%.
And you get:

And voila! You’re done! If you want to keep going, just add this step:
6. Make a new layer, fill with #A2FF82, set to saturation 39% and you get:

And if you still want to keep going:
7. Copy base, drag to top, desaturate, set to color dodge 76% and you get:

Note that the optional steps (6, 7) will make the image a little harsher.
For light(er) images:
1. Take image, crop it, sharpen, etc.
2. My image was a little dark, so I used levels and only moved the right one a little.
3. Make a new layer, fill it with #000B1E (that wasn't the exact one, but it was a dark blue around that), set to exclusion 100%.
4. Make a new layer, fill with #9A7994, saturation 22%.
5. Duplicate base, drag to top, set to overlay 85%.
6. Make a new layer, fill with #FFBBBB, set to saturation 100%.
7. Make a new layer, fill with #FFBBBB, set to color burn and play around with the opacity until it looks good. I set mine to 81%, but if I wasn’t feeling picky, 100% would have been fine.
You'll get

Other icons made using this tutorial:


Credit for the screencaps belongs to: whoresque