Header Tutorial
How to get this:

1. Choose the pictures you want and open a new file big enough so they can call fit and paste them there. The picture in the middle goes on top of the other two. Put the end of the pictures on top of each other like so:
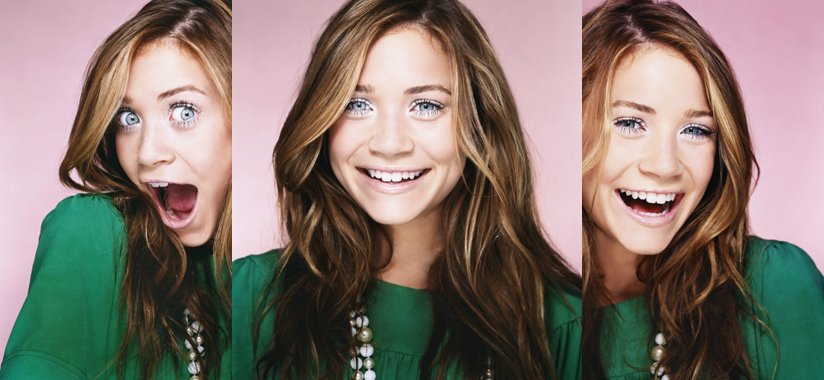
(Suggestion: Change the view to 50% percent so it's easier to see)
2. Now Add Layer Mask to the Layer on top (which is the picture in the middle)
To Add a Layer Mask: Click on the Square with the little circle inside it, it is located at the bottom of your layers window.
Now when you add Layer Mask your foreground color has to be black. Choose a Soft Round brush of 100 pixels and change the Opacity to 60%. Now with the brush go over the parts that you don't want which are the ones around the middle picture. When you are done Merge all layers. You should have something like this...
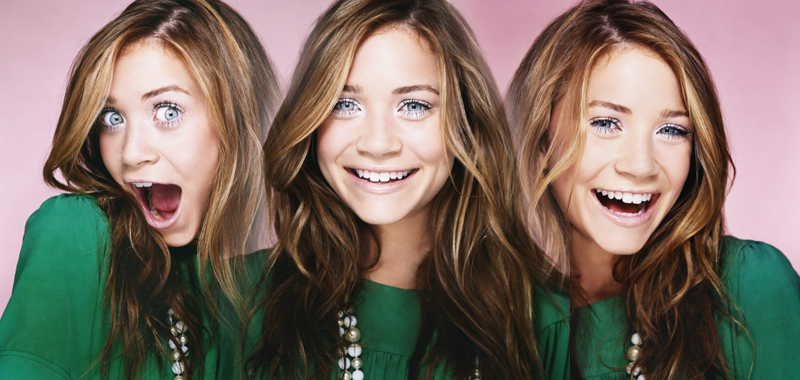
Okay enough of blending let's move on to coloring :)
3. Duplicate your Background, now go to Filter > Blur > Gaussian Blur, and choose 2 pixels. Now set the blur layer to Multiply. Create a New Layer and fill it with #6FA9FF and set it Soft Light at 100%. Merge all the layers and duplicate your background again. Set this new layer to Overlay 100% Opacity.
Yay we've got some pretty coloring :)
Now for the text we're just going to put something, it doesn't really matter.

I also added a small brush. I think it's by unmasked but I'm not sure.
And this light texture. I like both with the light texture and without it.

Use your imagination ^^

Enjoy and ask questions :)
Make sure you friend us suicidalxlies

1. Choose the pictures you want and open a new file big enough so they can call fit and paste them there. The picture in the middle goes on top of the other two. Put the end of the pictures on top of each other like so:

(Suggestion: Change the view to 50% percent so it's easier to see)
2. Now Add Layer Mask to the Layer on top (which is the picture in the middle)
To Add a Layer Mask: Click on the Square with the little circle inside it, it is located at the bottom of your layers window.
Now when you add Layer Mask your foreground color has to be black. Choose a Soft Round brush of 100 pixels and change the Opacity to 60%. Now with the brush go over the parts that you don't want which are the ones around the middle picture. When you are done Merge all layers. You should have something like this...

Okay enough of blending let's move on to coloring :)
3. Duplicate your Background, now go to Filter > Blur > Gaussian Blur, and choose 2 pixels. Now set the blur layer to Multiply. Create a New Layer and fill it with #6FA9FF and set it Soft Light at 100%. Merge all the layers and duplicate your background again. Set this new layer to Overlay 100% Opacity.
Yay we've got some pretty coloring :)
Now for the text we're just going to put something, it doesn't really matter.

I also added a small brush. I think it's by unmasked but I'm not sure.
And this light texture. I like both with the light texture and without it.

Use your imagination ^^

Enjoy and ask questions :)
Make sure you friend us suicidalxlies