Cedric/Cho Tutorial For PSP 9
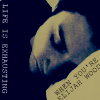
Would you like to go from 
to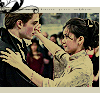
in seven easy steps?
First, crop your base. I cropped this to 100x74 (which is what you want to do).
Don't make it too big or small or else it won't look that great, so I'd stick to between 100x70-100x75.
Adjustments > Sharpness > Sharpen
Adjustments > Sharpness > Unsharp Mask. Set your strength for about 50%, your radius at 2.00, and your clipping at 5. It all really depends on your base, but I had to do it for mine. 
Next, duplicate your base once and set it to multiply at 50% opacity.
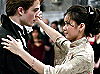
Create a new layer and fill it with #C0B068. Set this to darken between 80-90% opacity. I chose 80%.
You may merge all of the layers together.
Now go to Image > Add Borders. If a weird pop-up comes up, click OK. Now, click your color box and change it to #D6D2BA and click OK. Then, make sure that all of your top, bottom, left, and right pixels are size 6. Click OK.

Okay, it's not that hard to do, but it's a little complicated to explain.
Press Ctrl + A and then Ctrl + C.
Open a new window that's 100x100 and make sure the background is white.
Press Ctrl + E and your copied picture will show up. Don't click down until you align it as you wish, as seen below. 
Next, press Ctrl + A again and then Ctrl + C. Then, press Ctrl + V, not Ctrl + E this time.
Now, just add text and/or brushes. I chose a simple tiny text brush by ewanism.
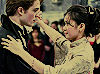
And voilà! You have your finished result:
Other examples:
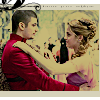

You may take those icons above for use (including the tutorial one), but if you do please let me know and credit checkerd or stitchy_icons.
to
in seven easy steps?
First, crop your base. I cropped this to 100x74 (which is what you want to do).
Don't make it too big or small or else it won't look that great, so I'd stick to between 100x70-100x75.
Next, duplicate your base once and set it to multiply at 50% opacity.
Create a new layer and fill it with #C0B068. Set this to darken between 80-90% opacity. I chose 80%.
You may merge all of the layers together.
Now go to Image > Add Borders. If a weird pop-up comes up, click OK. Now, click your color box and change it to #D6D2BA and click OK. Then, make sure that all of your top, bottom, left, and right pixels are size 6. Click OK.
Okay, it's not that hard to do, but it's a little complicated to explain.
Next, press Ctrl + A again and then Ctrl + C. Then, press Ctrl + V, not Ctrl + E this time.
Now, just add text and/or brushes. I chose a simple tiny text brush by ewanism.
And voilà! You have your finished result:
Other examples:
You may take those icons above for use (including the tutorial one), but if you do please let me know and credit checkerd or stitchy_icons.