Tutorial #1
A friend of mine asked for a general tutorial on how I do my icons...so I thought I'd give it a try! My very first one, it's very detailed and hopefully easy to understand. :)
I'm using Photoshop 7, but this should be fairly easily to translate.
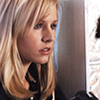
1. I started out with this picture from Luminary and resized [Image >> Image size] it to 106x160 [I generally just resize the height until I get the picture around the size I want].
2. Open a new 100x100 document.
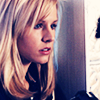
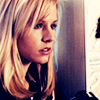
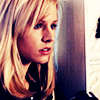
3. Drag your resized picture into the new 100x100 document and move it around until you find something that looks good to you.
I ended up with this:

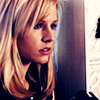
4. Sharpen once [Filter >> Sharpen]. I really hate when my icons are over sharpened, so I faded the sharpen to 50% [Edit >> Fade Sharpen >> 50%]
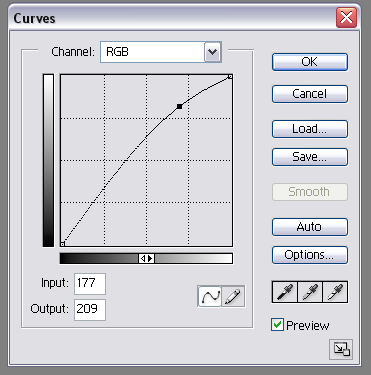
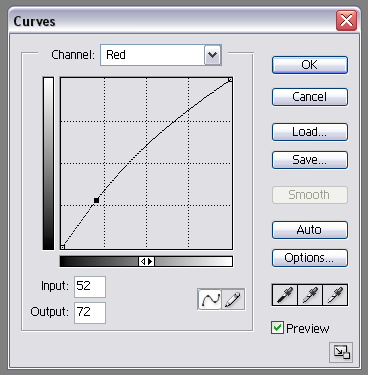
5. To lighten the image I use curves, a lot of people use screen for this step and it works pretty much exactly the same way...curves is just easier for me. Curves can be a little confusing if you're not used to them, but this is not complicated...all you have to do is move one dot.
a) Go to Layer >> New Adjustment Layer >> Curves so the curves box pops up.
b) Click any place on the top part of the line that goes through the center of the box to create a dot.
c) Drag the dot to the left and upward and watch how your image becomes lighter. Stop when you feel your image is light enough.
My curves box looks like this:
The icon so far:
6. Between the base layer and the curves layer create a new fill layer [Layer >> New Fill Layer >> Solid Color] and fill it with a dark blue [I chose 000D24]and set it to exclusion.
7. Create a new layer at the very top and put a copy of all the layers merged into it [sounds confusing...just press CTRl+ALT+SHIFT+E whith the new layer highlighted]. Set this layer to soft light.
8. Hide the top soft light layer you just made [by clicking the little eyeball next to it]. Go down and duplicate the exclusion layer, leaving it right on top of the other one.
Create another new layer underneath the top hidden layer. Copy the merged picture into this layer [CTRL+ALT+SHIFT+E] and set it to soft light.
Make the top layer visible again by clicking the eyeball.
Your image should look something like this:
9. Create a new fill layer in between the 2 top layers [Layer >> New Fill Layer >> Solid Color] and fill it with a tan color [I used EADCCD] set it to color burn.
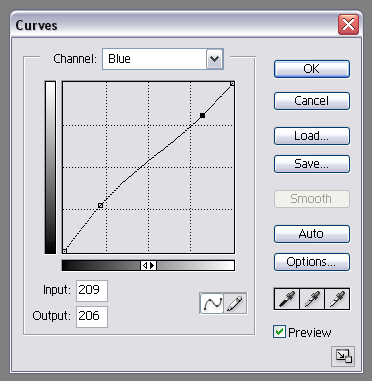
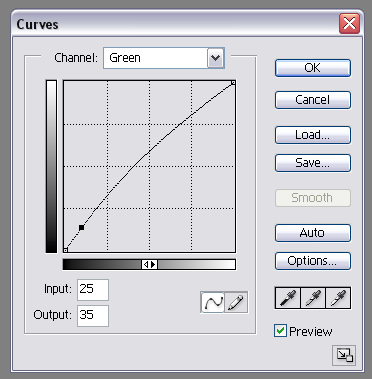
10. On top of everything create a new curves layer [Layer >> New Adjustment Layer >> Curves]. Using the dropdown menu at the top, select:
The Blue Channel
[I usually create 2 dots on this line, one on the top and one on the bottom. I move the bottom dot up and to the left to add more blue, and the top dot down and to the right to add a little more yellow].
The Green Channel
[I usually create one dot on this line, all the way in the bottom left corner and adjust it slightly by going up and to the left. This adds more green to the image, and I find that it lightens some images significantly].
The Red Channel
[I usually just add one dot to this channel too, around the same place as the green...but a little bit higher. I also generally add more red than anything else].
11. Duplicate the top curves layer. Set the one on the bottom [the second one] to soft light at an opacity of 50.
12. On top of everything create a new Levels layer [Layers >> New Adjustment Layer >> Levels].
Select the Blue channel from the dropdown menu. Slide the middle slider to the right to add a little blue.
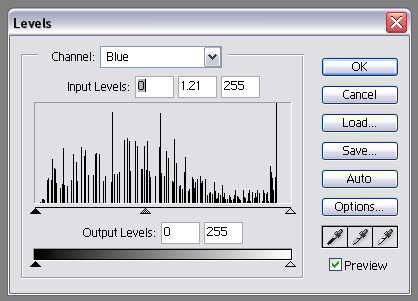
Select the Red channel, slide the middle slider to the right again to add a little more red.
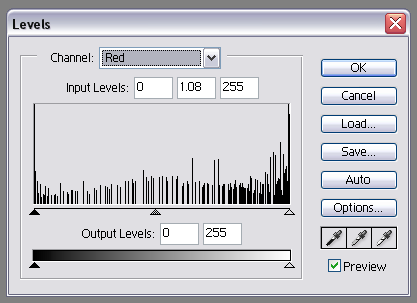
Select the Green channel, and slide the middle slider to the right to add some green and lighten it up a little.
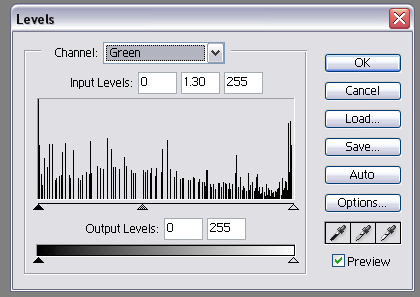
The icon after messing with the levels looks like this: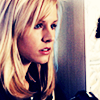
[Note: With every cap the levels and the curves will vary greatly, it really all depends on the image you're working with. So play around a little!]
13. Duplicate the levels layer and set it to soft light opacity 80%.

14. Create a new layer on top of everything and merge a copy of all the layers into it [CTRL+ALT+SHIFT+E]. Select the magnifying tool and zoom in one time. Smooth out the face [and background] a little with the Blur tool if needed. Zoom out.
15. Flatten the image and you're done!
Final Icon: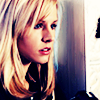
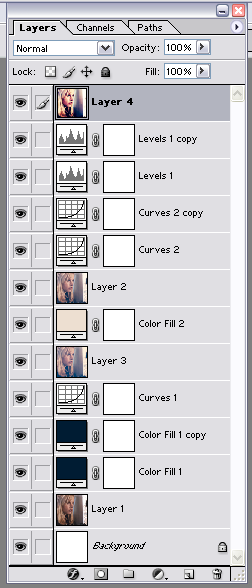
Here's a screen shot of my layers palette just in case:
I hope this was helpful, and I'd love to see what you come up with! :D
I'm using Photoshop 7, but this should be fairly easily to translate.
1. I started out with this picture from Luminary and resized [Image >> Image size] it to 106x160 [I generally just resize the height until I get the picture around the size I want].
2. Open a new 100x100 document.
3. Drag your resized picture into the new 100x100 document and move it around until you find something that looks good to you.
I ended up with this:
4. Sharpen once [Filter >> Sharpen]. I really hate when my icons are over sharpened, so I faded the sharpen to 50% [Edit >> Fade Sharpen >> 50%]
5. To lighten the image I use curves, a lot of people use screen for this step and it works pretty much exactly the same way...curves is just easier for me. Curves can be a little confusing if you're not used to them, but this is not complicated...all you have to do is move one dot.
a) Go to Layer >> New Adjustment Layer >> Curves so the curves box pops up.
b) Click any place on the top part of the line that goes through the center of the box to create a dot.
c) Drag the dot to the left and upward and watch how your image becomes lighter. Stop when you feel your image is light enough.
My curves box looks like this:
The icon so far:
6. Between the base layer and the curves layer create a new fill layer [Layer >> New Fill Layer >> Solid Color] and fill it with a dark blue [I chose 000D24]and set it to exclusion.
7. Create a new layer at the very top and put a copy of all the layers merged into it [sounds confusing...just press CTRl+ALT+SHIFT+E whith the new layer highlighted]. Set this layer to soft light.
8. Hide the top soft light layer you just made [by clicking the little eyeball next to it]. Go down and duplicate the exclusion layer, leaving it right on top of the other one.
Create another new layer underneath the top hidden layer. Copy the merged picture into this layer [CTRL+ALT+SHIFT+E] and set it to soft light.
Make the top layer visible again by clicking the eyeball.
Your image should look something like this:
9. Create a new fill layer in between the 2 top layers [Layer >> New Fill Layer >> Solid Color] and fill it with a tan color [I used EADCCD] set it to color burn.
10. On top of everything create a new curves layer [Layer >> New Adjustment Layer >> Curves]. Using the dropdown menu at the top, select:
The Blue Channel
[I usually create 2 dots on this line, one on the top and one on the bottom. I move the bottom dot up and to the left to add more blue, and the top dot down and to the right to add a little more yellow].
The Green Channel
[I usually create one dot on this line, all the way in the bottom left corner and adjust it slightly by going up and to the left. This adds more green to the image, and I find that it lightens some images significantly].
The Red Channel
[I usually just add one dot to this channel too, around the same place as the green...but a little bit higher. I also generally add more red than anything else].
11. Duplicate the top curves layer. Set the one on the bottom [the second one] to soft light at an opacity of 50.
12. On top of everything create a new Levels layer [Layers >> New Adjustment Layer >> Levels].
Select the Blue channel from the dropdown menu. Slide the middle slider to the right to add a little blue.
Select the Red channel, slide the middle slider to the right again to add a little more red.
Select the Green channel, and slide the middle slider to the right to add some green and lighten it up a little.
The icon after messing with the levels looks like this:
[Note: With every cap the levels and the curves will vary greatly, it really all depends on the image you're working with. So play around a little!]
13. Duplicate the levels layer and set it to soft light opacity 80%.
14. Create a new layer on top of everything and merge a copy of all the layers into it [CTRL+ALT+SHIFT+E]. Select the magnifying tool and zoom in one time. Smooth out the face [and background] a little with the Blur tool if needed. Zoom out.
15. Flatten the image and you're done!
Final Icon:
Here's a screen shot of my layers palette just in case:
I hope this was helpful, and I'd love to see what you come up with! :D