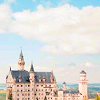
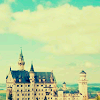
(no subject)
TUTORIAL

>>
1. Take your base and resize it, sharpen it, whatever you need to do.
2. Go to Enhance Photo >> Smart Photo Fix. Mess around with it until you the kind of coloring that looks similar to the starting icon above.
3. New layer. #130a54
. Set to exlusion 100%
3. New raster layer. this time this color: #04072a
. set to exclusion 100%
4. Another new raster layer. #ccf2ff
set to burn 100%
5. Duplicate the layer in step 4
6. Duplicate your base, bring it to the top, and set to soft light 100%
7. Last step. Go to Layers >> New Adjustment Layers >> Curves. Select blue in the drop down menu for Channels. The first point on the line should be 132 and 122. The second point on that same line should be 144 and 113.
8. Ta da!
Hope this was helpful and that you like it. If you have any questions feel free to leave comments. :)

>>

1. Take your base and resize it, sharpen it, whatever you need to do.
2. Go to Enhance Photo >> Smart Photo Fix. Mess around with it until you the kind of coloring that looks similar to the starting icon above.
3. New layer. #130a54

. Set to exlusion 100%
3. New raster layer. this time this color: #04072a

. set to exclusion 100%
4. Another new raster layer. #ccf2ff

set to burn 100%
5. Duplicate the layer in step 4
6. Duplicate your base, bring it to the top, and set to soft light 100%
7. Last step. Go to Layers >> New Adjustment Layers >> Curves. Select blue in the drop down menu for Channels. The first point on the line should be 132 and 122. The second point on that same line should be 144 and 113.
8. Ta da!
Hope this was helpful and that you like it. If you have any questions feel free to leave comments. :)