(no subject)
Tutorial #01
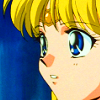
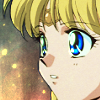
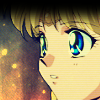
We'll be going from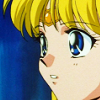
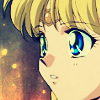
to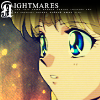
using PSP9
Now, before we start... Don't follow this exactly. Mess around and have a little creativity.
01.
Crop image down to your base and clean in it. This includes sharpening, and, if you like, unsharp masking the base.
02.
Make a Hue/Saturation/Lightness Adjustment Layer. Increase Saturation to 40 and leave the other two settings alone.
03.
Create a new layer and set it to color at opacity 100. Use a black paint brush and paint over the background so it is completly black and white except for your main subject.
04.
Create another new layer set at Color (Legacy) at opacity 50. Use a black paint brush on your subject. I left her eyes alone because I wanted them to stand out. After this is done merge all (flatten) the image.
05.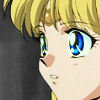
As mentioned before, I want Venus' eyes to stand out. So I took my dodge tool (size 4, opacity 63, limit none) and carefully went over the blue part of her eyes.
06.
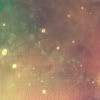
Now for some fun light textures.
by immoral
set it to Hard Light opacity 82. Cut the light texture off your subject so it only effects the background. I used the lasso tool with feathering of two to select Venus and cut the texture off her.
07.
Create a new layer and set it to Exclusion opacity 100. Fill with a dark blue (I used #00126a).
08.
Duplicate your base layer and bring it to the top. Set it to Soft Light opacity 100.
09.
Create a new layer and select a line bursh

by me (but there are a million like it)
I used color #8b8165, but it depends on the image and the feel you want in the icon. I wanted a more serious tone and my subject is typically linked to earthy tones. So I chose a brownish. You will probably use something else. After this I cut it off the background and set it to Soft Light 100. So now it is only effecting the subject.
10.
Using another line brush
by me (but there are a million like it)
Using the same color #8b8165 put it on yet another new layer. Cut this one off of the subject. Again, set to Soft Light 100.
11.
Add a thick black line on a new layer less than 10 pixels wide. I then used the smudge tool (set to opacity 55) to smudge up the bottom. Then I used Gaussian Blur set at two.
12.
Now add text and tiny text. And you're done! Wee!
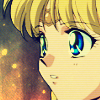
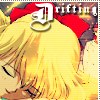
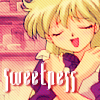
Other icons made using this method
We'll be going from
to
using PSP9
Now, before we start... Don't follow this exactly. Mess around and have a little creativity.
01.
Crop image down to your base and clean in it. This includes sharpening, and, if you like, unsharp masking the base.
02.
Make a Hue/Saturation/Lightness Adjustment Layer. Increase Saturation to 40 and leave the other two settings alone.
03.
Create a new layer and set it to color at opacity 100. Use a black paint brush and paint over the background so it is completly black and white except for your main subject.
04.
Create another new layer set at Color (Legacy) at opacity 50. Use a black paint brush on your subject. I left her eyes alone because I wanted them to stand out. After this is done merge all (flatten) the image.
05.
As mentioned before, I want Venus' eyes to stand out. So I took my dodge tool (size 4, opacity 63, limit none) and carefully went over the blue part of her eyes.
06.
Now for some fun light textures.
by immoral
set it to Hard Light opacity 82. Cut the light texture off your subject so it only effects the background. I used the lasso tool with feathering of two to select Venus and cut the texture off her.
07.
Create a new layer and set it to Exclusion opacity 100. Fill with a dark blue (I used #00126a).
08.
Duplicate your base layer and bring it to the top. Set it to Soft Light opacity 100.
09.
Create a new layer and select a line bursh
by me (but there are a million like it)
I used color #8b8165, but it depends on the image and the feel you want in the icon. I wanted a more serious tone and my subject is typically linked to earthy tones. So I chose a brownish. You will probably use something else. After this I cut it off the background and set it to Soft Light 100. So now it is only effecting the subject.
10.
Using another line brush
by me (but there are a million like it)
Using the same color #8b8165 put it on yet another new layer. Cut this one off of the subject. Again, set to Soft Light 100.
11.
Add a thick black line on a new layer less than 10 pixels wide. I then used the smudge tool (set to opacity 55) to smudge up the bottom. Then I used Gaussian Blur set at two.
12.
Now add text and tiny text. And you're done! Wee!
Other icons made using this method