tutorials #84 and #85
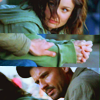
Make the following 2 icons:
Turn:
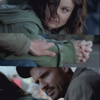
TO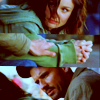
This icon was part of this post and was requested by ishallbelieve_x.
1. Open a new 100 x 100 image
2. Open your images and resize them. Drag them onto your 100 x 100 image. Place them one on top of the other until you like the effect. Merge the layers
I got:

3. Duplicate your base and set it to screen at 50% opacity.
I got:
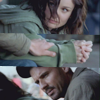
4. Now go to Layer > New Adjustment Layer > Hue/Saturation
Set the Saturation to +51 (Adjust to suit your image)
I got:
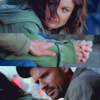
5. Now go to Layer > New Adjustment Layer > Curves
Set to:
RGB:
Point One
I: 71
O: 78
Point Two
I: 193
O: 223
BLUE:
Point One
I: 76
O: 50
Point Two
I: 198
O: 215
I got:
6. Now go to Layer > New Adjustment Layer > Brightness/Contrast. Set to:
Brightness: -15
Contrast: +18
I got:
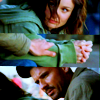
7. Now I filled a new layer with #290000. Set to Exclusion.
And you are done!
Finished Product:

and turn:
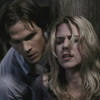
TO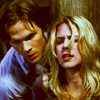
This icon was part of this post and was requested by mscellym.
1. Open a new 100 x 100 image
2. Open your image and resize it. Drag it onto your 100 x 100 image.
I got:

3. Now go to Layer > New Adjustment Layer > Curves
Set to:
RGB:
Point One
I: 155
O: 209
I got:
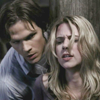
4. Now go to Layer > New Adjustment Layer > Hue/Saturation
Set the Saturation to +51 (Adjust to suit your image)
I got:
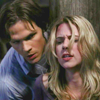
5. Now go to Layer > New Adjustment Layer > Curves
Set to:
RGB:
Point One
I: 71
O: 78
Point Two
I: 193
O: 223
BLUE:
Point One
I: 76
O: 50
Point Two
I: 198
O: 215
I got:
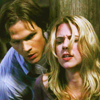
6. Now go to Layer > New Adjustment Layer > Brightness/Contrast. Set to:
Brightness: -15
Contrast: +18
I got:
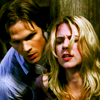
7. Now I filled a new layer with #290000. Set to Exclusion.
And you are done!
Finished Product:

If you have any trouble at all, or need any help just let me know! I am more than happy to help!
I hope you liked these tutorials. If you did, feel free to check out the many others that can be found right HERE!!!
Have fun and please comment! Friend me
Both made in Photoshop 7.0
Turn:

TO

This icon was part of this post and was requested by ishallbelieve_x.
1. Open a new 100 x 100 image
2. Open your images and resize them. Drag them onto your 100 x 100 image. Place them one on top of the other until you like the effect. Merge the layers
I got:

3. Duplicate your base and set it to screen at 50% opacity.
I got:

4. Now go to Layer > New Adjustment Layer > Hue/Saturation
Set the Saturation to +51 (Adjust to suit your image)
I got:

5. Now go to Layer > New Adjustment Layer > Curves
Set to:
RGB:
Point One
I: 71
O: 78
Point Two
I: 193
O: 223
BLUE:
Point One
I: 76
O: 50
Point Two
I: 198
O: 215
I got:

6. Now go to Layer > New Adjustment Layer > Brightness/Contrast. Set to:
Brightness: -15
Contrast: +18
I got:

7. Now I filled a new layer with #290000. Set to Exclusion.
And you are done!
Finished Product:

and turn:

TO

This icon was part of this post and was requested by mscellym.
1. Open a new 100 x 100 image
2. Open your image and resize it. Drag it onto your 100 x 100 image.
I got:

3. Now go to Layer > New Adjustment Layer > Curves
Set to:
RGB:
Point One
I: 155
O: 209
I got:

4. Now go to Layer > New Adjustment Layer > Hue/Saturation
Set the Saturation to +51 (Adjust to suit your image)
I got:

5. Now go to Layer > New Adjustment Layer > Curves
Set to:
RGB:
Point One
I: 71
O: 78
Point Two
I: 193
O: 223
BLUE:
Point One
I: 76
O: 50
Point Two
I: 198
O: 215
I got:

6. Now go to Layer > New Adjustment Layer > Brightness/Contrast. Set to:
Brightness: -15
Contrast: +18
I got:

7. Now I filled a new layer with #290000. Set to Exclusion.
And you are done!
Finished Product:

If you have any trouble at all, or need any help just let me know! I am more than happy to help!
I hope you liked these tutorials. If you did, feel free to check out the many others that can be found right HERE!!!
Have fun and please comment! Friend me
Both made in Photoshop 7.0