Tutorial #70!
A new tutorial!
Make the following icon;
Turn:

TO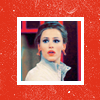
This icon was part of this post.
Tutorial requested by lyssafan.
1. Open a new 100 x 100 image
2. Open your image and resize it. Drag it into your 100 x 100 image. Place it towards the bottom.
I got:

3. Now go to Layer > New Adjustment Layer > Curves. Set to:
RGB:
Point One: I-117 , O- 205

4. Now go to Layer > New Adjustment Layer > Colour Balance.
Set to:
Midtones: -1, +29, -3.
I got:

5. Now go to Layer > New Adjustment Layer > Selective Colour
Set to:
Neutrals:
C: +48
M: 0
Y: -41
B: 0
I got:

6. Now go to Layer > New Adjustment Layer > Hue/Saturation. Set the Saturation to +8.
7. Now go to Layer > New Adjustment Layer > Selective Colour
Reds:
C: -70
M: 0
Y: +37
B: 0
I got:

8. Now go to Layer > New Adjustment Layer > Selective Colour
Reds:
C: -47
M: 0
Y: 0
B: 0
I got:
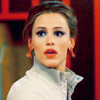
9. Now go to Layer > New Adjustment Layer > Selective Colour
Whites:
C: -46
M: 0
Y: +18
B: -5
I got:

10. Sorry about all the Selective Colour layers but it is worth it! Go to Layer > New Adjustment Layer > Selective Colour
Neutrals:
C: 0
M: -22
Y: +7
B: 0
I got:
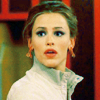
11. Just one last Selective Colour! Go to Layer > New Adjustment Layer > Selective Colour
Reds:
C: -100
M: 0
Y: 0
B: 0
Neutrals:
C: 41
M: 0
Y: -41
B: 0
I got:
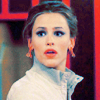
12. Now resize your image to 60 x 60. Drag it onto a 100 x 100 canvas filled with #E1301A.
I got:
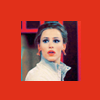
13. On the layer in between your background and your picture, place this texture by lovelamp and set to screen.
Texture:
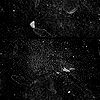
I got:
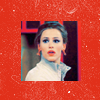
14. Now add a white box a bit bigger than your picture and place it on a new layer between the texture and your picture.
Box:
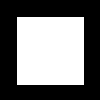
And you are done!
Finished Product:

If you have any trouble at all, or need any help just let me know! I am more than happy to help!
I hope you liked this tut. If you did, feel free to check out the many others that can be found right HERE!!!
Have fun and please comment! Friend me
Make the following icon;
Turn:

TO

This icon was part of this post.
Tutorial requested by lyssafan.
1. Open a new 100 x 100 image
2. Open your image and resize it. Drag it into your 100 x 100 image. Place it towards the bottom.
I got:

3. Now go to Layer > New Adjustment Layer > Curves. Set to:
RGB:
Point One: I-117 , O- 205

4. Now go to Layer > New Adjustment Layer > Colour Balance.
Set to:
Midtones: -1, +29, -3.
I got:

5. Now go to Layer > New Adjustment Layer > Selective Colour
Set to:
Neutrals:
C: +48
M: 0
Y: -41
B: 0
I got:

6. Now go to Layer > New Adjustment Layer > Hue/Saturation. Set the Saturation to +8.
7. Now go to Layer > New Adjustment Layer > Selective Colour
Reds:
C: -70
M: 0
Y: +37
B: 0
I got:

8. Now go to Layer > New Adjustment Layer > Selective Colour
Reds:
C: -47
M: 0
Y: 0
B: 0
I got:

9. Now go to Layer > New Adjustment Layer > Selective Colour
Whites:
C: -46
M: 0
Y: +18
B: -5
I got:

10. Sorry about all the Selective Colour layers but it is worth it! Go to Layer > New Adjustment Layer > Selective Colour
Neutrals:
C: 0
M: -22
Y: +7
B: 0
I got:

11. Just one last Selective Colour! Go to Layer > New Adjustment Layer > Selective Colour
Reds:
C: -100
M: 0
Y: 0
B: 0
Neutrals:
C: 41
M: 0
Y: -41
B: 0
I got:

12. Now resize your image to 60 x 60. Drag it onto a 100 x 100 canvas filled with #E1301A.
I got:

13. On the layer in between your background and your picture, place this texture by lovelamp and set to screen.
Texture:

I got:

14. Now add a white box a bit bigger than your picture and place it on a new layer between the texture and your picture.
Box:

And you are done!
Finished Product:

If you have any trouble at all, or need any help just let me know! I am more than happy to help!
I hope you liked this tut. If you did, feel free to check out the many others that can be found right HERE!!!
Have fun and please comment! Friend me