Tutorial 53
Yet another tutorial!!!!
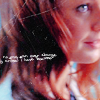
Make the following icon
Turn:

TO
This technique was used to make a whole set of icons that can be found RIGHT HERE. Many tuts were requested, but the same technique was used for all so I only have to post one!
Other icons requested:


1. Open a new 100 x 100 image
2. Open your image and resize it. Drag it into your 100 x 100 image.
I got:

3. Duplicate your base and set to screen.

4. Now go to Layer > New Adjustment Layer > Curves
Set to:
RGB
Point One
Input: 50
Output: 87
Point Two
Input: 207
Output: 221
I got:

5. Now go to Layer > New Adjustment Layer > Hue/Saturation. Set the Saturation to +29.
I got:

6. Now I went to Layer > New Adjustment Layer > Selective Colour.
REDS
C: -21
M: +10
Y: +92
B: +15
YELLOWS
C: -100
M: +16
Y: +87
B: +8
GREENS
C: +100
M: -100
Y: -100
B: +68
CYANS
C: +100
M: -100
Y: -100
B: +38
NEUTRALS
C: 0
M: 0
Y: -21
B: 0
BLACKS
C: 0
M: 0
Y: 0
B: +100
I got:

7. Now I added a brush by _chokeanddie and toxxxicgirl
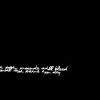
And you are done!
Finished Product:

If you have any trouble at all, or need any help just let me know! I am more than happy to help!
I hope you liked this tut. If you did, feel free to check out the many others that can be found right HERE!!!
Have fun and please comment! Friend me!
Make the following icon
Turn:

TO

This technique was used to make a whole set of icons that can be found RIGHT HERE. Many tuts were requested, but the same technique was used for all so I only have to post one!
Other icons requested:


1. Open a new 100 x 100 image
2. Open your image and resize it. Drag it into your 100 x 100 image.
I got:

3. Duplicate your base and set to screen.

4. Now go to Layer > New Adjustment Layer > Curves
Set to:
RGB
Point One
Input: 50
Output: 87
Point Two
Input: 207
Output: 221
I got:

5. Now go to Layer > New Adjustment Layer > Hue/Saturation. Set the Saturation to +29.
I got:

6. Now I went to Layer > New Adjustment Layer > Selective Colour.
REDS
C: -21
M: +10
Y: +92
B: +15
YELLOWS
C: -100
M: +16
Y: +87
B: +8
GREENS
C: +100
M: -100
Y: -100
B: +68
CYANS
C: +100
M: -100
Y: -100
B: +38
NEUTRALS
C: 0
M: 0
Y: -21
B: 0
BLACKS
C: 0
M: 0
Y: 0
B: +100
I got:

7. Now I added a brush by _chokeanddie and toxxxicgirl

And you are done!
Finished Product:

If you have any trouble at all, or need any help just let me know! I am more than happy to help!
I hope you liked this tut. If you did, feel free to check out the many others that can be found right HERE!!!
Have fun and please comment! Friend me!