Driven -- Icon Tutorial
Icons are coming VERY soon, I promise! XD School kind of ate me. But I should get the next batch up sometime next week.
So to make up for that, I bring you a tutorial!
Learn to go from
to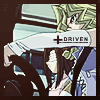
________________

Start out with your base. I got the image from here, re-sized, cropped it, and applied auto contrast. Then I sharpened the base.
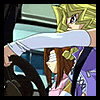
As you can see, here I added a 4-pixel black border. There is a reason for doing that right away, everything we do to the image will affect the border as well. Merge the base image and the border!
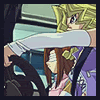
Create a new layer, fill it with #161625, and set it to Exclusion, 100% opacity.
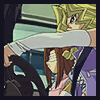
Make a new layer, fill it with #DDD19D and set it on Multiply, 30% opacity.

And yet again, make a new layer, fill it with #A5D3ED and set it on Color Burn, 50% opacity.
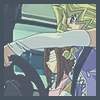
One more time, folks. XD Another layer, fill it with #CAF6F0 and set it on Linear Dodge, 30% opacity.
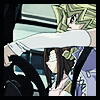
Duplicate your base(make sure the border is included!) twice, bring both to the top, desaturate them both, and set them both to Soft Light, 100% opacity.
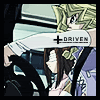
Add your text and brushes. I used brushes by terra_katta and ingenu0us.

And finally, I took this gradient (by hales731), flipped it vertically, and added it to the icon and set it to Lighten, 50% opacity. And we're done!
Please don't copy the icon exactly when following this tutorial.
So to make up for that, I bring you a tutorial!
Learn to go from

to

________________

Start out with your base. I got the image from here, re-sized, cropped it, and applied auto contrast. Then I sharpened the base.

As you can see, here I added a 4-pixel black border. There is a reason for doing that right away, everything we do to the image will affect the border as well. Merge the base image and the border!

Create a new layer, fill it with #161625, and set it to Exclusion, 100% opacity.

Make a new layer, fill it with #DDD19D and set it on Multiply, 30% opacity.

And yet again, make a new layer, fill it with #A5D3ED and set it on Color Burn, 50% opacity.

One more time, folks. XD Another layer, fill it with #CAF6F0 and set it on Linear Dodge, 30% opacity.

Duplicate your base(make sure the border is included!) twice, bring both to the top, desaturate them both, and set them both to Soft Light, 100% opacity.

Add your text and brushes. I used brushes by terra_katta and ingenu0us.

And finally, I took this gradient (by hales731), flipped it vertically, and added it to the icon and set it to Lighten, 50% opacity. And we're done!
Please don't copy the icon exactly when following this tutorial.