Fan Art : Sam Winchester - Bad Omen
Fan Art : Sam Winchester - Bad Omen

The full size version is available here : http://img191.imageshack.us/img191/5770/sambadomenlj.jpg
GENERAL QUESTIONS
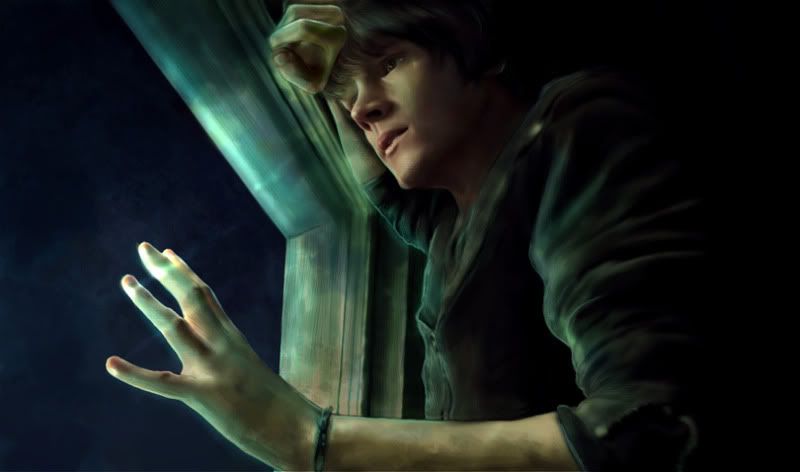
What's the concept ?
Sam seeing his future as Lucifer's vessel. I thought at the beginning of using an image of Mark Pellegrino for the reflexion in the window pane but the effect would have been less powerful than Sam watching himself going "dark side". The red eyes are the cherry on the top of the cake even if in the show, of course, because of the demon blood, the eyes are black. However as it is a night scene and that half of his face is in the dark, the black eyes wouldn't have been visible so...
No zombies or monsters this time ?
Lucifer's vessel isn't enough for you ? He's the Big Boss ;)
You always draw "Season 1!Sam", when will we see a fan art where Jared looks like 2010!Sam ?
In my next fan art. You will see Sam as he is right now : big, evil...and with a green striped shirt. And Dean too. The brothers are back :)
Funniest things to draw ?
Sam's mouth and hair.
Most boring ?
Sam's eyes. I used a poor quality reference pix, a mistake I normally don't do. I liked his face and his expression on the image, I thought it would have been easier to use but no. See below, Let's talk about technique - Step 1 of the WIP, for the reference image.
LET'S TALK ABOUT TECHNIQUE
THE USUAL DRILL...
What softwares did you use ?
Photoshop CS and Painter Essential 3
Tablet : Wacom Graphire 4
How long did it take you ?
About 15 hours for that one I think, it was far more easier than when I had to draw Los Angeles...
What brushes did you use ?
Photoshop CS : Mainly default brushes from the "Basic Brush set" (Opacity 30%-50%), a "dry brush" for the shadows and outlines plus a whole bunch of brushes downloaded on the net. Here is a little glimpse at the main brushes I used in my drawing :
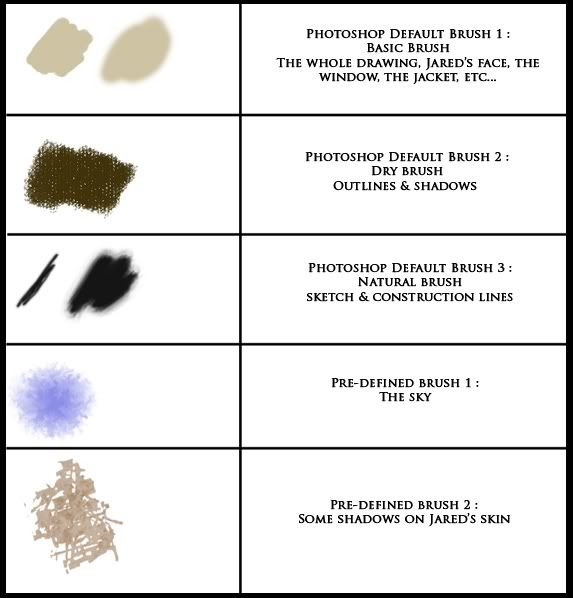
Painter : Acrylics, pastels and digital watercolors with a very low opacity.
THE BIG "STEP BY STEP" : "BAD OMEN" WORK IN PROGRESS
As this picture has nothing particular technically speaking (unlike the next fan art I will post on this LJ where I drew a whole pentacle with smoke..), we will take a look together at the construction of the image itself, from scratch.
STEP 1 (Photoshop CS)
I open a document with a white background (#FFFFFF) then open two new layers, the first one set to "Normal", the second one set to "Multiply", both with an opacity of 100%. As far as the layer order is concerned, the "Multiply" layer is above the "Normal" layer. My working document is pretty big as it is around 2400 px X 1400 px.
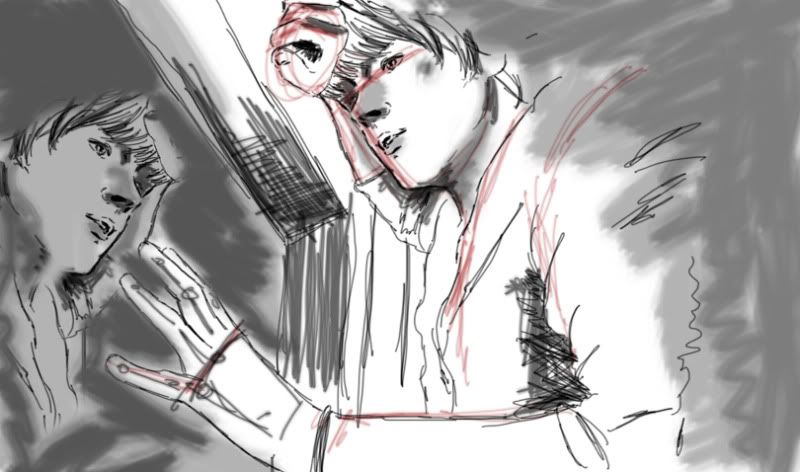
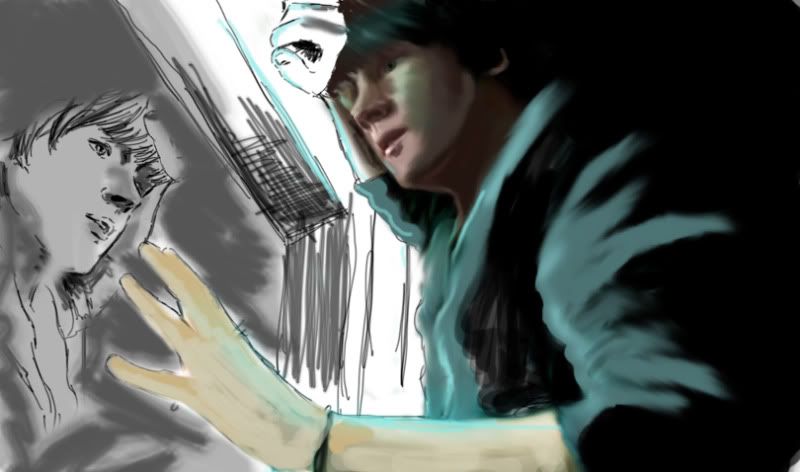
I start by drawing some construction lines in red on the layer set to "Multiply", just to have a general idea of the image and to help me to have the body proportions right. I use a "Basic Brush" with an opacity of 100%, a flow of 85% and an brush diameter of 2px. I erased some of the lines while working so, what you can see here is just maybe 30% of all the constructions lines. Sorry about that.
Then, I switch to the layer set to "Normal" and this time I start to draw a real sketch. As far as my brushes are concerned I use :
- a "Basic Brush" (with fuzzy edges) with an opacity of 100%, a flow of 85% and an brush diameter of 2px.
- a "Basic Brush" (with straight edges) with an opacity of 100%, a flow of 45% and an brush diameter of 2px.
- a "Natural Brush" with an opacity of 60%, a flow of 85%. I use various brush diameters, it depended on how much surface I have to cover.
I didn't draw Jared's reflexion on the window pane. I just used the "Stamp tool". I am not going to use it anyway, it is just to have a general idea of what the final image will look like so it's not worth waisting time.
As you can imagine, I didn't create my drawing out of thin air. I got the inspiration from :
- A picture of a young man lying against a window I found on the Internet. Sorry about the credits, I have no idea where that photo comes from and who the hell is the guy. You can find it here if you want.
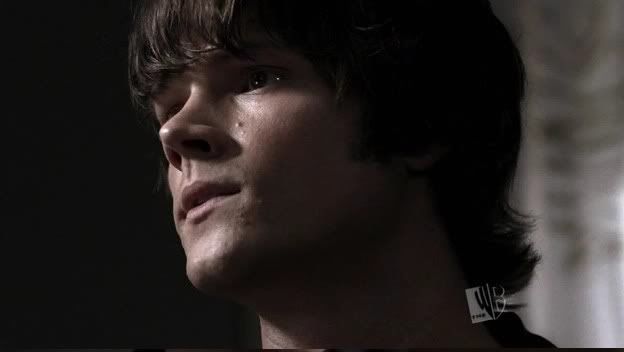
- a screen shot of Jared from Supernatural that you can see here.
Usually I don't start directly on the computer. I draw my sketch on a piece of paper then I scan it, and I start to color with Photoshop CS. However this time as the composition of the image was simple, I gave it a shot. If you don't feel comfortable reproducing a face like I did just with a sketch and construction lines, you can use the "grind method" as shown in this tutorial by Miss Becc-j, on her Deviant Art page (she has great Supernatural fan arts so don't hesitate to check her fantastic works ;) )
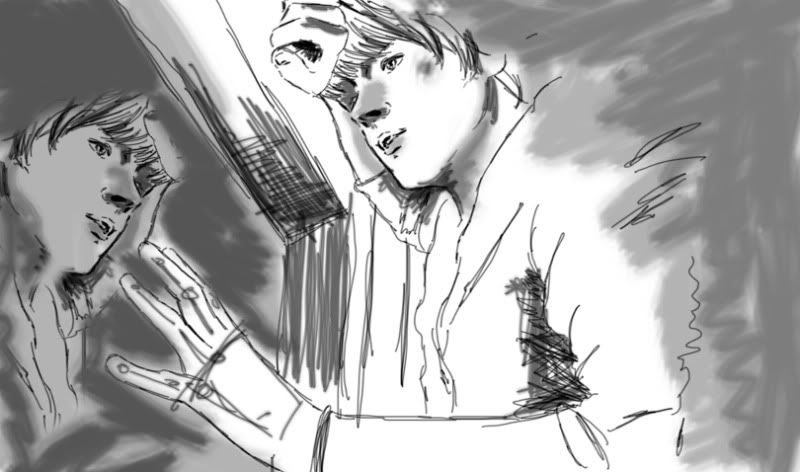
STEP 2 (Photoshop CS)
I erase the "Multiply" layer (I don't need it anymore), and I flatten the image. I now have a sketch I am going to use as a guideline to color the drawing.
STEP 3 (Photoshop CS)
I use 3 layers to add colors, all set to 100% as what I change isn't the opacity of the layer itself but the opacity and the flow of the brush. I usally work with an opacity set between 20% and 50% with :
- Layer 1 (at the bottom) : Normal
- Layer 2 (in the middle) : Multiply
- Layer 3 (at the top) : Soft Light
As you may guess, each layer is used for a different purpose :
- Normal : The main colors
- Multiply : Shadows (I used dark greens, blues and browns)
- Soft Light : Blue and green highlights
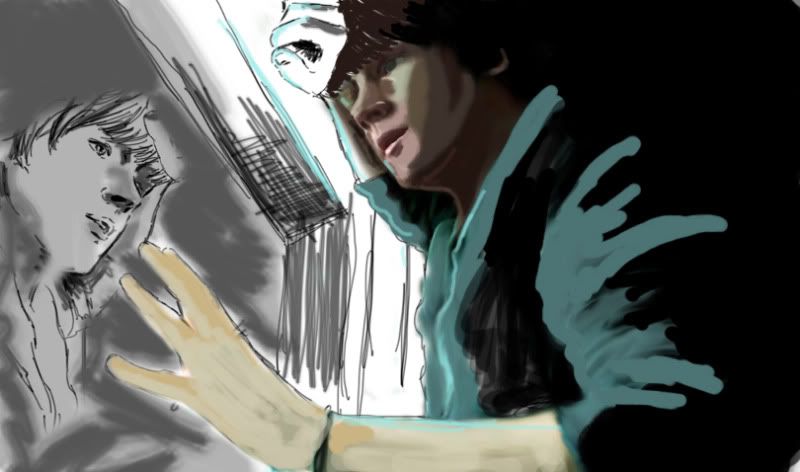
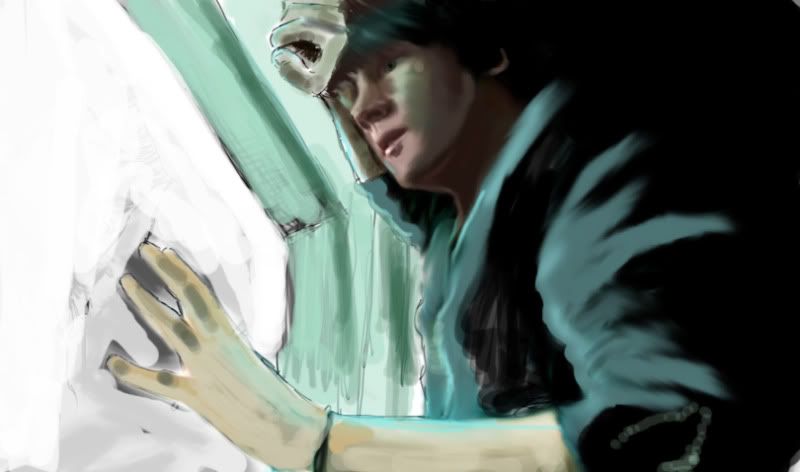
I start with big stokes, we'll see the details later of course. I already have a general idea of the final picture before starting so I know that basically the main tones will be green and blue hence the use of those two colors for the shadows and highlights.
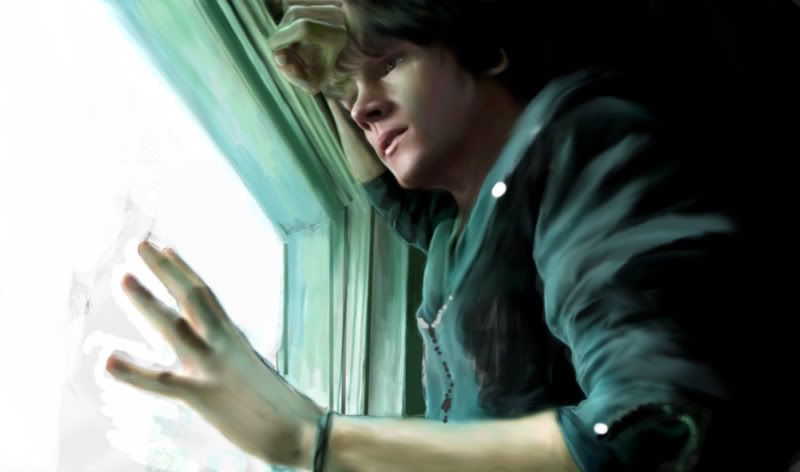
STEP 4 (Photoshop CS)
I flatten the image and blur with the "Blur Tool" (Strentgh = 60%) a part of the face. To blend the colors I also use the "Smudge
Tool" (Strentgh = 30%). The smooth texture of the skin and the main features start to appear but for the moment, well, Sam isn't really Sam...
STEP 5 (Photoshop CS)
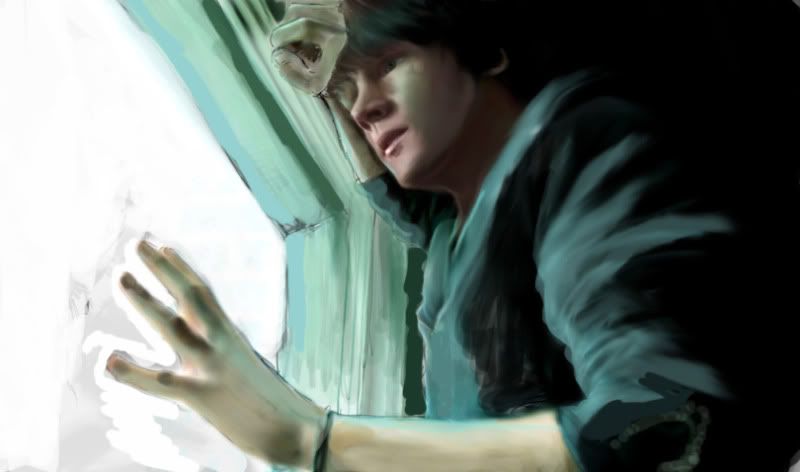
I open my 3 layers again, add some shadows and hightlights, get rig of the face in the window. Then I flatten the image again and work with the "Blur Tool" to have a smoother texture.
STEP 6 (Photoshop CS)
Same thing here, still the 3 layers and the flattening of the image at the end. This time, however, to obtain smooth textures I use the "Lasso" and a "Gaussian Blur", exactly like I did in this preceding tutorial (check out Let's talk about technique, the question devoted to the skin). I add some details, start to draw the window, take care of Jared's nose and eye, etc..
STEP 7 (Photoshop CS)
I carry on working on the details of the face, the hair. This time, I really take care of the window. To obtain straight lines I use the "Line Tool". It's pretty handy to draw things like windows, boxes, guitar strings, etc..
STEP 8 (Photoshop CS)
Here I stop using layers. I draw directly on the picture. I know it's NOT a good method and it's not really usual but that's how I work. I learned to paint with traditional tools such as pastels and watercolors and I am self-taught with Photoshop. So, sometimes, I use Photoshop exactly like I would use a real canvas or a piece of paper. I don't care about layers, I just...paint !! Of course, if you are afraid of failing or not really sure about what you are doing, open a new layer and paint on it. If you don't obtain the result you initially planned, you can still delete the layer afterward.
I use mainly a "basic brush" sometimes set to "Normal", sometimes set to "Multiply" and play with the opacity (usually never more than 50%). From here, I use very small brush stroke. It has to be subtle. However as far as the textures are concerned I still use the "Smudge" and the "Blur" tools to blend the colors.
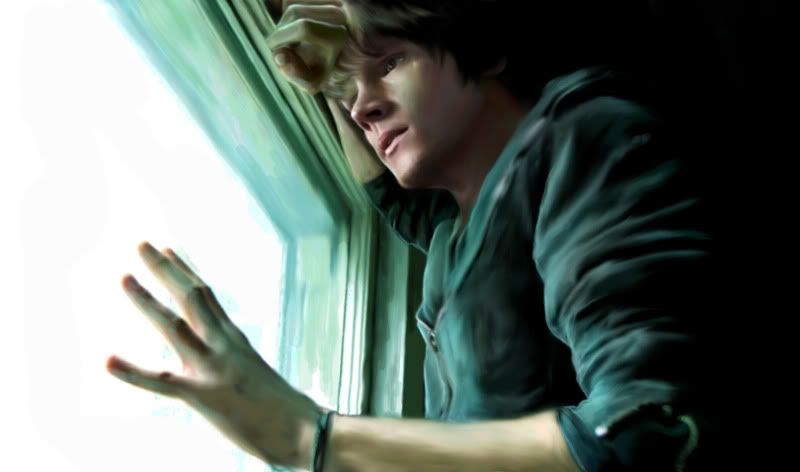
STEP 9 (Photoshop CS)
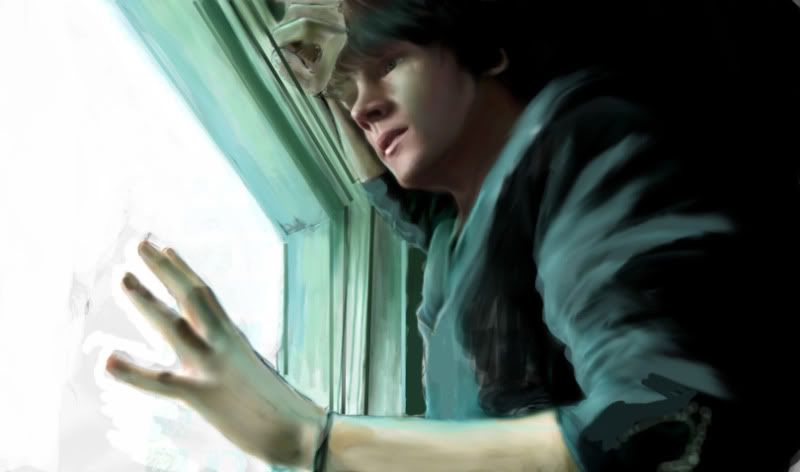
I carry on painting. Sam finally looks like Sam even if some details are still missing...
STEP 10 (Photoshop CS)
I get rid of the white background once and for all and create a night sky thanks to a predefined brush. I used the "Magic Wand" to isolate the white background.
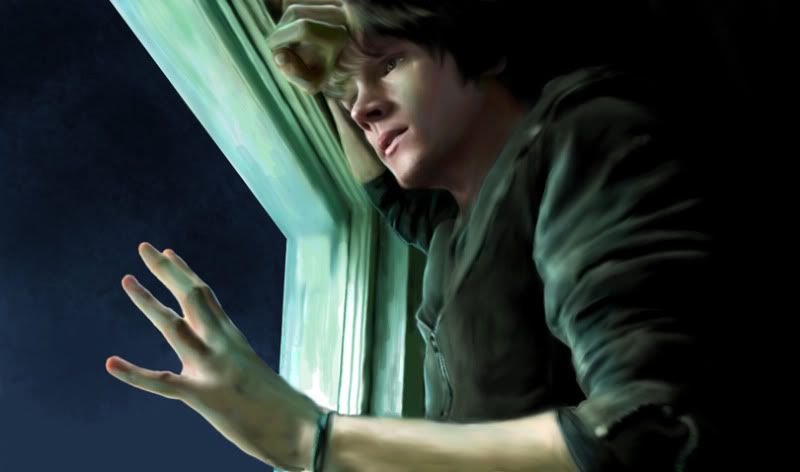
I also change the color of Sam's jacket that was definitely too green (thanks to the "Desaturate Tool" and the "Color Balance") and take care of the very little details like the eyelashes, the zipper, the hair, the bracelets. For those particular elements of the pic, I use a brush with a diameter of 1 or 2 px and the "blur tool" to be really super precise.
STEP 11 (Painter Essential 3 and Photoshop CS)
I close the document in Photoshop CS and open it in Painter Essential 3. (Don't forget to save a copy, we never know...) I add some textures and redrew some parts thanks to the "Digital Watercolors" and the "Acrylics" brushes. I add some details thanks to the "Pastels".
Then I go back to Photoshop and add some highlights with the "Dodge Tool" set on "Midtones" (Opacity : 30%). I also add outlines with the "Dry Brush" set to "Normal" (30%) using a dark brown. I add shadows on Sam's skin thanks to a predefined brush to give a more "human skin" texture, I hate it when the skin is super smooth or look like plastic.
STEP 12 (Photoshop CS)
Ladies, this is the final touch ! (Hum...well almost...)
I use a sepia filter (set to 30%), change the tones of the picture thanks to the "Color Balance" ("More Blue") and the "Luminosity/Contrast" (less "Luminosity"). I also darken some part of the image thanks to the "burn tool" (Opacity 20%).
STEP 13 (Photoshop CS)
The layers are back !
I open 3 layers, the 3 of them set to "Soft Light". Then I use the "stamp tool" :
Layer 1 : "Jared's face" - Opacity 40%
I duplicate the image, flip it horizontal and use the stamp tool to add Jared's face on the window pane. Technically his reflexion shouldn't look like that, but I guess that we can cheat a bit, no ? ;)
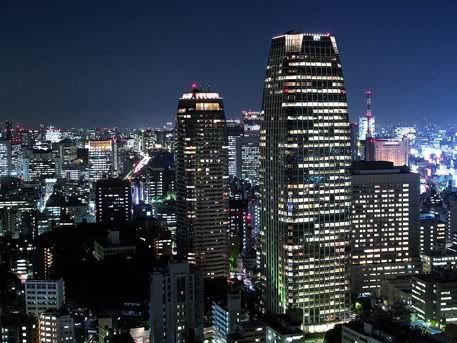
Layer 2 : "The town" - Opacity 30%
I used this image and add it to the drawing thanks to the "Stamp Tool". Ok, the town is Tokyo, not a big American city but let just say I didn't tell you anything and that it's Philadelphia or Detroit...
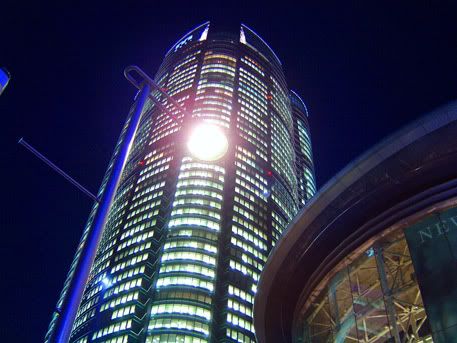
Layer 3 : "Lights on Jared's face" - Opacity 20%
Here again I used a photography of Tokyo. Same process >> "Stamp Tool"
If you have a problem, don't hesitate to use the eraser.
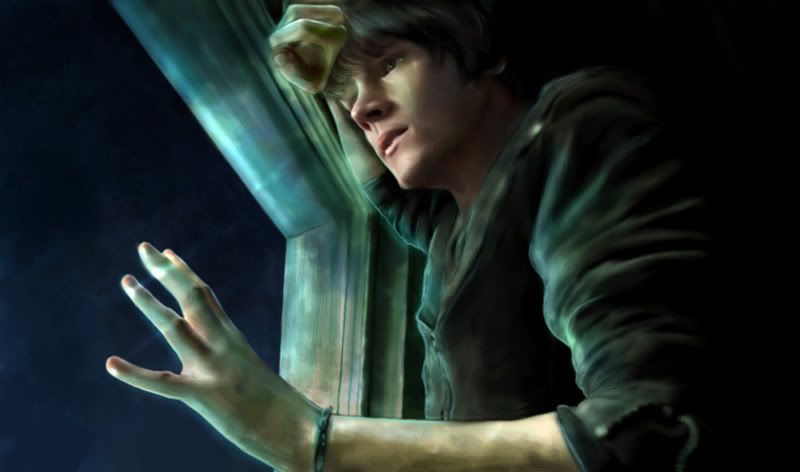
The final touch (at last!!)
I flatten the image then I use a brush set to "Soft Light" (Opacity 40%) to color Jared's eyes with a light red. I also add some blood dripping from his mouth, still with the same brush and the same color.
As far as the blood on his hand is concerned, I use a brush set to "Multiply" (30%) and a dark red.
Finally, I used a texture (this one) to give the super final-final-final touch.
ET VOILA!!!
That's it !! Once again, sorry about my English -_______-
More questions ? DON'T HESITATE!!!
Just ask here on LJ or on FormSpring.me : http://www.formspring.me/PetiteMadame
FAN ARTS MASTER POST (Click below)
The full size version is available here : http://img191.imageshack.us/img191/5770/sambadomenlj.jpg
GENERAL QUESTIONS
What's the concept ?
Sam seeing his future as Lucifer's vessel. I thought at the beginning of using an image of Mark Pellegrino for the reflexion in the window pane but the effect would have been less powerful than Sam watching himself going "dark side". The red eyes are the cherry on the top of the cake even if in the show, of course, because of the demon blood, the eyes are black. However as it is a night scene and that half of his face is in the dark, the black eyes wouldn't have been visible so...
No zombies or monsters this time ?
Lucifer's vessel isn't enough for you ? He's the Big Boss ;)
You always draw "Season 1!Sam", when will we see a fan art where Jared looks like 2010!Sam ?
In my next fan art. You will see Sam as he is right now : big, evil...and with a green striped shirt. And Dean too. The brothers are back :)
Funniest things to draw ?
Sam's mouth and hair.
Most boring ?
Sam's eyes. I used a poor quality reference pix, a mistake I normally don't do. I liked his face and his expression on the image, I thought it would have been easier to use but no. See below, Let's talk about technique - Step 1 of the WIP, for the reference image.
LET'S TALK ABOUT TECHNIQUE
THE USUAL DRILL...
What softwares did you use ?
Photoshop CS and Painter Essential 3
Tablet : Wacom Graphire 4
How long did it take you ?
About 15 hours for that one I think, it was far more easier than when I had to draw Los Angeles...
What brushes did you use ?
Photoshop CS : Mainly default brushes from the "Basic Brush set" (Opacity 30%-50%), a "dry brush" for the shadows and outlines plus a whole bunch of brushes downloaded on the net. Here is a little glimpse at the main brushes I used in my drawing :
Painter : Acrylics, pastels and digital watercolors with a very low opacity.
THE BIG "STEP BY STEP" : "BAD OMEN" WORK IN PROGRESS
As this picture has nothing particular technically speaking (unlike the next fan art I will post on this LJ where I drew a whole pentacle with smoke..), we will take a look together at the construction of the image itself, from scratch.
STEP 1 (Photoshop CS)
I open a document with a white background (#FFFFFF) then open two new layers, the first one set to "Normal", the second one set to "Multiply", both with an opacity of 100%. As far as the layer order is concerned, the "Multiply" layer is above the "Normal" layer. My working document is pretty big as it is around 2400 px X 1400 px.
I start by drawing some construction lines in red on the layer set to "Multiply", just to have a general idea of the image and to help me to have the body proportions right. I use a "Basic Brush" with an opacity of 100%, a flow of 85% and an brush diameter of 2px. I erased some of the lines while working so, what you can see here is just maybe 30% of all the constructions lines. Sorry about that.
Then, I switch to the layer set to "Normal" and this time I start to draw a real sketch. As far as my brushes are concerned I use :
- a "Basic Brush" (with fuzzy edges) with an opacity of 100%, a flow of 85% and an brush diameter of 2px.
- a "Basic Brush" (with straight edges) with an opacity of 100%, a flow of 45% and an brush diameter of 2px.
- a "Natural Brush" with an opacity of 60%, a flow of 85%. I use various brush diameters, it depended on how much surface I have to cover.
I didn't draw Jared's reflexion on the window pane. I just used the "Stamp tool". I am not going to use it anyway, it is just to have a general idea of what the final image will look like so it's not worth waisting time.
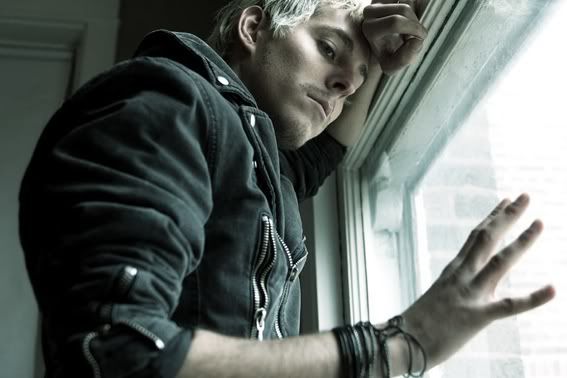
As you can imagine, I didn't create my drawing out of thin air. I got the inspiration from :
- A picture of a young man lying against a window I found on the Internet. Sorry about the credits, I have no idea where that photo comes from and who the hell is the guy. You can find it here if you want.
- a screen shot of Jared from Supernatural that you can see here.
Usually I don't start directly on the computer. I draw my sketch on a piece of paper then I scan it, and I start to color with Photoshop CS. However this time as the composition of the image was simple, I gave it a shot. If you don't feel comfortable reproducing a face like I did just with a sketch and construction lines, you can use the "grind method" as shown in this tutorial by Miss Becc-j, on her Deviant Art page (she has great Supernatural fan arts so don't hesitate to check her fantastic works ;) )
STEP 2 (Photoshop CS)
I erase the "Multiply" layer (I don't need it anymore), and I flatten the image. I now have a sketch I am going to use as a guideline to color the drawing.
STEP 3 (Photoshop CS)
I use 3 layers to add colors, all set to 100% as what I change isn't the opacity of the layer itself but the opacity and the flow of the brush. I usally work with an opacity set between 20% and 50% with :
- Layer 1 (at the bottom) : Normal
- Layer 2 (in the middle) : Multiply
- Layer 3 (at the top) : Soft Light
As you may guess, each layer is used for a different purpose :
- Normal : The main colors
- Multiply : Shadows (I used dark greens, blues and browns)
- Soft Light : Blue and green highlights
I start with big stokes, we'll see the details later of course. I already have a general idea of the final picture before starting so I know that basically the main tones will be green and blue hence the use of those two colors for the shadows and highlights.
STEP 4 (Photoshop CS)
I flatten the image and blur with the "Blur Tool" (Strentgh = 60%) a part of the face. To blend the colors I also use the "Smudge
Tool" (Strentgh = 30%). The smooth texture of the skin and the main features start to appear but for the moment, well, Sam isn't really Sam...
STEP 5 (Photoshop CS)
I open my 3 layers again, add some shadows and hightlights, get rig of the face in the window. Then I flatten the image again and work with the "Blur Tool" to have a smoother texture.
STEP 6 (Photoshop CS)
Same thing here, still the 3 layers and the flattening of the image at the end. This time, however, to obtain smooth textures I use the "Lasso" and a "Gaussian Blur", exactly like I did in this preceding tutorial (check out Let's talk about technique, the question devoted to the skin). I add some details, start to draw the window, take care of Jared's nose and eye, etc..
STEP 7 (Photoshop CS)
I carry on working on the details of the face, the hair. This time, I really take care of the window. To obtain straight lines I use the "Line Tool". It's pretty handy to draw things like windows, boxes, guitar strings, etc..
STEP 8 (Photoshop CS)
Here I stop using layers. I draw directly on the picture. I know it's NOT a good method and it's not really usual but that's how I work. I learned to paint with traditional tools such as pastels and watercolors and I am self-taught with Photoshop. So, sometimes, I use Photoshop exactly like I would use a real canvas or a piece of paper. I don't care about layers, I just...paint !! Of course, if you are afraid of failing or not really sure about what you are doing, open a new layer and paint on it. If you don't obtain the result you initially planned, you can still delete the layer afterward.
I use mainly a "basic brush" sometimes set to "Normal", sometimes set to "Multiply" and play with the opacity (usually never more than 50%). From here, I use very small brush stroke. It has to be subtle. However as far as the textures are concerned I still use the "Smudge" and the "Blur" tools to blend the colors.
STEP 9 (Photoshop CS)
I carry on painting. Sam finally looks like Sam even if some details are still missing...
STEP 10 (Photoshop CS)
I get rid of the white background once and for all and create a night sky thanks to a predefined brush. I used the "Magic Wand" to isolate the white background.
I also change the color of Sam's jacket that was definitely too green (thanks to the "Desaturate Tool" and the "Color Balance") and take care of the very little details like the eyelashes, the zipper, the hair, the bracelets. For those particular elements of the pic, I use a brush with a diameter of 1 or 2 px and the "blur tool" to be really super precise.
STEP 11 (Painter Essential 3 and Photoshop CS)
I close the document in Photoshop CS and open it in Painter Essential 3. (Don't forget to save a copy, we never know...) I add some textures and redrew some parts thanks to the "Digital Watercolors" and the "Acrylics" brushes. I add some details thanks to the "Pastels".
Then I go back to Photoshop and add some highlights with the "Dodge Tool" set on "Midtones" (Opacity : 30%). I also add outlines with the "Dry Brush" set to "Normal" (30%) using a dark brown. I add shadows on Sam's skin thanks to a predefined brush to give a more "human skin" texture, I hate it when the skin is super smooth or look like plastic.
STEP 12 (Photoshop CS)
Ladies, this is the final touch ! (Hum...well almost...)
I use a sepia filter (set to 30%), change the tones of the picture thanks to the "Color Balance" ("More Blue") and the "Luminosity/Contrast" (less "Luminosity"). I also darken some part of the image thanks to the "burn tool" (Opacity 20%).
STEP 13 (Photoshop CS)
The layers are back !
I open 3 layers, the 3 of them set to "Soft Light". Then I use the "stamp tool" :
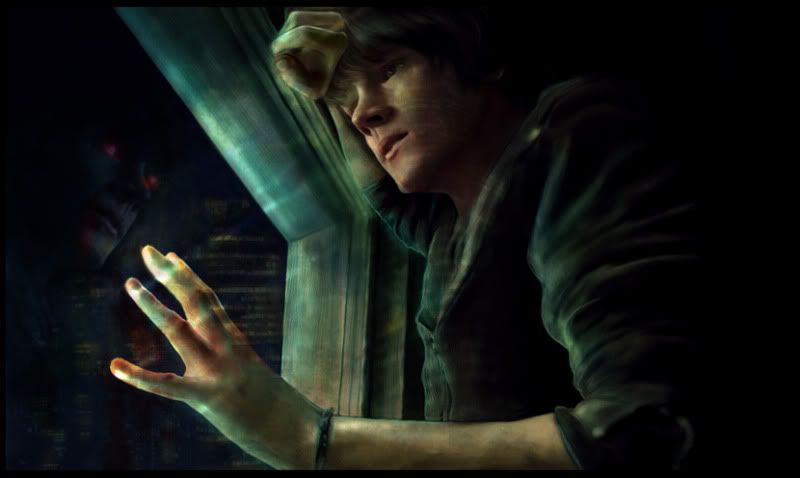
Layer 1 : "Jared's face" - Opacity 40%
I duplicate the image, flip it horizontal and use the stamp tool to add Jared's face on the window pane. Technically his reflexion shouldn't look like that, but I guess that we can cheat a bit, no ? ;)
Layer 2 : "The town" - Opacity 30%
I used this image and add it to the drawing thanks to the "Stamp Tool". Ok, the town is Tokyo, not a big American city but let just say I didn't tell you anything and that it's Philadelphia or Detroit...
Layer 3 : "Lights on Jared's face" - Opacity 20%
Here again I used a photography of Tokyo. Same process >> "Stamp Tool"
If you have a problem, don't hesitate to use the eraser.
The final touch (at last!!)
I flatten the image then I use a brush set to "Soft Light" (Opacity 40%) to color Jared's eyes with a light red. I also add some blood dripping from his mouth, still with the same brush and the same color.
As far as the blood on his hand is concerned, I use a brush set to "Multiply" (30%) and a dark red.
Finally, I used a texture (this one) to give the super final-final-final touch.
ET VOILA!!!
That's it !! Once again, sorry about my English -_______-
More questions ? DON'T HESITATE!!!
Just ask here on LJ or on FormSpring.me : http://www.formspring.me/PetiteMadame
FAN ARTS MASTER POST (Click below)