ETERNAL SUNSHINE TUTORIAL
from 
to
with PS CS2
NO SELECTIVE COLOR!
NO CURVES!
should be translatable. Uses brightness/contrast and high-pass filter (optional)
PSD FILE AVAILABLE!
IT´S EASY AND BEGGINERS FRIEND!
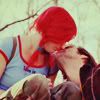
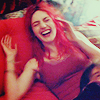
Other exemples


RULES:
- Credit me
- Comment (pleassseee!! :)
- DON´T HOTLINK!
- Textless avatars aren´t bases. DON´T EDIT THEM.
- Don´t share the avvys/tutorial as yours.
- RESOURCES | TUTORIALS | AWARDS
1 - Open your screencap and read this tutorial about aspect ratio! IT´S VERY VERY IMPORTANT!
2 - Crop 100X100 >>
3 - Duplicate the base twice and set all to screen, opacity 100% (you can add more screen layers if you want)
>>
>>
>>
4 -Flatten the image and sharpen once.
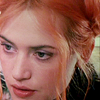
5 - Go edit > Fade sharpen > 50%. This is your NEW BASE:
6 - Add this pink layer and set to difference, opacity 30% >>
>
>
7 - Add this gray layer and set to color burn, opacity 73% >>
>
>
8 - Add this beige (i gess...) layer and set it to multiply 88%>>
>
>
9 - Add this blue layer and set to luminosity (i think that is "luminance" in PSP)
>>
>
>
10 - Now you have to duplicate the base, drag to the top and set this layer to softlight, opacity 100%

>>
11 - Go to filter> blur > gaussian blur > radius: 1,0

>
12 - duplicate the base again and set to overlay, opacity 100% (you can set this layer to softlight also or overlay, opacity 50%)

>
13 - Go to filter > other > highpass> radius: 53 (if you wanna change the effect, play with the numbers)

>
14 - Add a brightness / contrast layer, but it´s optional!
Brightness: +4
Contrast: +11

>
Done! :D
DOWNLOAD THE PSD FILE HERE
THIS TUTORIAL DON´T WORK WITH ALL PICS!!! DO YOU HAVE TO PLAY WITH THE OPACITIES!! :D
Screencap by
_jems_
- I´D LOVE TO SEE YOUR RESULTS!!! :D and if you have any doubts please tell me!
- I have more tutorials about how to work with dark screencaps! wanna try? TUTORIALS
- RESOURCES | TUTORIALS | AWARDS
to
with PS CS2
NO SELECTIVE COLOR!
NO CURVES!
should be translatable. Uses brightness/contrast and high-pass filter (optional)
PSD FILE AVAILABLE!
IT´S EASY AND BEGGINERS FRIEND!
Other exemples
RULES:
- Credit me
- Comment (pleassseee!! :)
- DON´T HOTLINK!
- Textless avatars aren´t bases. DON´T EDIT THEM.
- Don´t share the avvys/tutorial as yours.
- RESOURCES | TUTORIALS | AWARDS
1 - Open your screencap and read this tutorial about aspect ratio! IT´S VERY VERY IMPORTANT!
2 - Crop 100X100 >>
3 - Duplicate the base twice and set all to screen, opacity 100% (you can add more screen layers if you want)
>>
>>
>>
4 -Flatten the image and sharpen once.
5 - Go edit > Fade sharpen > 50%. This is your NEW BASE:
6 - Add this pink layer and set to difference, opacity 30% >>
>
>
7 - Add this gray layer and set to color burn, opacity 73% >>
>
>
8 - Add this beige (i gess...) layer and set it to multiply 88%>>
>
>
9 - Add this blue layer and set to luminosity (i think that is "luminance" in PSP)
>>
>
>
10 - Now you have to duplicate the base, drag to the top and set this layer to softlight, opacity 100%
>>
11 - Go to filter> blur > gaussian blur > radius: 1,0
>
12 - duplicate the base again and set to overlay, opacity 100% (you can set this layer to softlight also or overlay, opacity 50%)
>
13 - Go to filter > other > highpass> radius: 53 (if you wanna change the effect, play with the numbers)
>
14 - Add a brightness / contrast layer, but it´s optional!
Brightness: +4
Contrast: +11
>
Done! :D
DOWNLOAD THE PSD FILE HERE
THIS TUTORIAL DON´T WORK WITH ALL PICS!!! DO YOU HAVE TO PLAY WITH THE OPACITIES!! :D
Screencap by
_jems_
- I´D LOVE TO SEE YOUR RESULTS!!! :D and if you have any doubts please tell me!
- I have more tutorials about how to work with dark screencaps! wanna try? TUTORIALS
- RESOURCES | TUTORIALS | AWARDS