Tutorial 8 - Arwen
A tutorial to make 
from
, as a lot of people asked for icon tutorials. (I picked one at random.)
This tutorial includes base fixing, blending, and a bit of masking and brushwork. Image heavy, and long.
A warning: while I've tried to make this tutorial as simple as possible, this was not an easy icon to make and I can't promise a completely beginner-friendly tutorial. However, feel free to give it a shot, and I'll certainly clarify if there's anything that needs explaining.
You will probably need to know how to make layer masks in your program, as I only have GIMP and can't explain. You'll also need to know how to crop, resize, and make new layers.
This tutorial was written for GIMP 2.2. It is, however, translatable.
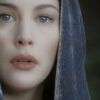
I started with a cap from 'Arwen's Vision' in RotK, provided by Annon nan Galadh. I cropped it to my satisfaction and resized:
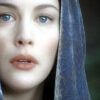
I duplicated the layer. Then, I opened the 'Levels' dialogue (Layers>>Colors>>Levels), and clicked 'Auto'. I got this:
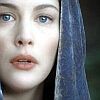
I sharpened my image (Filters>>Enhance>>Sharpen):
Then, I used the Blur tool with a small round brush and fixed Arwen's skin a little:
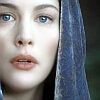
It might not look like much now, but you'll see the difference it makes to the later stages, as some of the steps really emphasise even very fine lines. Eck.
I duplicated that layer and set it to Soft Light at 100:
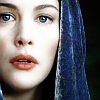
I flood-filled a new layer with black (#000000) and set to Soft Light, 70 percent opacity:
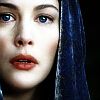
That's the end of my base prep, so I merge and save. Now, I take this purple texture by (?):
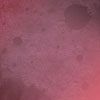
I paste it in on a new layer, set to Normal.
I create another layer, and add this purple gradient by (?):
I set it to Multiply and get this:
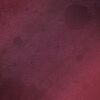
Now, I duplicate the first purple texture and bring it to the top. Setting it to Soft Light, I get this:
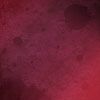
New layer. I use a smallish round brush and doodle a bit in beige:
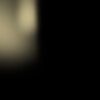
(The black is just there so that the beige will show up more clearly.)
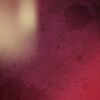
Setting that to Normal at 100, this is what I get:
Time to bring Arwen back into the picture (literally). I create a new layer, and add a layer mask. Then I paste this into the mask:
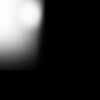
Then, I bring my final base of Arwen (the one I get after all the layering) to the top, and resize a bit. I crop out the bits I don't need; I then duplicate and desaturate (Layers>>Colors>>Desaturate) to get this:
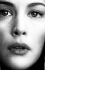
I set that to Multiply:

I now bring the coloured version up, and set it to Screen:

Duplicate that and set to Soft Light:

Duplicate the Soft Light layer again:
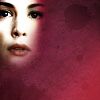
Now, I go back to my base and crop out a new part, like so:
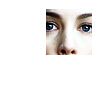
I set that to Multiply:
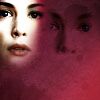
Then add a couple of duplicates on Screen and Soft Light:
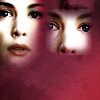
I add a brush in beige, set to Screen at 100:
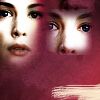
Now, I took a lovely Evenstar base from cassie2003, and pasted in a beige Multiply layer over it to colour it beige:
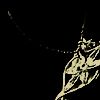
I set it to Screen:
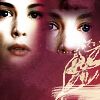
Duplicated and set to Soft Light, after masking out the black:
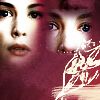
Now, another crop of the base, this time with Arwen's eyes:
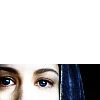
I masked it out, with my layer mask looking like this:

I set it to Soft Light. This was my icon:
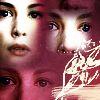
I added this tinytext brush by saihara:
My icon now looks like this (almost there...!)
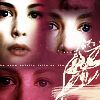
A couple of bruses (by _joni and dorky_duck, I believe) later:
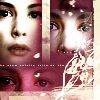
There, I'm done. If you have questions, feel free to fire away. You can also request other tutorials.

from

, as a lot of people asked for icon tutorials. (I picked one at random.)
This tutorial includes base fixing, blending, and a bit of masking and brushwork. Image heavy, and long.
A warning: while I've tried to make this tutorial as simple as possible, this was not an easy icon to make and I can't promise a completely beginner-friendly tutorial. However, feel free to give it a shot, and I'll certainly clarify if there's anything that needs explaining.
You will probably need to know how to make layer masks in your program, as I only have GIMP and can't explain. You'll also need to know how to crop, resize, and make new layers.
This tutorial was written for GIMP 2.2. It is, however, translatable.
I started with a cap from 'Arwen's Vision' in RotK, provided by Annon nan Galadh. I cropped it to my satisfaction and resized:

I duplicated the layer. Then, I opened the 'Levels' dialogue (Layers>>Colors>>Levels), and clicked 'Auto'. I got this:

I sharpened my image (Filters>>Enhance>>Sharpen):

Then, I used the Blur tool with a small round brush and fixed Arwen's skin a little:

It might not look like much now, but you'll see the difference it makes to the later stages, as some of the steps really emphasise even very fine lines. Eck.
I duplicated that layer and set it to Soft Light at 100:

I flood-filled a new layer with black (#000000) and set to Soft Light, 70 percent opacity:

That's the end of my base prep, so I merge and save. Now, I take this purple texture by (?):

I paste it in on a new layer, set to Normal.
I create another layer, and add this purple gradient by (?):

I set it to Multiply and get this:

Now, I duplicate the first purple texture and bring it to the top. Setting it to Soft Light, I get this:

New layer. I use a smallish round brush and doodle a bit in beige:

(The black is just there so that the beige will show up more clearly.)
Setting that to Normal at 100, this is what I get:

Time to bring Arwen back into the picture (literally). I create a new layer, and add a layer mask. Then I paste this into the mask:

Then, I bring my final base of Arwen (the one I get after all the layering) to the top, and resize a bit. I crop out the bits I don't need; I then duplicate and desaturate (Layers>>Colors>>Desaturate) to get this:

I set that to Multiply:

I now bring the coloured version up, and set it to Screen:

Duplicate that and set to Soft Light:

Duplicate the Soft Light layer again:

Now, I go back to my base and crop out a new part, like so:

I set that to Multiply:

Then add a couple of duplicates on Screen and Soft Light:

I add a brush in beige, set to Screen at 100:

Now, I took a lovely Evenstar base from cassie2003, and pasted in a beige Multiply layer over it to colour it beige:

I set it to Screen:

Duplicated and set to Soft Light, after masking out the black:

Now, another crop of the base, this time with Arwen's eyes:

I masked it out, with my layer mask looking like this:

I set it to Soft Light. This was my icon:

I added this tinytext brush by saihara:

My icon now looks like this (almost there...!)

A couple of bruses (by _joni and dorky_duck, I believe) later:

There, I'm done. If you have questions, feel free to fire away. You can also request other tutorials.