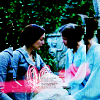
new tutorial.
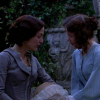
go from:
>>

1. crop/resize/sharpen your base:

2. duplicate your base and increase the saturation. Do this by going to adjust >> hue and saturation >> hue/saturation/lightness. set saturation at about 30%, and leave the other settings as they are (on 0).
3. Now we need to add a curves layer. go to layers >> new adjustments layer >> curves. set the settings at:
RGB: Input - 0, Output - 49
Red: Input - 0, Output - 5
Green: Input - 0, Output - 55
Blue: Input - 61, Output 0
duplicate this layer 3 times. set the first two layers to 'soft light', and the third to 'multiply'.
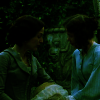
don't worry about it being dark, we're going to lighten it later.
4. okay, now we need another curves layer. this time set the settings to:
RGB: Input - 0, Output - 49
Red: Input - 128, Output - 0
Green: Input - 58, Output - 0
Blue: Input - 0, Output - 32
set this layer to 'multiply', and duplicate once.
5. so now it's really really dark. great, so now we need to lighten it a lot. go back to the base, duplicate it and set it to 'screen'. then duplicate this new sceened layer as many times as it takes to get the icon to a respectable light. i duplicated mine 7 times.

6. now right click the image and click 'copy merged'. paste as new layer. you now have a new merged base. resize the new base to about 70x70 pixels.
7. using the selection tool on 'rounded square' and feathered by 1, select the whole of the new resized base.
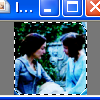
8. copy and paste the new selection onto your old base above all of the curves layers. you might need to sharpen your selection a little. it should look something like this:
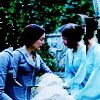
9. add a new layer above everything else. using the paintbrush tool, create random scribbles in a bright colour around an area of your icon. you can do the same in white. set this layer to 'lighten'
10. add a new layer, and with the paintbrush tool, add a very small text brush, and your done!
