(no subject)
I don't want to do these. I REALLY don't want to do these. Lol. I'm so lazy. Writing tutorials are hard. But alas, I have to get them out of the way. So, I'm doing them.
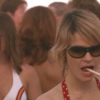
to
First and foremost, there is something that you need to understand about my icon making process right off the bat. That base was probably brighter, but I lowered it's brightness and made it darker. This is because I usually work by adding alot of screen layers. If the icon is already bright, adding screen layers will make it too bright so I have to make it darker to start with. Does that make sense?
I didn't use this so much with this icon, but you will see much darker bases that I use in later tutorials.
Moving along!
Our base:

Duplicate the base and set it to screen 100%
Normal 34%
(It's just a little something I add sometimes. I don't think it's incredibly necessary.)
Duplicate the base again and bring it all the way to the top of everything. Set it so screen 100%
Now we are going to add some curves.
Layers-->New Adjustment Later-->Curves
Red=Input: 188 Output: 255
Green=Input: 54 Output: 97
Blue=Input: 226 Output: 126
You should play around with this. Of course the curves aren't going to look the same for every icon.
After I do the curves and add the following color

And set it to burn at 62% it looks like this:
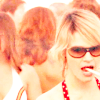
Duplicate the base twice and bring them to the top of everything.

Screen 100%

Burn 50%
Now we add another blue color.

Burn 100%
Softlight 100%
Duplicate that gradient once.
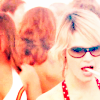
Duplicate and bring the base to the top once again.

soflight 100%
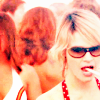
We add the light blue color again.

However, we are just trying to color Alice's face so we erase the part of it that's on the background.

Burn 100%
Duplicate that last color once.

Burn 26%
I hate the way the background looks. It's so...yuck. Lets cover it up with a with brush.
Normal 100%
Add some tiny text.
Then grab the selection tool and copy some of Alice's face.
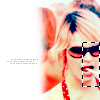
Copy and paste as new image the part that you selected. Desaturate it, resize it a bit, and copy, and paste it to the left of the icon.

Tada! :)
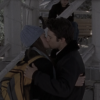
to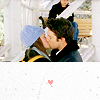
Notice how dark the base is. Once again, I did this purposely. I lowered the brightness of it to make room for more screen layers. :)
Start with our base:

Add a new layer and put in an orange color.

Softlight 100%
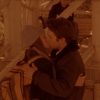
Now we are going to duplicate the base and drag it to the top of the orange softlight layer.

Screen 100%
Duplicate the screened base 2 times.
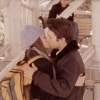
Drag the base to the top once again and increase it's saturation.
Adjust-->Hue and Saturation-->Hue/Saturation/Lightness
I generally increase the saturation to about 70-74. Sometimes 80.
It was this:

Now:
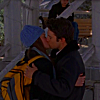
Set the saturated base to Screen 100% and duplicate it 3 times.
We don't want their faces to bee too red, so erase their faces on the forth saturated screen layer.
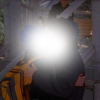
Hope the wasn't too hard to understand.
Now, we're going to add some random colors. You can always mess around with these. Change color and opacities and whatnot.

Burn 10%

Burn 20%

Burn 30%
This is usually the time when I like my icons to be sharper. So I copy all layers. I don't Merge them. I Just copy them. Edit-->Copy Merged. I then paste what I've copied on top of all the layers.
I then sharpen it and leave it at normal. I lowered the opacity to 72%. It really depends on how sharp the icon is as to how much your lower the sharpened layer.
Hope that made sense.
Was:
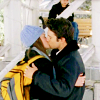
Now:
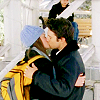
See? just a bit sharper in appearance. :)
Now we will take this texture:
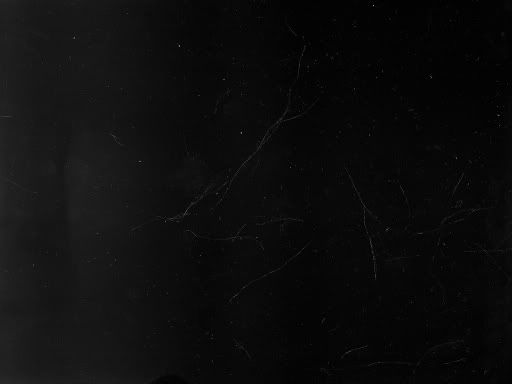
by peoplemachines
I don't want it to be black, so i go to Adjust-->Color Balance-->Negative Image
It should now be mostly white instead of mostly black.
I paste that onto the icon. I also add a heart.
Normal 100%
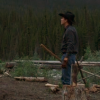
it loos like this:

And thats it! :)
to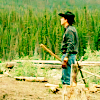
THIS TUTORIAL IS UNDER CONSTRUCTION
I'm sorry if these were extremely confusing. I'm also sorry for any typos or anything incorrect I might have put. I did the best I could. If you have any question, comments, or corrections, feel free to comment and tell me about them.
Have a nice one!

to
First and foremost, there is something that you need to understand about my icon making process right off the bat. That base was probably brighter, but I lowered it's brightness and made it darker. This is because I usually work by adding alot of screen layers. If the icon is already bright, adding screen layers will make it too bright so I have to make it darker to start with. Does that make sense?
I didn't use this so much with this icon, but you will see much darker bases that I use in later tutorials.
Moving along!
Our base:

Duplicate the base and set it to screen 100%

Normal 34%
(It's just a little something I add sometimes. I don't think it's incredibly necessary.)
Duplicate the base again and bring it all the way to the top of everything. Set it so screen 100%
Now we are going to add some curves.
Layers-->New Adjustment Later-->Curves
Red=Input: 188 Output: 255
Green=Input: 54 Output: 97
Blue=Input: 226 Output: 126
You should play around with this. Of course the curves aren't going to look the same for every icon.
After I do the curves and add the following color

And set it to burn at 62% it looks like this:

Duplicate the base twice and bring them to the top of everything.

Screen 100%

Burn 50%
Now we add another blue color.

Burn 100%

Softlight 100%
Duplicate that gradient once.

Duplicate and bring the base to the top once again.

soflight 100%

We add the light blue color again.

However, we are just trying to color Alice's face so we erase the part of it that's on the background.

Burn 100%
Duplicate that last color once.

Burn 26%
I hate the way the background looks. It's so...yuck. Lets cover it up with a with brush.

Normal 100%
Add some tiny text.
Then grab the selection tool and copy some of Alice's face.

Copy and paste as new image the part that you selected. Desaturate it, resize it a bit, and copy, and paste it to the left of the icon.
Tada! :)

to

Notice how dark the base is. Once again, I did this purposely. I lowered the brightness of it to make room for more screen layers. :)
Start with our base:

Add a new layer and put in an orange color.

Softlight 100%

Now we are going to duplicate the base and drag it to the top of the orange softlight layer.

Screen 100%
Duplicate the screened base 2 times.

Drag the base to the top once again and increase it's saturation.
Adjust-->Hue and Saturation-->Hue/Saturation/Lightness
I generally increase the saturation to about 70-74. Sometimes 80.
It was this:

Now:

Set the saturated base to Screen 100% and duplicate it 3 times.
We don't want their faces to bee too red, so erase their faces on the forth saturated screen layer.

Hope the wasn't too hard to understand.
Now, we're going to add some random colors. You can always mess around with these. Change color and opacities and whatnot.

Burn 10%

Burn 20%

Burn 30%
This is usually the time when I like my icons to be sharper. So I copy all layers. I don't Merge them. I Just copy them. Edit-->Copy Merged. I then paste what I've copied on top of all the layers.
I then sharpen it and leave it at normal. I lowered the opacity to 72%. It really depends on how sharp the icon is as to how much your lower the sharpened layer.
Hope that made sense.
Was:

Now:

See? just a bit sharper in appearance. :)
Now we will take this texture:

by peoplemachines
I don't want it to be black, so i go to Adjust-->Color Balance-->Negative Image
It should now be mostly white instead of mostly black.
I paste that onto the icon. I also add a heart.

Normal 100%
it loos like this:

And thats it! :)

to

THIS TUTORIAL IS UNDER CONSTRUCTION
I'm sorry if these were extremely confusing. I'm also sorry for any typos or anything incorrect I might have put. I did the best I could. If you have any question, comments, or corrections, feel free to comment and tell me about them.
Have a nice one!