How to make your own radial lens flares in Photoshop.
It's time for my second tutorial! =^.^=
As always, I use Photoshop.
How to make these textures:


To get this effect on icons:
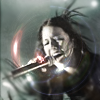
p.s: I know the icon sucks, it serves as an example :)
Step 1: Fill the Background Layer with Black and Duplicate it.

Step 2: Filter > Render > Lens Flare. Do it many times. Move them around.
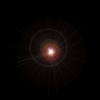
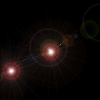
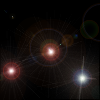
Choose Whatever Lens Type you want.
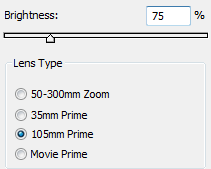
I used the 50-300 mm Zoom Flares for the first 2 at around 75% (you can change this to what you want.)
For the third one I used 105mm Prime also at 75%.
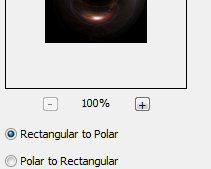
Step 3: Filter > Distort > Polar Coordinates. Select Rectangular to Polar.
That's pretty much it!
Result:

WITH LINES:

Go back to step 2 and carelessly draw lines with your 1px brush (pick any light color) at low opacity, I chose 42%.

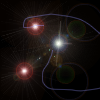
Go to step 3.
You should have something that looks like this:
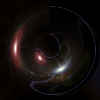
If you think that the lines are too sharp, you can just use the blur tool and blur them a little bit:


If you want your texture to shine brighter, simply duplicate your layer and set it to either Screen, Color Dodge or Linear Dodge.
If you want it to be darker, duplicate it and set it to Multiply, Overlay, Soft Light, Hard Light.. etc. I'm not going to name them all <3
Just play around those settings.
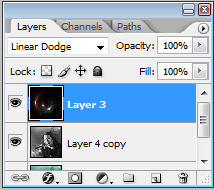
To put the texture on your icon, set the texture to Linear Dodge (other settings may look nice too):
Final Result:

I hope this was helpful to some of you:D
Show me your results!!
watch/add my community.
may_icons
As always, I use Photoshop.
How to make these textures:
To get this effect on icons:
p.s: I know the icon sucks, it serves as an example :)
Step 1: Fill the Background Layer with Black and Duplicate it.
Step 2: Filter > Render > Lens Flare. Do it many times. Move them around.
Choose Whatever Lens Type you want.
I used the 50-300 mm Zoom Flares for the first 2 at around 75% (you can change this to what you want.)
For the third one I used 105mm Prime also at 75%.
Step 3: Filter > Distort > Polar Coordinates. Select Rectangular to Polar.
That's pretty much it!
Result:
WITH LINES:
Go back to step 2 and carelessly draw lines with your 1px brush (pick any light color) at low opacity, I chose 42%.
Go to step 3.
You should have something that looks like this:
If you think that the lines are too sharp, you can just use the blur tool and blur them a little bit:
If you want your texture to shine brighter, simply duplicate your layer and set it to either Screen, Color Dodge or Linear Dodge.
If you want it to be darker, duplicate it and set it to Multiply, Overlay, Soft Light, Hard Light.. etc. I'm not going to name them all <3
Just play around those settings.
To put the texture on your icon, set the texture to Linear Dodge (other settings may look nice too):
Final Result:
I hope this was helpful to some of you:D
Show me your results!!
watch/add my community.
may_icons