Crying effect tutorial
dertodesengel asked for a tutorial on this icon:

<-- base by sweet__illusion
Unfortunately I no longer have the base to this icon anymore, so I'll use this base, which was also provided by sweet__illusion:

This tutorial was made in Adobe Image Ready 7.0, and it is my first tutorial, so forgive me if it's a little confusing. ^^;;
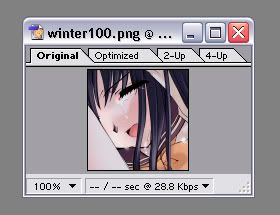
1. First, open the base you're going to be working with. Duh. XD
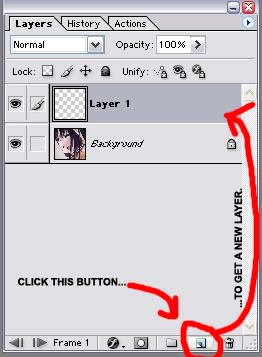
2. Add a new layer; this is going to be the layer with the dot that represents your teardrop(s)
3. Using the eyedrop tool (
), select the stream of tears to pick up the color that will be used for your teardrop. Though you might want to lighten it slightly so it can stand out okay.
4. Select the paintbrush (
), and while still on your new layer, use a brush (3px or bigger depending on how big the tear stream is) and move it where you want the teardrop to start falling from. I used red in the example so it's easy to see.
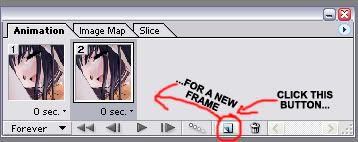
5. Now it's time to place where the teardrop's path will end. First, create a new frame.
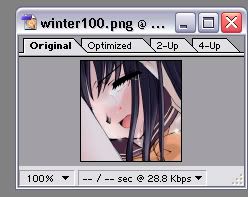
6. When the 2nd frame is selected, move the layer with your teardrop to where you want its path to end.
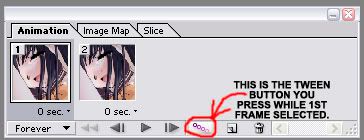
7. Now it's the fun part. Select the first frame again, and click the tween button.
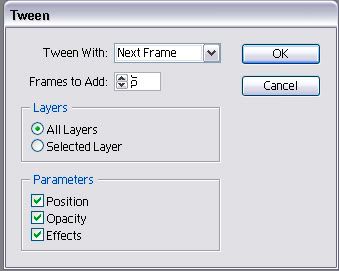
8. It doesn't hurt to have your tween menu to look like this, though feel free to increase or decrease the number of frames created by the tween, but keep in mind that your final product must be under 40k to be used on LJ.
9. Now you should have seven frames with the teardrop in a different position. You might need to move the teardrop manually on each frame to fit the path better, but eventually your end result will be this:

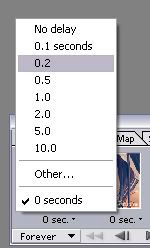
10. There's two problems with this however. One, the teardrop moves way to fast. Two, it's too constant; you need a period of time where she's not crying. To rectify these two situations, first select all the frames and then click the triangle at the bottom of one of the frames to change the amount of time a frame is on the screen for all of them. I picked 0.2 seconds, though you can play around with the seconds to get the speed you like best.
Next to make a time when she's not crying. Select the last frame, and then add a new frame. Select this new frame and deselect the layer with the teardrop. Also, make this frame last for 1.5 seconds so people see there's a pause in her crying.
11. Add a border, an exclusion layer, text and other effects, and you have a finished icon!

Lyrics Credit: "One More Sad Song" by All-American Rejects
I hoped my tutorial helped you, and if you have any questions, feel free to ask. Also, I would love to see any icons you make using this tutorial! :D
<-- base by sweet__illusion
Unfortunately I no longer have the base to this icon anymore, so I'll use this base, which was also provided by sweet__illusion:
This tutorial was made in Adobe Image Ready 7.0, and it is my first tutorial, so forgive me if it's a little confusing. ^^;;
1. First, open the base you're going to be working with. Duh. XD
2. Add a new layer; this is going to be the layer with the dot that represents your teardrop(s)
3. Using the eyedrop tool (
), select the stream of tears to pick up the color that will be used for your teardrop. Though you might want to lighten it slightly so it can stand out okay.
4. Select the paintbrush (
), and while still on your new layer, use a brush (3px or bigger depending on how big the tear stream is) and move it where you want the teardrop to start falling from. I used red in the example so it's easy to see.
5. Now it's time to place where the teardrop's path will end. First, create a new frame.
6. When the 2nd frame is selected, move the layer with your teardrop to where you want its path to end.
7. Now it's the fun part. Select the first frame again, and click the tween button.
8. It doesn't hurt to have your tween menu to look like this, though feel free to increase or decrease the number of frames created by the tween, but keep in mind that your final product must be under 40k to be used on LJ.
9. Now you should have seven frames with the teardrop in a different position. You might need to move the teardrop manually on each frame to fit the path better, but eventually your end result will be this:
10. There's two problems with this however. One, the teardrop moves way to fast. Two, it's too constant; you need a period of time where she's not crying. To rectify these two situations, first select all the frames and then click the triangle at the bottom of one of the frames to change the amount of time a frame is on the screen for all of them. I picked 0.2 seconds, though you can play around with the seconds to get the speed you like best.
Next to make a time when she's not crying. Select the last frame, and then add a new frame. Select this new frame and deselect the layer with the teardrop. Also, make this frame last for 1.5 seconds so people see there's a pause in her crying.
11. Add a border, an exclusion layer, text and other effects, and you have a finished icon!
Lyrics Credit: "One More Sad Song" by All-American Rejects
I hoped my tutorial helped you, and if you have any questions, feel free to ask. Also, I would love to see any icons you make using this tutorial! :D