Tutorial #2 -- Lucy's Dream
My second tutorial ^__^
Learn how to go from
to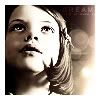
using Photoshop CS2; applicable to any version and other programs
1)

I started with this base made by the lovely britishness
2)

I then smoothed out Lucy's face using the blur tool (strenght: 30%)
3)

I then adjusted the levels of the base by going to Image->Adjustments->Levels. Go to the drop down menu and choose red, then slide the arrow to where the color starts (example here); repeat this with green and blue. Click the preview button on and off and you can see the difference.
4)
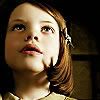
I then went to Filters->Unsharp Mask, I don't remember what my setting were, but just fiddle with them until the picture looks crisp. Don't worry if it looks a little rough. I took my blur tool (strength:30%) and smoothed out her face a little (avoiding her eyes and lips). I also took the dodge tool (exposer:23%) and used it to brighten up the highlights and white of her eyes.
5)
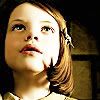
I then duplicated the base and set it to Screen 100%
6)
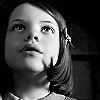
6a)
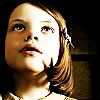
I then duplicated the base layer again, desaturated it (SHIFT + CTRL + U) and set it to Soft Light 100%. 6a is the way the icon looks after the layer is applied, this is how you layers pallette should sort of look like (the extra layers at the bottom are just for reference, they are not needed)
7)

7a)

I then applied awmp's light texture set to Screen 100%. I applied a gradient (7a) onto a layer mask, getting rid of the light texture on Lucy's face
8)

I then applied inxsomniax's brush in white on a black layer and set it to Screen 100%
9)

I created a new layer and applied this gradient (#d6a3c2-#d9ba87) set to Soft Light 60%
10)

I created another new layer and filled it with #dfdfdf and it to Color Burn 100%
11)

11a)
I then created a new layer and applied this gradient (#f1e3d2-#dbc3a) and set it to Saturation 100%. I then applied a gradient to a layer mask (11a) getting rid of part of the gradient from Lucy's face; I also masked out her eyes
12)

12a)

I then created a new layer and filled it with #dfdfdf and set it to Color 30%. I also appled a layer mask (12a) and masked out Lucy's eyes
13)
13a)
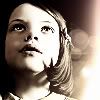
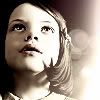
I then duplicated the base, desaturated it, brought it to the top and set it to Soft Light 100% (13a)
14)

I then added the text: DREAM with Kartika 10pt, tracking 200. And I also added some tiny text set to Kartika 4pt, tracking 200
15)
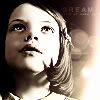
I set the font color to #fbe9e9 and set it to blending mode Soft Light 100%
16)
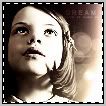
Now select all (CTRL+ A), create a new layer and go to Edit->Stroke, and set your stroke to 5px inside, hit enter, and then deselect
17)

And that's it, not too complicated, just for reference, here's how you layer pallette should like when your done
I hope this was helpful, I love feedback, so tell me what you think of it. I would also love to see what you guys can make out it, happy icon making.
~Maryam
Learn how to go from

to
using Photoshop CS2; applicable to any version and other programs
1)

I started with this base made by the lovely britishness
2)

I then smoothed out Lucy's face using the blur tool (strenght: 30%)
3)

I then adjusted the levels of the base by going to Image->Adjustments->Levels. Go to the drop down menu and choose red, then slide the arrow to where the color starts (example here); repeat this with green and blue. Click the preview button on and off and you can see the difference.
4)

I then went to Filters->Unsharp Mask, I don't remember what my setting were, but just fiddle with them until the picture looks crisp. Don't worry if it looks a little rough. I took my blur tool (strength:30%) and smoothed out her face a little (avoiding her eyes and lips). I also took the dodge tool (exposer:23%) and used it to brighten up the highlights and white of her eyes.
5)

I then duplicated the base and set it to Screen 100%
6)

6a)

I then duplicated the base layer again, desaturated it (SHIFT + CTRL + U) and set it to Soft Light 100%. 6a is the way the icon looks after the layer is applied, this is how you layers pallette should sort of look like (the extra layers at the bottom are just for reference, they are not needed)
7)

7a)

I then applied awmp's light texture set to Screen 100%. I applied a gradient (7a) onto a layer mask, getting rid of the light texture on Lucy's face
8)

I then applied inxsomniax's brush in white on a black layer and set it to Screen 100%
9)

I created a new layer and applied this gradient (#d6a3c2-#d9ba87) set to Soft Light 60%
10)

I created another new layer and filled it with #dfdfdf and it to Color Burn 100%
11)

11a)

I then created a new layer and applied this gradient (#f1e3d2-#dbc3a) and set it to Saturation 100%. I then applied a gradient to a layer mask (11a) getting rid of part of the gradient from Lucy's face; I also masked out her eyes
12)

12a)

I then created a new layer and filled it with #dfdfdf and set it to Color 30%. I also appled a layer mask (12a) and masked out Lucy's eyes
13)

13a)

I then duplicated the base, desaturated it, brought it to the top and set it to Soft Light 100% (13a)
14)

I then added the text: DREAM with Kartika 10pt, tracking 200. And I also added some tiny text set to Kartika 4pt, tracking 200
15)
I set the font color to #fbe9e9 and set it to blending mode Soft Light 100%
16)
Now select all (CTRL+ A), create a new layer and go to Edit->Stroke, and set your stroke to 5px inside, hit enter, and then deselect
17)
And that's it, not too complicated, just for reference, here's how you layer pallette should like when your done
I hope this was helpful, I love feedback, so tell me what you think of it. I would also love to see what you guys can make out it, happy icon making.
~Maryam