There and Back Again - the shirt
Slowly, but surely, I'm getting photos of everything I've got from There and Back Again organized and online. Last time, we visited the velvet and corduroy long vest. Today, it's the shirt layer of my gaudy ensemble. We begin with the inspiration shirt from which I took the pattern:
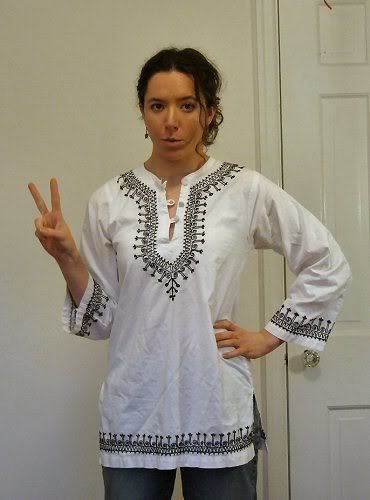
Vintage '70s. (Don't tell my mother I called it "vintage.")
...And the costume shirt (with totally different sleeves, obvs...)
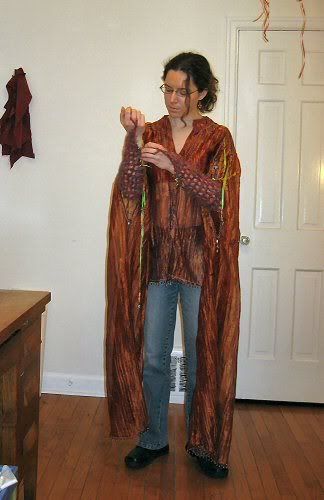
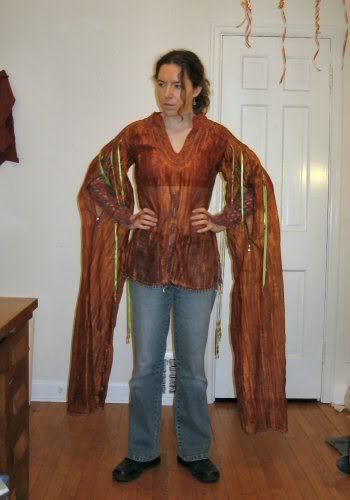
This was made of an orangey, rust-colored crinkle organza that was not particularly fun to work with. The body of the shirt and armscyes are the only things copied from the original, and I added slits in the front in addition to the existing ones at the side. The sleeves were roughly based on ones from a McCall's shirt pattern, but I lengthened them considerably and made arm slits up near the top. There is a lining layer of the same red cotton/lame used in lining the long vest. This is attached only at the neckline and is gathered with elastic just under the bust. Attached to the lining are a pair of short under-sleeves of quilting calico in shades of red and orange, to which the crocheted sleeves are attached.
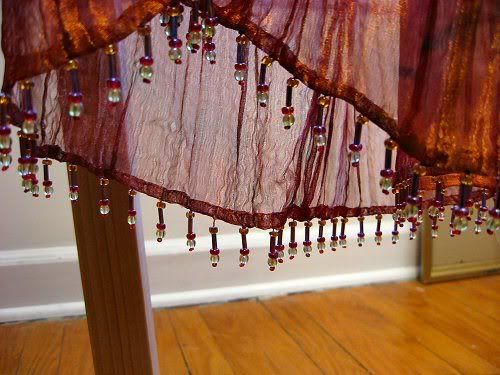
Hemming the organza was difficult. I ended up sewing it to purple seam tape, flipping that over, and sewing it again with a decorative stitch in lime green thread to encase the raw edges of the organza. I then added beaded fringe (strung entirely by hand).
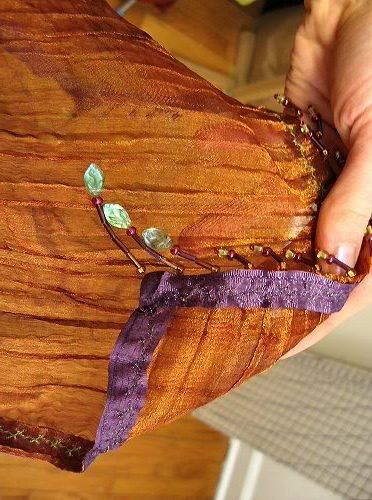
At each corner of the hem where it was broken by a slit, I lengthened the fringe and added leaf beads.
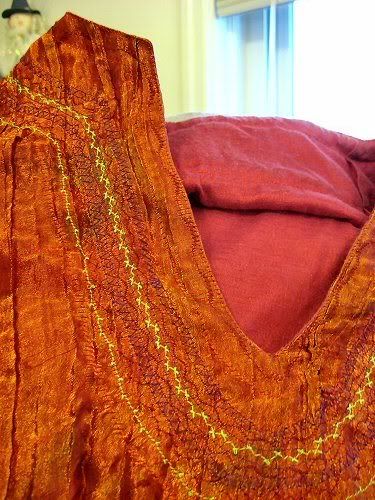
The rest of the body of the shirt isn't terribly exciting. I did play around with decorative stitches on my machine to embroider the neckline (which does not show when the shirt is worn with the short vest) but otherwise most of the fun is in the sleeves.
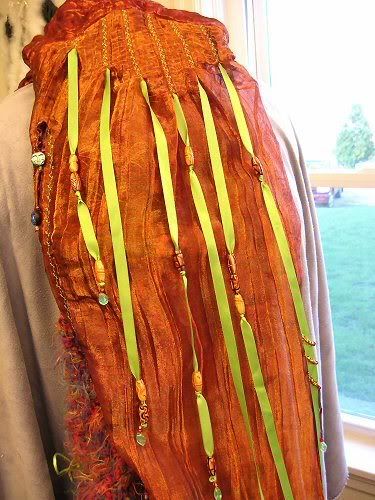
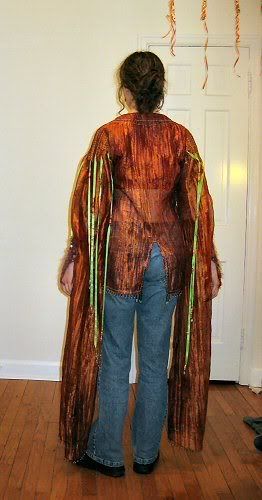
I slashed and spread my sleeve pattern vertically in seven places, spreading each by about an inch. Where each slash occurred, I made a tuck, bringing the sleeve back to its original shape at the shoulder. I made these tucks of graduated length, longest on the side and shortest at the front and back. Then I inserted green ribbons into each tuck, flattened each tuck, and stitched down the length of the tucks with the same decorative stitch I'd used on the hem. The ribbons are left to hang loose where they emerge from the tucks. The ribbons are also of graduated lengths, with the longest in back and the shortest in front.
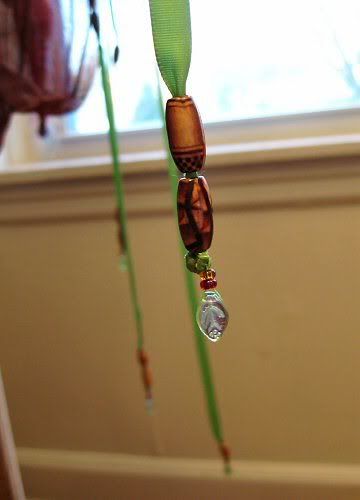
I threaded some beads onto the ribbons, securing them in place with knots. Each ribbon was ended with 1-3 wooden beads secured with a knot, the tail of the knot threaded back up through the wooden bead(s), and a few beads used in the hem fringe (including a leaf bead) sewn to the knot.
The arm slit:
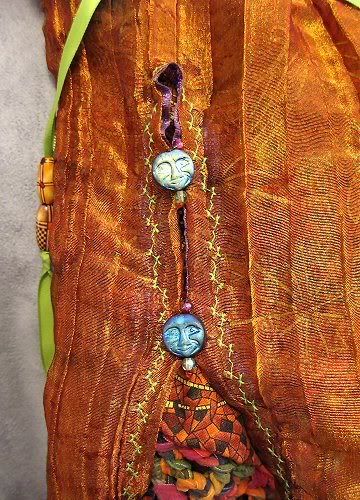
I made these slits a bit too long and begin a bit too high up. I turned this into a design feature by tacking each slit closed in two places and covering the joins with these fun moon-face beads.

The edges of the slits were finished the same way as the shirt hem. At the bottom of each slit, I made a little tassel of beads.
The sleeve hem. Instead of using seam tape and a decorative stitch, I just turned the edge over twice and sewed it by hand. I added the same fringe as on the hem of the body of the shirt.
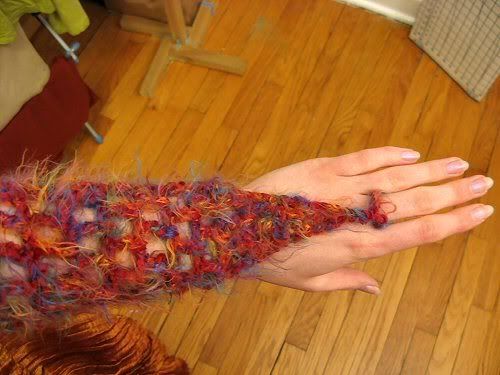
The crocheted sleeves. This was an addition I made just last winter, after the costume had already been on stage twice. It was something I'd wanted to do all along, but hadn't found the time.
I didn't have enough of this wonderful yarn, so there's about two inches up around the elbows where a different yarn was used to bridge the gap between what is seen here and the fabric under-sleeve that attaches to the shirt lining. The insides of the wrists of these crocheted sleeves are open and can be closed with green rattail loops and wooden beads used as buttons.
Stay tuned for the short vest and the pants!
Vintage '70s. (Don't tell my mother I called it "vintage.")
...And the costume shirt (with totally different sleeves, obvs...)
This was made of an orangey, rust-colored crinkle organza that was not particularly fun to work with. The body of the shirt and armscyes are the only things copied from the original, and I added slits in the front in addition to the existing ones at the side. The sleeves were roughly based on ones from a McCall's shirt pattern, but I lengthened them considerably and made arm slits up near the top. There is a lining layer of the same red cotton/lame used in lining the long vest. This is attached only at the neckline and is gathered with elastic just under the bust. Attached to the lining are a pair of short under-sleeves of quilting calico in shades of red and orange, to which the crocheted sleeves are attached.
Hemming the organza was difficult. I ended up sewing it to purple seam tape, flipping that over, and sewing it again with a decorative stitch in lime green thread to encase the raw edges of the organza. I then added beaded fringe (strung entirely by hand).
At each corner of the hem where it was broken by a slit, I lengthened the fringe and added leaf beads.
The rest of the body of the shirt isn't terribly exciting. I did play around with decorative stitches on my machine to embroider the neckline (which does not show when the shirt is worn with the short vest) but otherwise most of the fun is in the sleeves.
I slashed and spread my sleeve pattern vertically in seven places, spreading each by about an inch. Where each slash occurred, I made a tuck, bringing the sleeve back to its original shape at the shoulder. I made these tucks of graduated length, longest on the side and shortest at the front and back. Then I inserted green ribbons into each tuck, flattened each tuck, and stitched down the length of the tucks with the same decorative stitch I'd used on the hem. The ribbons are left to hang loose where they emerge from the tucks. The ribbons are also of graduated lengths, with the longest in back and the shortest in front.
I threaded some beads onto the ribbons, securing them in place with knots. Each ribbon was ended with 1-3 wooden beads secured with a knot, the tail of the knot threaded back up through the wooden bead(s), and a few beads used in the hem fringe (including a leaf bead) sewn to the knot.
The arm slit:
I made these slits a bit too long and begin a bit too high up. I turned this into a design feature by tacking each slit closed in two places and covering the joins with these fun moon-face beads.
The edges of the slits were finished the same way as the shirt hem. At the bottom of each slit, I made a little tassel of beads.
The sleeve hem. Instead of using seam tape and a decorative stitch, I just turned the edge over twice and sewed it by hand. I added the same fringe as on the hem of the body of the shirt.
The crocheted sleeves. This was an addition I made just last winter, after the costume had already been on stage twice. It was something I'd wanted to do all along, but hadn't found the time.
I didn't have enough of this wonderful yarn, so there's about two inches up around the elbows where a different yarn was used to bridge the gap between what is seen here and the fabric under-sleeve that attaches to the shirt lining. The insides of the wrists of these crocheted sleeves are open and can be closed with green rattail loops and wooden beads used as buttons.
Stay tuned for the short vest and the pants!