Tutorial: How to make animated icons
Tutorial requested by
prettybutt
How to make:


- First, you have to make some screencaps from the scene you want to make the icon.
Here you can find a great tutorial by
anesthezea
Its pretty easy to make the screens. I use Power DVD to make mine.
*How to make animated icons (using Image Ready and Photoshop CS2)*
So, I already made my caps from the scene I want. I will be making this icon:
**Changing the background**
Before we start to animate the caps using Image Ready, we have to change the background to get this
effect.
This is kind of a hard work... Not hard really, but you will have to be patient.
- Open all the caps you are going to use to make the icon with Adobe Photoshop.
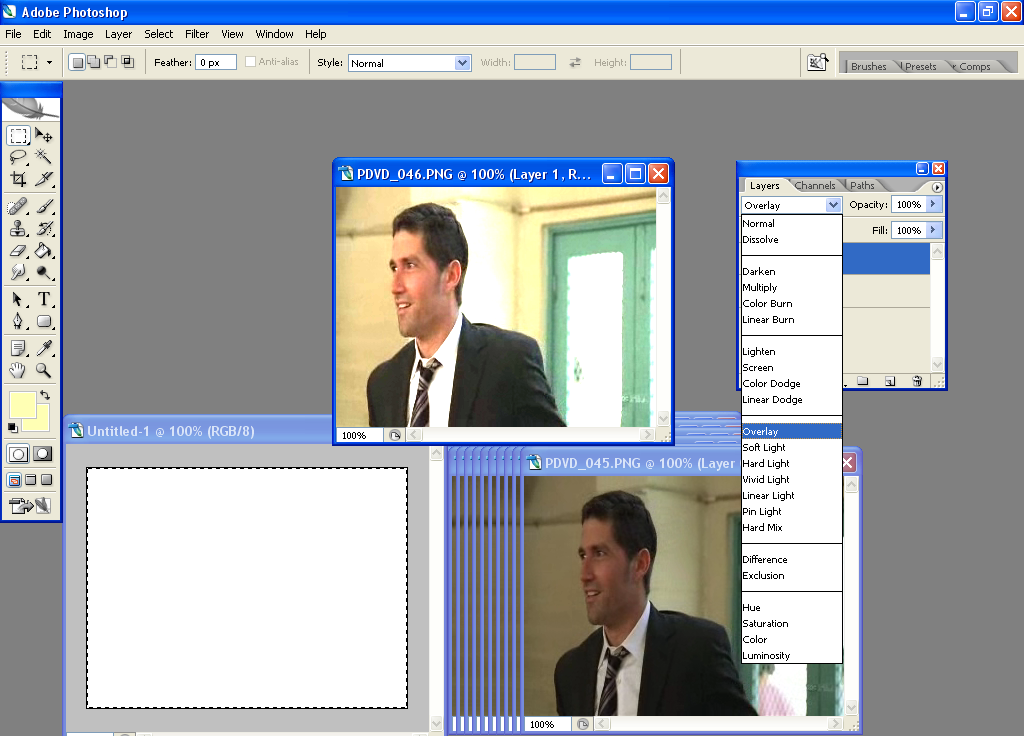
- I think my caps are too dark, so I will make a new layer #FFFFFF. Then, I am going to copy and past this layer onto ever single one of my caps and change it to "overlay". Now my caps are brighter. Flatten image.

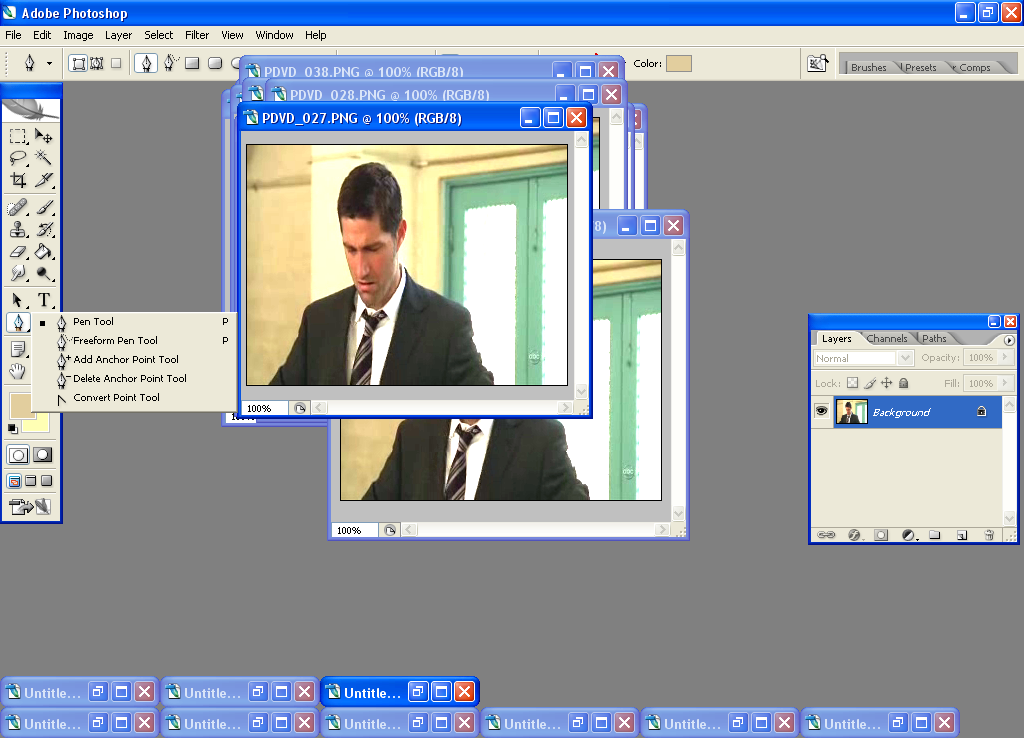
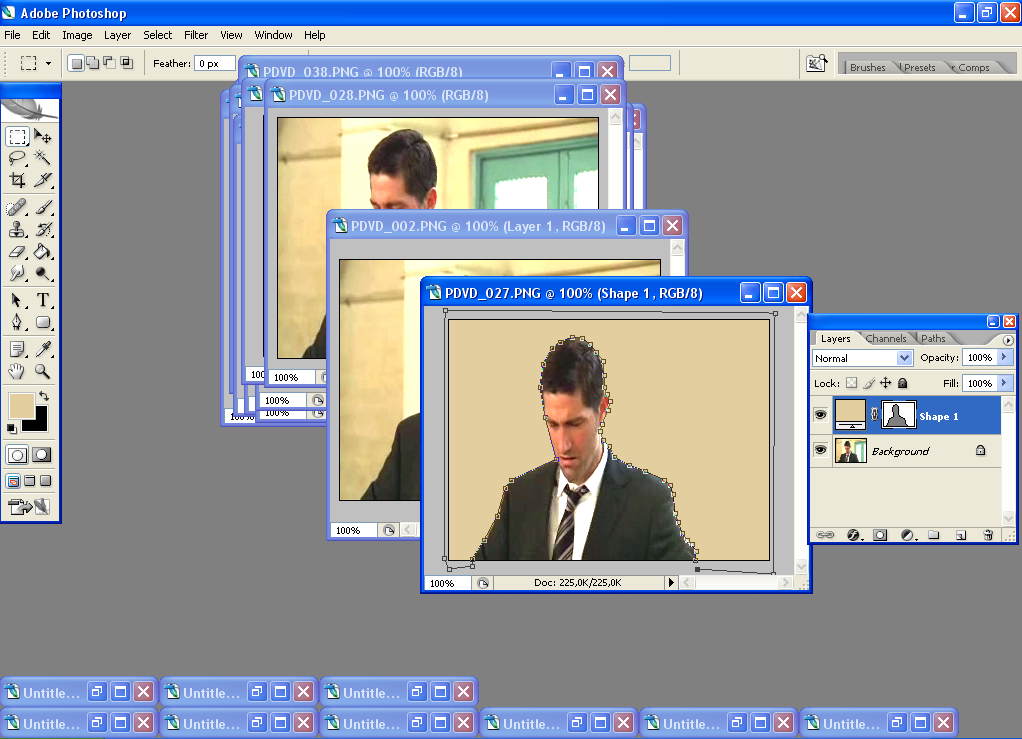
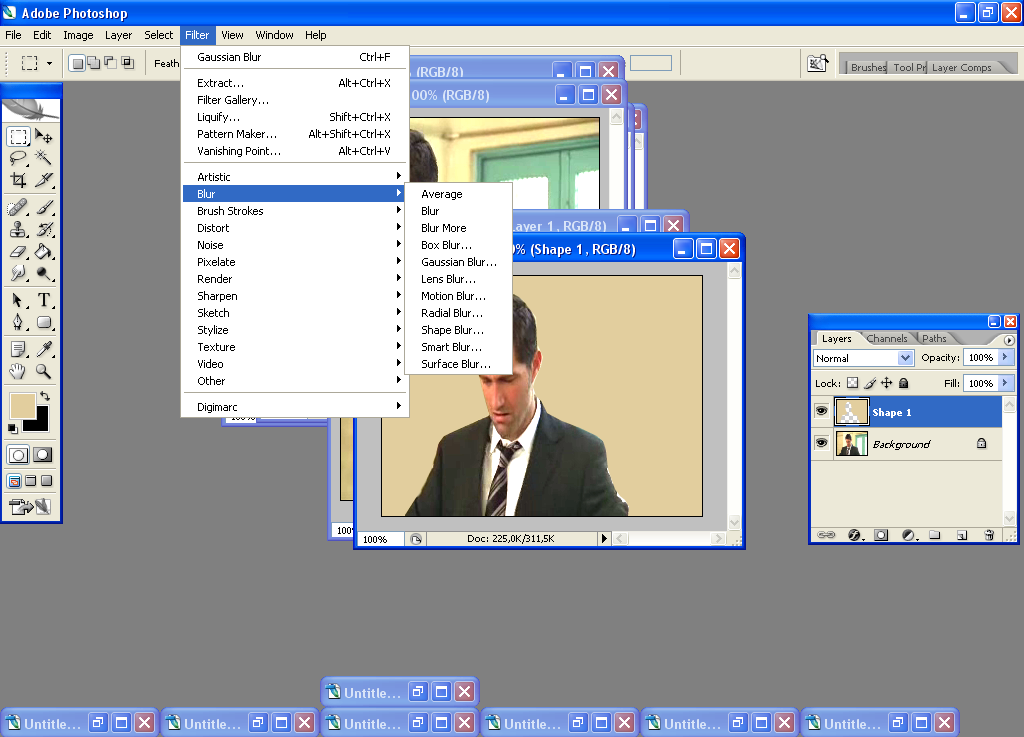
- Now, we are going to use the PEN TOOL to FLOOD the background. You must pick a color that its similar to the original background color around the image you want to use. (You will get a better effect in the end.)

- I´m going to use #e2ce9e to Flood fill everything around the image. In my case, I will fill everything around Jack.

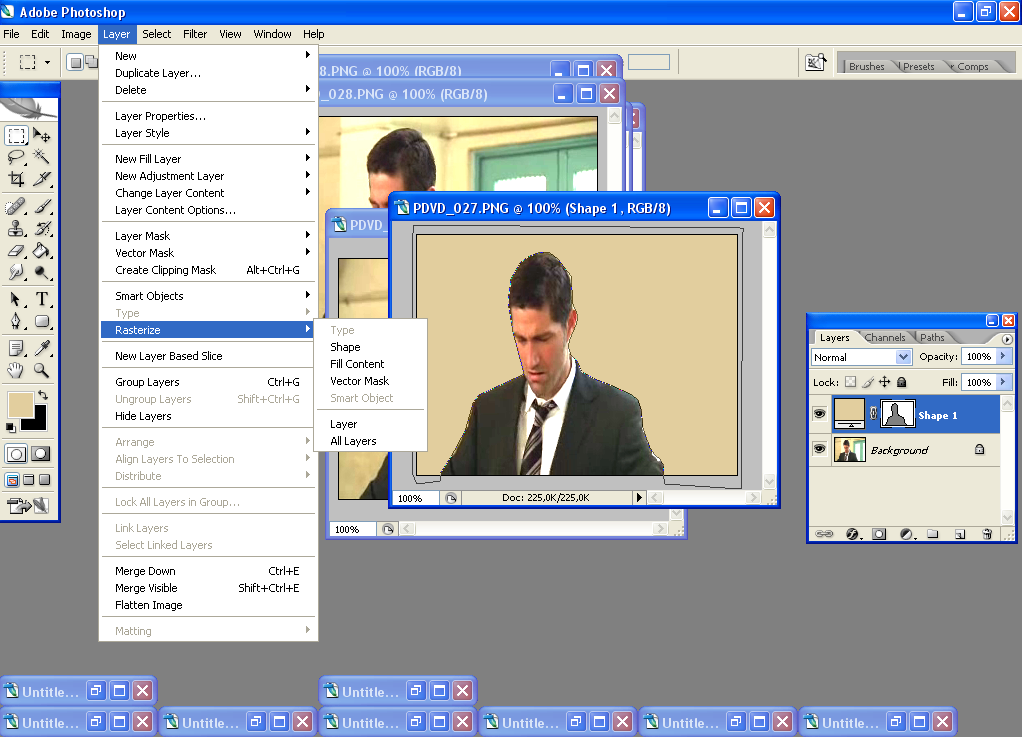
- Rasterize the layer.

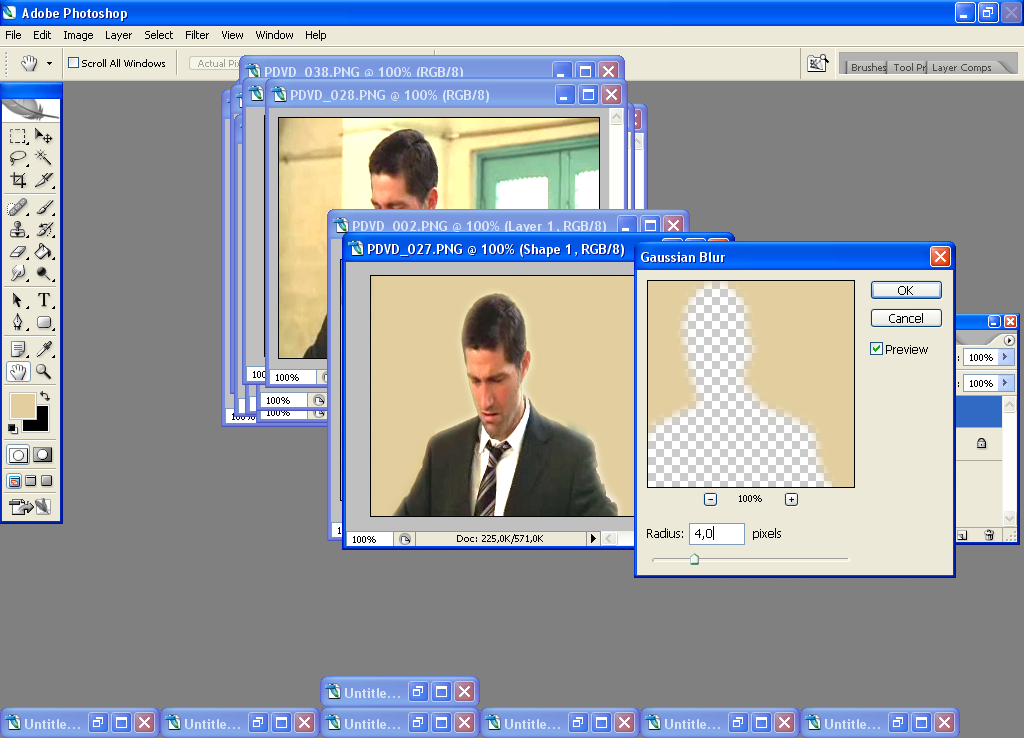
- Filter - Grassian Blur - pixel between 3 and 6, depending of your image. I´m going to use 4px.


- Flatten image, save.
- You have to do that with every single one of your caps. This is the only way I know of doing this. If you know any other way to make this faster and not so annoyng, please share with us! *grin*.
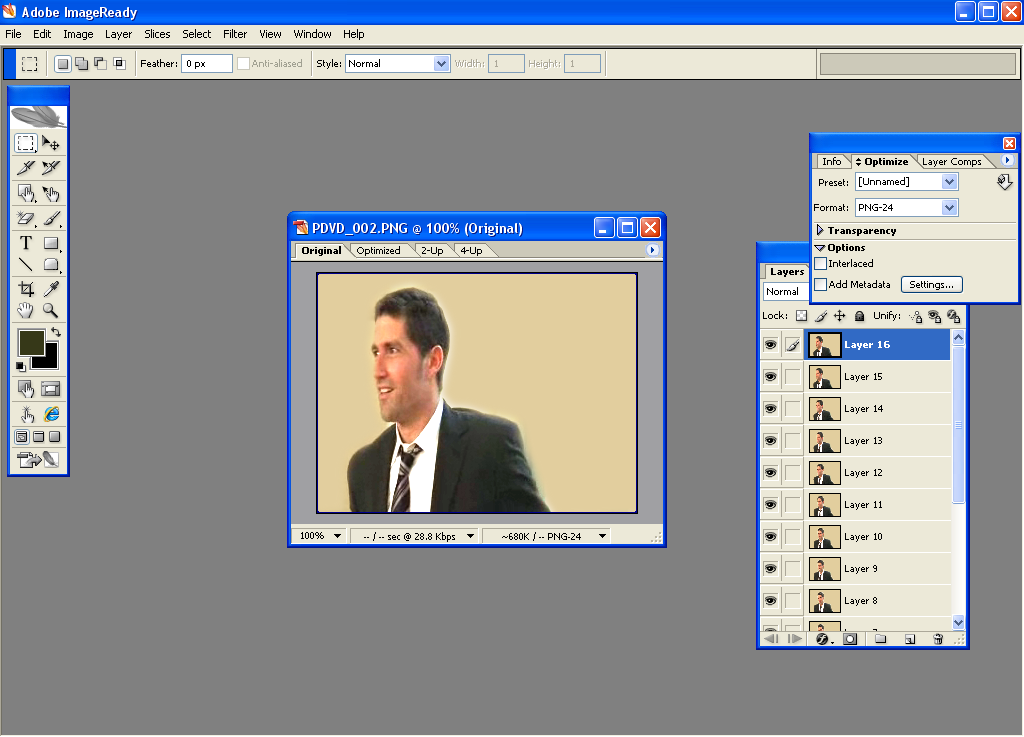
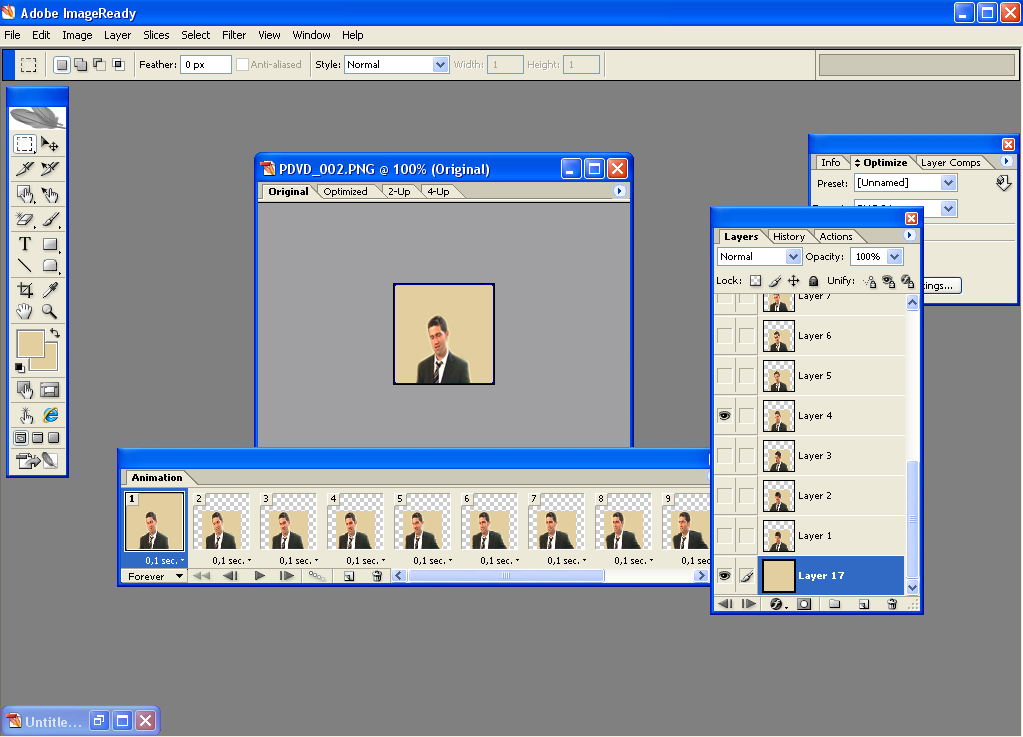
- Now, open your caps with Image Ready.
- One by one, drag each cap over the first one. You have to keep them in order, starting with the first one, the first frame of the scene;

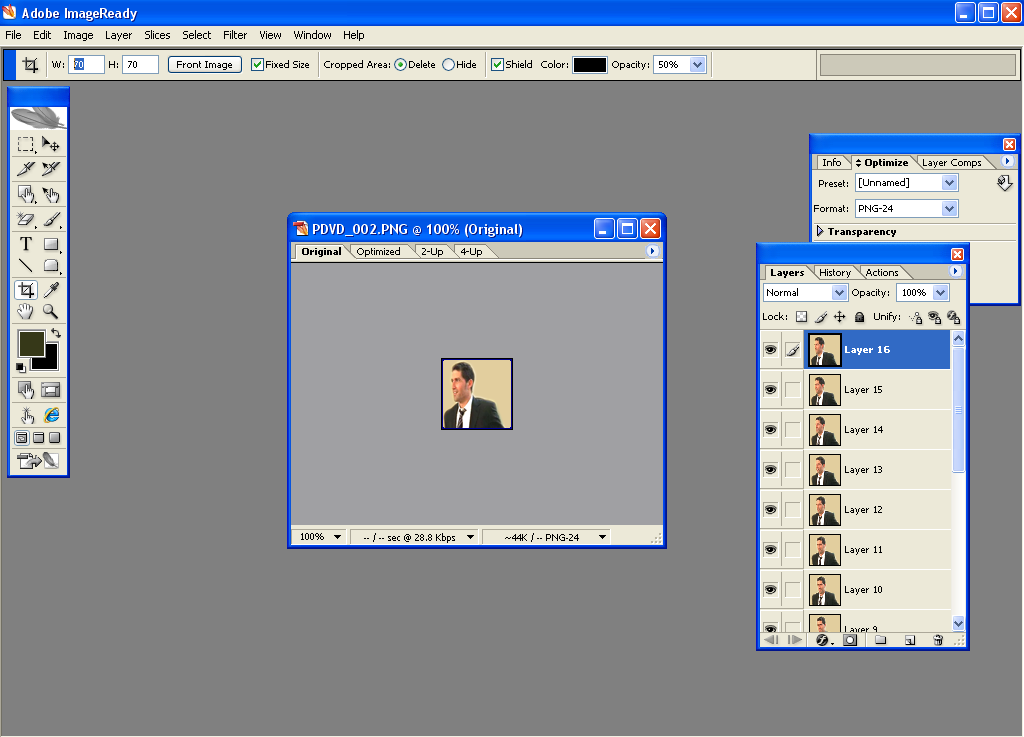
- Click on the Crop Tool and enter the size you want for your image. I´m going with w: 70 h: 70. Crop your image.

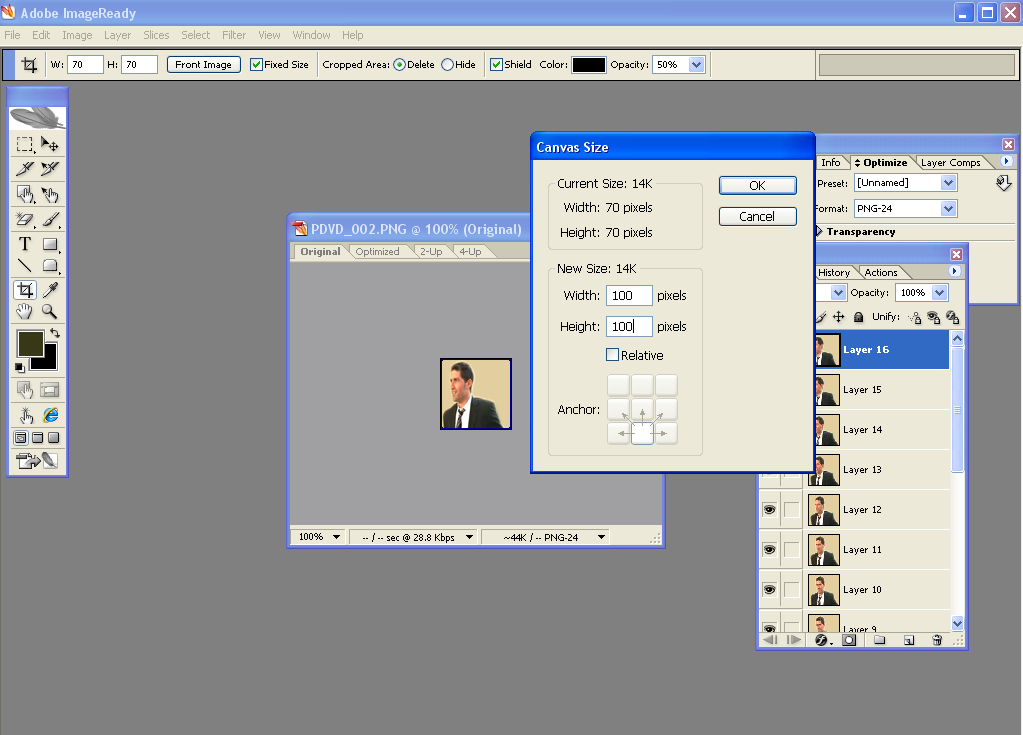
- Got to "Image" - "Canvas size". 100 x 100

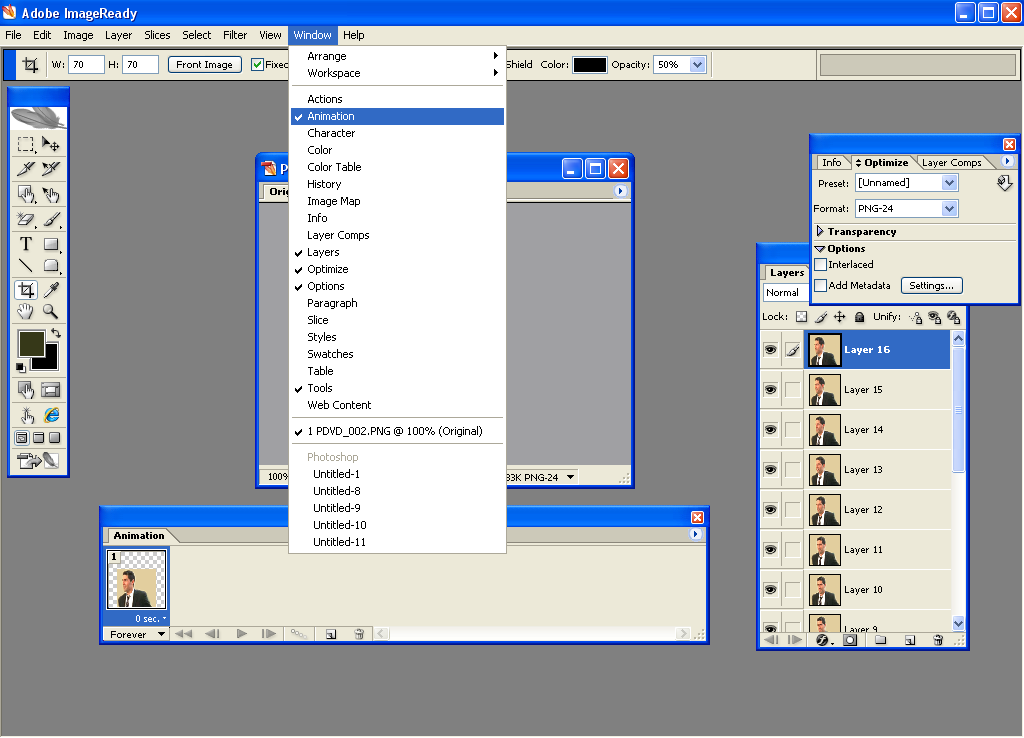
- Open the animation window;
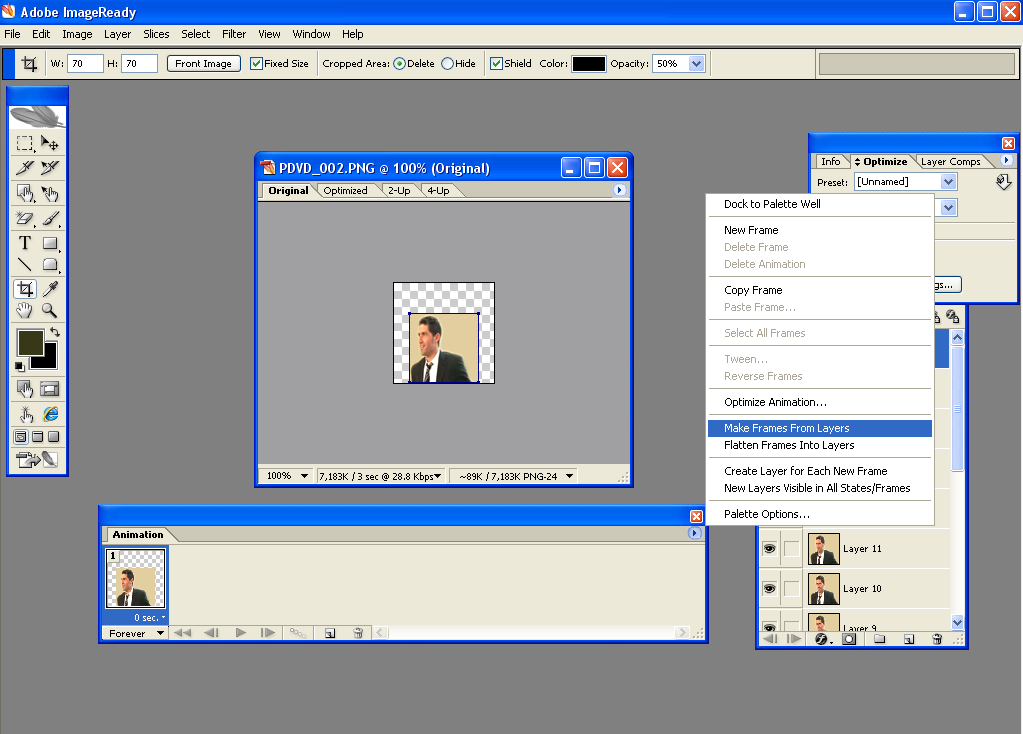
- In the animation window, click on "Make frames from layers";


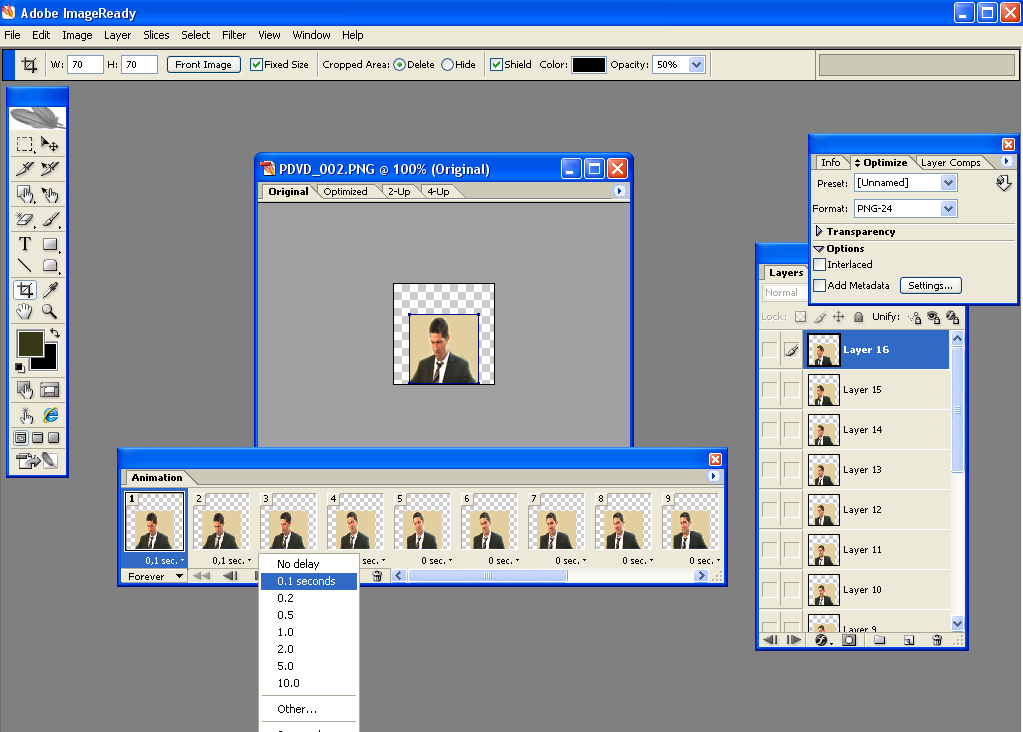
- I think my animation is moving too fast, so I´m going to change the delay from 0 to 0,1. You have to do that in every single frame;

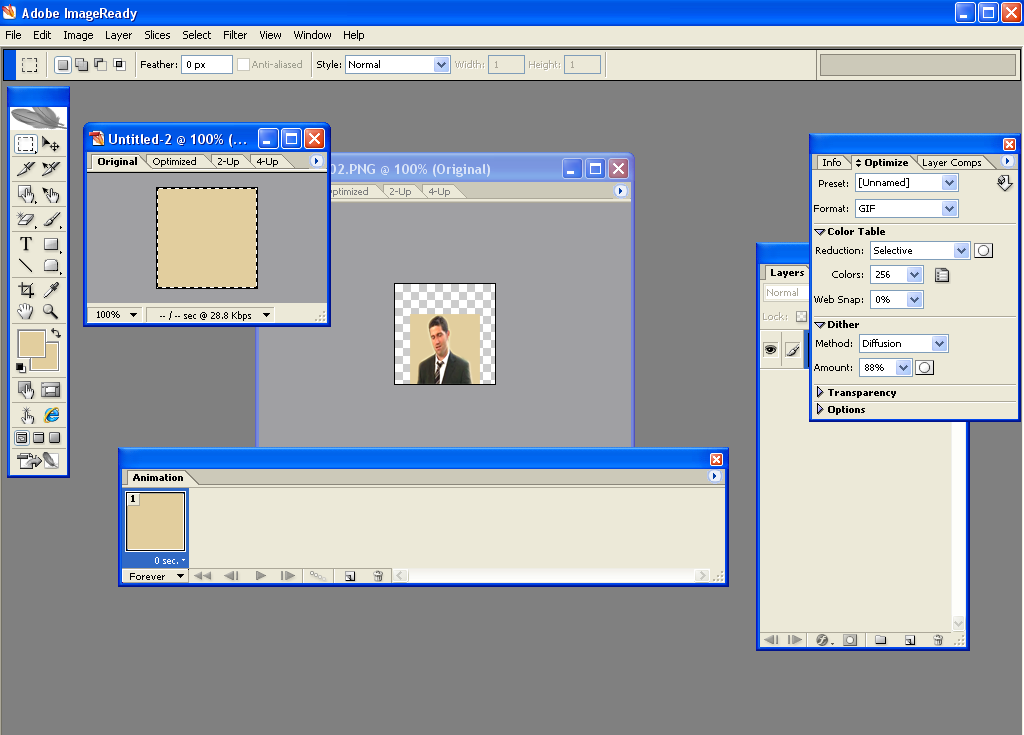
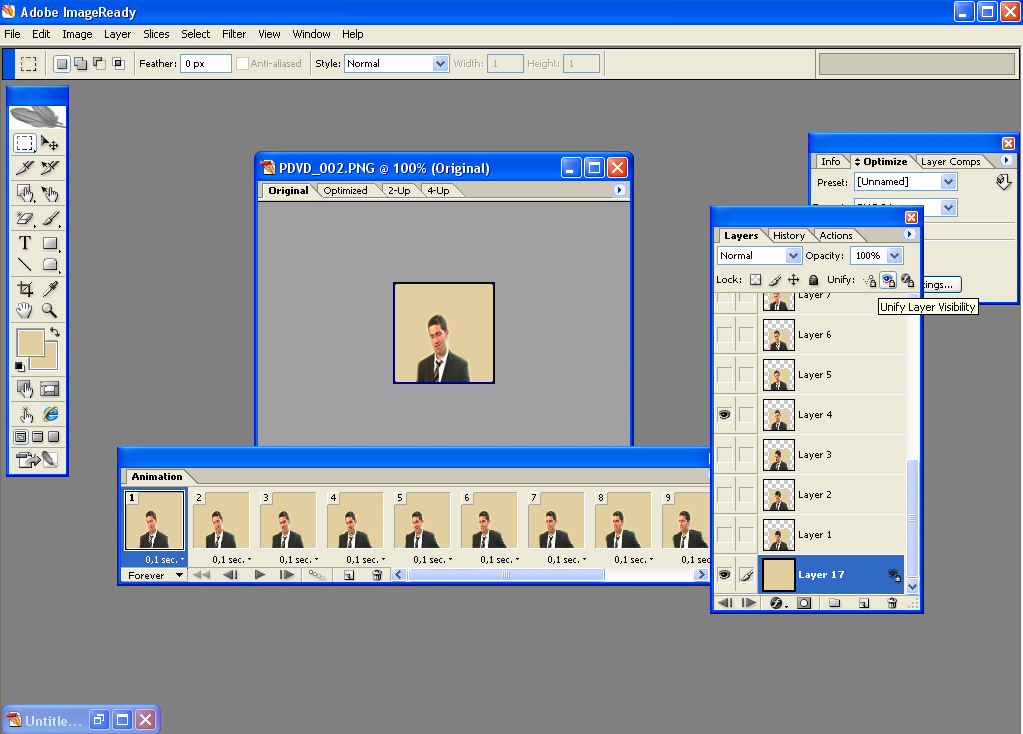
- Make a new 100 x 100 layer with the same color as the one in the background of your caps.

- Copy and past onto the top of your layers;

- Drag this layer to the bottom of all your caps; Then, click the eye on the layer pallete (Unify Layer visibility) and click "match" on the window that will pop up;


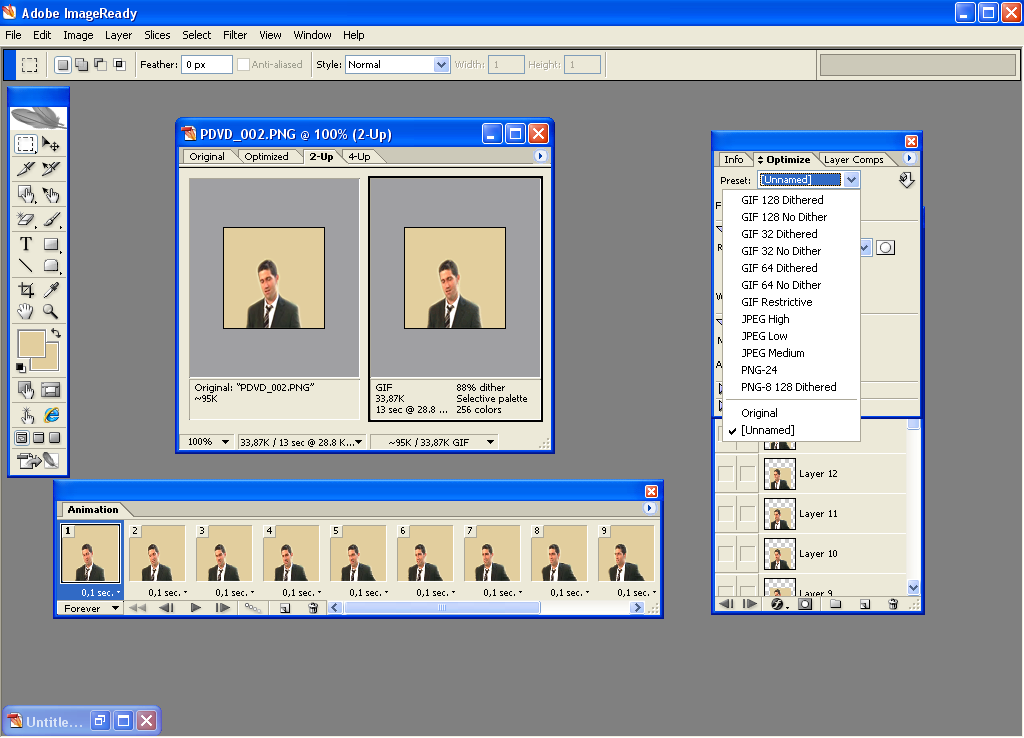
- Now, all your animation layers are supposed to have the icon on their background. Click on 2-UP.

- Play with the optimazed sizes to find the best one for you icon;

- Click "play" to see how your icon looks like with he animation;
- Go to "File", "save optimazed as..." and you are done!
Other exemples:
prettybutt
How to make:
- First, you have to make some screencaps from the scene you want to make the icon.
Here you can find a great tutorial by
anesthezea
Its pretty easy to make the screens. I use Power DVD to make mine.
*How to make animated icons (using Image Ready and Photoshop CS2)*
So, I already made my caps from the scene I want. I will be making this icon:
**Changing the background**
Before we start to animate the caps using Image Ready, we have to change the background to get this
effect.
This is kind of a hard work... Not hard really, but you will have to be patient.
- Open all the caps you are going to use to make the icon with Adobe Photoshop.
- I think my caps are too dark, so I will make a new layer #FFFFFF. Then, I am going to copy and past this layer onto ever single one of my caps and change it to "overlay". Now my caps are brighter. Flatten image.
- Now, we are going to use the PEN TOOL to FLOOD the background. You must pick a color that its similar to the original background color around the image you want to use. (You will get a better effect in the end.)
- I´m going to use #e2ce9e to Flood fill everything around the image. In my case, I will fill everything around Jack.
- Rasterize the layer.
- Filter - Grassian Blur - pixel between 3 and 6, depending of your image. I´m going to use 4px.
- Flatten image, save.
- You have to do that with every single one of your caps. This is the only way I know of doing this. If you know any other way to make this faster and not so annoyng, please share with us! *grin*.
- Now, open your caps with Image Ready.
- One by one, drag each cap over the first one. You have to keep them in order, starting with the first one, the first frame of the scene;
- Click on the Crop Tool and enter the size you want for your image. I´m going with w: 70 h: 70. Crop your image.
- Got to "Image" - "Canvas size". 100 x 100
- Open the animation window;
- In the animation window, click on "Make frames from layers";
- I think my animation is moving too fast, so I´m going to change the delay from 0 to 0,1. You have to do that in every single frame;
- Make a new 100 x 100 layer with the same color as the one in the background of your caps.
- Copy and past onto the top of your layers;

- Drag this layer to the bottom of all your caps; Then, click the eye on the layer pallete (Unify Layer visibility) and click "match" on the window that will pop up;
- Now, all your animation layers are supposed to have the icon on their background. Click on 2-UP.

- Play with the optimazed sizes to find the best one for you icon;
- Click "play" to see how your icon looks like with he animation;
- Go to "File", "save optimazed as..." and you are done!
Other exemples: