Tutorials #11 & #12
from 
to
requested by her_lovelyheart
Icon from this batch.
Created using Adobe Photoshop CS3
Note: This is a very lenghty tutorial with lots of layers. I'm sure there is an easier way to achieve this coloring but I've just lucked into this technique, so I've used the basics on a lot of my recent icons with only slight variations. I still hope this tutorial is easy enough to follow. I'm providing the psd, but I suggest you really have a look at the different steps to get something out of the various techniques and what they achieve.
All textures used are by me unless otherwise stated.
01. I took this picture and resized it to 200px width. Then hit STRG+A to select the image, STRG+C to copy and on a new 100x100 canvas hit STRG+V to paste the image as a new layer. Move the image around until you find an interesting crop.
result:
02. Go to Filter > Sharpen > Sharpen
result: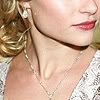
03. Next up I pasted this
texture as a new layer and set it to Linear Burn 20%
result: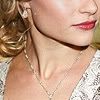
04. Paste this
(not sure if this texture is by me, I'll try to find out asap) texture and set the layer to Darken 63%
result: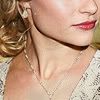
05. Paste this
gradient as a new layer and set it Linear Burn 100%
result: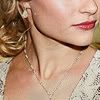
06. Paste this
texture and set the layer to Color Burn 15%
result: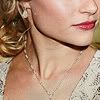
07. Go to Layer > New Adjustment Layer > Levels
settings:
Input Levels 0 1,17 241
Output Levels 0 255
result: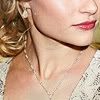
08. Paste this
texture and set the layer to Screen 11%
result: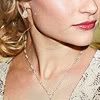
09. Paste this
gradient as a new layer and set it Screen 100%
result: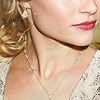
10. Go to Layer > New Adjustment Layer > Brightness/Contrast
settings:
Brightness 0
Contrast +9
result: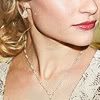
11. Paste this
gradient as a new layer and set it Lighten 33%
result: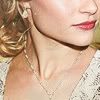
12. Go to Layer > New Adjustment Layer > Selective Colors
settings:
Reds +67 +10 -71 0
Neutrals -9 +9 0 +6
Set this layer to Normal 34%
result: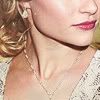
13. Paste this
texture and set the layer to Multiply 100%
result: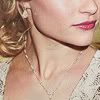
14. Go to Layer > New Adjustment Layer > Levels
settings:
Input Levels 0 1,10 250
Output Levels 0 255
Set this layer to Normal 61%
result: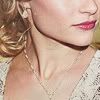
15. Paste this
texture (by spinspiderspin) and set the layer to Multiply 33%
result: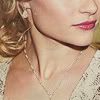
16. Go to Layer > New Adjustment Layer > Brightness/Contrast
settings:
Brightness 0
Contrast +25
result: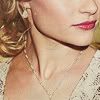
17. Go to Layer > New Adjustment Layer > Curves
settings:
RGB Point 1: 45 (Input) 42 (Output) Point 2: 174 (Input) 189 (Output)
Red 183 (Input) 182 (Output)
Green 180 (Input) 176 (Output)
Blue 168 (Input) 178 (Output)
Set this layer to Normal 30%
result: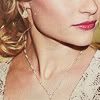
18. Go to Layer > New Adjustment Layer > Brightness/Contrast
settings:
Brightness +8
Contrast +4
result: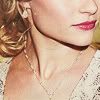
19. Go to Layer > New Adjustment Layer > Brightness/Contrast
settings:
Brightness +5
Contrast +12
result:
20. Paste this
texture and set the layer to Lighten 22%
result: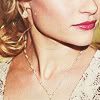
21. Paste this
texture and set the layer to Lighten 10%
Merge all layers and you're done!
finale result:
DOWNLOAD PSD
As mentioned, this is the predominant coloring I've used in my last batch. Just varying stuff here and there.
For this
icon for example, I've only duplicated the base and set this layer to screen 100% and left out the layer in step 3.
from
to
requested by yummygraphics
Icon from this batch.
Created using Adobe Photoshop CS3
Note: I only followed the steps after preparing my base. So, my base that you see here has already been cropped and the negative space has been created with the smudge tool.
All textures used are by me unless otherwise stated.
01. Duplicate the base and set it to Screen 100%
Sharpen this screen layer with Filter > Sharpen > Sharpen
result:
02. Paste this
texture (by above_blues) and set the layer to Darken 29%
result:
03. Go to Layer > New Adjustment Layer > Selective Colors
settings:
Reds +4 0 0 0
Neutrals -2 -5 -15 0
result:
04. Paste this
texture and set the layer to Multiply 100%
result:
05. Paste this
texture and set the layer to Soft Light 47%
result:
06. And now, follow steps 3-21 from Tutorial #11.
You should be getting the following icon after performing all steps.
final result:
DOWNLOAD PSD

to

requested by her_lovelyheart
Icon from this batch.
Created using Adobe Photoshop CS3
Note: This is a very lenghty tutorial with lots of layers. I'm sure there is an easier way to achieve this coloring but I've just lucked into this technique, so I've used the basics on a lot of my recent icons with only slight variations. I still hope this tutorial is easy enough to follow. I'm providing the psd, but I suggest you really have a look at the different steps to get something out of the various techniques and what they achieve.
All textures used are by me unless otherwise stated.
01. I took this picture and resized it to 200px width. Then hit STRG+A to select the image, STRG+C to copy and on a new 100x100 canvas hit STRG+V to paste the image as a new layer. Move the image around until you find an interesting crop.
result:

02. Go to Filter > Sharpen > Sharpen
result:

03. Next up I pasted this

texture as a new layer and set it to Linear Burn 20%
result:

04. Paste this

(not sure if this texture is by me, I'll try to find out asap) texture and set the layer to Darken 63%
result:

05. Paste this

gradient as a new layer and set it Linear Burn 100%
result:

06. Paste this

texture and set the layer to Color Burn 15%
result:

07. Go to Layer > New Adjustment Layer > Levels
settings:
Input Levels 0 1,17 241
Output Levels 0 255
result:

08. Paste this

texture and set the layer to Screen 11%
result:

09. Paste this

gradient as a new layer and set it Screen 100%
result:

10. Go to Layer > New Adjustment Layer > Brightness/Contrast
settings:
Brightness 0
Contrast +9
result:

11. Paste this

gradient as a new layer and set it Lighten 33%
result:

12. Go to Layer > New Adjustment Layer > Selective Colors
settings:
Reds +67 +10 -71 0
Neutrals -9 +9 0 +6
Set this layer to Normal 34%
result:

13. Paste this

texture and set the layer to Multiply 100%
result:

14. Go to Layer > New Adjustment Layer > Levels
settings:
Input Levels 0 1,10 250
Output Levels 0 255
Set this layer to Normal 61%
result:

15. Paste this

texture (by spinspiderspin) and set the layer to Multiply 33%
result:

16. Go to Layer > New Adjustment Layer > Brightness/Contrast
settings:
Brightness 0
Contrast +25
result:

17. Go to Layer > New Adjustment Layer > Curves
settings:
RGB Point 1: 45 (Input) 42 (Output) Point 2: 174 (Input) 189 (Output)
Red 183 (Input) 182 (Output)
Green 180 (Input) 176 (Output)
Blue 168 (Input) 178 (Output)
Set this layer to Normal 30%
result:

18. Go to Layer > New Adjustment Layer > Brightness/Contrast
settings:
Brightness +8
Contrast +4
result:

19. Go to Layer > New Adjustment Layer > Brightness/Contrast
settings:
Brightness +5
Contrast +12
result:

20. Paste this

texture and set the layer to Lighten 22%
result:

21. Paste this

texture and set the layer to Lighten 10%
Merge all layers and you're done!
finale result:

DOWNLOAD PSD
As mentioned, this is the predominant coloring I've used in my last batch. Just varying stuff here and there.
For this

icon for example, I've only duplicated the base and set this layer to screen 100% and left out the layer in step 3.
from

to

requested by yummygraphics
Icon from this batch.
Created using Adobe Photoshop CS3
Note: I only followed the steps after preparing my base. So, my base that you see here has already been cropped and the negative space has been created with the smudge tool.
All textures used are by me unless otherwise stated.
01. Duplicate the base and set it to Screen 100%
Sharpen this screen layer with Filter > Sharpen > Sharpen
result:

02. Paste this

texture (by above_blues) and set the layer to Darken 29%
result:

03. Go to Layer > New Adjustment Layer > Selective Colors
settings:
Reds +4 0 0 0
Neutrals -2 -5 -15 0
result:

04. Paste this

texture and set the layer to Multiply 100%
result:

05. Paste this

texture and set the layer to Soft Light 47%
result:

06. And now, follow steps 3-21 from Tutorial #11.
You should be getting the following icon after performing all steps.
final result:

DOWNLOAD PSD