COLOR BY NUMBER
Tutorial: Coloring a Black and White Picture
From: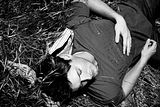
To: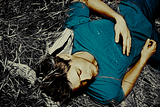
Hopefully I'll do something right after offending people with two of my icons.
Again I apologize.
Here's the tutorial.
I have Photoshop CS and this tutorial may or may not apply to the Photoshop you have.
I made visuals for those who are visual learners. Since I definitely am.
What you'll need:
+ A black and white picture
+ Use of the rectangle tool
+ Use of the eraser
This is my first tutorial so if it's confusing I'm sorry, people tell me I confuse them a lot, so if you have further questions feel free to ask.
NOTE: Ignore the other layers that aren't in use or are not highlighted. This tutorial was made from my saved .psd of the colorations and I might need it for further use so I didn't delete the other layers.
For the visuals click the thumbnails to enlarge.
1. Get a black and white image. Or you can take a colored image and make it black and white so you can color it the way you'd like.
2. Crop the image to your liking or in my case I like to start out with the size then copy + paste the image.
-So for me I took the black and white Mueller Photoshoot of Jensen pic and everything looked like this:
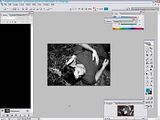
3. Then I chose a color for the shirt.
0
140
180
4. Using the rectangle tool which is darkend on the tools bar if you don't know what I mean I created a new layer.
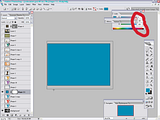
5. I rasterized this layer and set it to overlay then used the eraser to erase everything that wasn't the t-shirt.
I set it to overlay first before erasing because it's easier to see what is what.
And I got this:
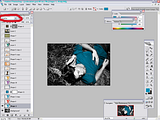
6. Next I chose a color for the jeans.
0
96
162
7. Then I created a new layer via the rectangle too again.
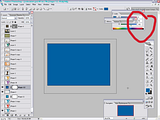
8. Rasterized that shape. Used the eraser tool for what wasn't jeans.
And got this:
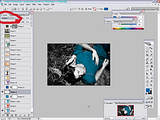
9. Then I chose a color for Jensen's skin. What I actually did was take another picture of him that was in color as you can see which was my layer 1. Used the eyedropper for the color.
231
171
117
10. Then I again made the rectangle color layer.
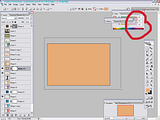
11. I set it to color burn this time because as overlay it looked "unskinly." Of course you don't have to use overlay or color burn you can experiment with other blending types.
But again I erased all that wasn't his skin and got this:
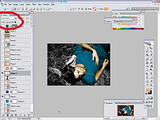
12. For the hair I used the same color. Made another rectangle color layer. Rasterized the layer and set it to overlay. And erased what wasn't his hair.
And got this:
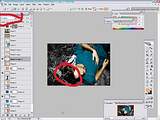
13. Then for the vintage hay look I chose another color.
153
153
102
And made a rectangle color layer.
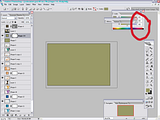
14. No erasing here. I set it to Darken and lowered the opacity to 49%
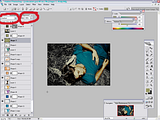
And here is the end result:
*Warning: depending on the image this can be rather tedious. It was for me trying to figure out what was hair and what was hay.
*NOTES: I recommend experimenting with other blending modes (color burn, color dodge, screen, overlay, lighten, darken, etc.) Depending on what mode it can definitely change how you "color" the picture.
I would also recommend making the color layer of a rectangle only as large as the object you're coloring, like only as big as the t-shirt, jeans, or body. In the visuals I made it as large as the picture because I got lazy to resize it... yeah. I'm lazy. Really. Lazy.
Have fun coloring.
From:

To:

Hopefully I'll do something right after offending people with two of my icons.
Again I apologize.
Here's the tutorial.
I have Photoshop CS and this tutorial may or may not apply to the Photoshop you have.
I made visuals for those who are visual learners. Since I definitely am.
What you'll need:
+ A black and white picture
+ Use of the rectangle tool
+ Use of the eraser
This is my first tutorial so if it's confusing I'm sorry, people tell me I confuse them a lot, so if you have further questions feel free to ask.
NOTE: Ignore the other layers that aren't in use or are not highlighted. This tutorial was made from my saved .psd of the colorations and I might need it for further use so I didn't delete the other layers.
For the visuals click the thumbnails to enlarge.
1. Get a black and white image. Or you can take a colored image and make it black and white so you can color it the way you'd like.
2. Crop the image to your liking or in my case I like to start out with the size then copy + paste the image.
-So for me I took the black and white Mueller Photoshoot of Jensen pic and everything looked like this:

3. Then I chose a color for the shirt.
0
140
180
4. Using the rectangle tool which is darkend on the tools bar if you don't know what I mean I created a new layer.

5. I rasterized this layer and set it to overlay then used the eraser to erase everything that wasn't the t-shirt.
I set it to overlay first before erasing because it's easier to see what is what.
And I got this:

6. Next I chose a color for the jeans.
0
96
162
7. Then I created a new layer via the rectangle too again.

8. Rasterized that shape. Used the eraser tool for what wasn't jeans.
And got this:

9. Then I chose a color for Jensen's skin. What I actually did was take another picture of him that was in color as you can see which was my layer 1. Used the eyedropper for the color.
231
171
117
10. Then I again made the rectangle color layer.

11. I set it to color burn this time because as overlay it looked "unskinly." Of course you don't have to use overlay or color burn you can experiment with other blending types.
But again I erased all that wasn't his skin and got this:

12. For the hair I used the same color. Made another rectangle color layer. Rasterized the layer and set it to overlay. And erased what wasn't his hair.
And got this:

13. Then for the vintage hay look I chose another color.
153
153
102
And made a rectangle color layer.

14. No erasing here. I set it to Darken and lowered the opacity to 49%
And here is the end result:

*Warning: depending on the image this can be rather tedious. It was for me trying to figure out what was hair and what was hay.
*NOTES: I recommend experimenting with other blending modes (color burn, color dodge, screen, overlay, lighten, darken, etc.) Depending on what mode it can definitely change how you "color" the picture.
I would also recommend making the color layer of a rectangle only as large as the object you're coloring, like only as big as the t-shirt, jeans, or body. In the visuals I made it as large as the picture because I got lazy to resize it... yeah. I'm lazy. Really. Lazy.
Have fun coloring.