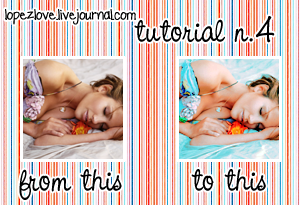
Tutorial n.4 + .PSD

For this tutorial I used Photoshop 7
#1: Choose your base, crop it and Auto Levels (Shft+Ctrl+L)
#2: Duplicate your base and set it to Screen 37%
#3: Create a new Fill Layer #8FB8BE - Set it to Soft Light 100%
#4: Create a new Selective Color layer
- Reds -100/0/+100/0
- Yellows -100/0/-100/0
- Greens +100/-100/-100/+100
- Cyans +100/-100/-100/+100
- Blue +100/-100/-100/+100
- Whites +100/-15/-40/0
- Neutrals 0/-8/+6/-5
#5: Create a new Selective Color layer
- Reds: -35/0/0/0
- Yellows -100/0/-12/0
- Cyans +100/-100/-100/+100
- Blue +100/-100/-100/+100
- Whites -9/0/0/0
#6: Create a new Hue/Saturation layer
Saturation
Master: +10
Yellows: +10
#7: Create a new Fill Layer #01130E - Set it to Exclusion 100%
#8: Duplicate your base, set it to the top, Pin Light 100%
DONE!! I'd love to see you results
Feel free to ask any questions.
*Icons made using this tut (or deleting/editing some layers)*


** Results could be different, it depends on the base of your icon ;
Play with settings =P