Icon Tutorial #02
This is an incredibly easy icon to make, so it will be a short tutorial (which is all I have time for I'm afraid). I'll try to make some more soon because I really enjoy doing it!
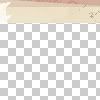
This is what we will be making:

>
01. First of all, I sharpen the image, just once. Filter > Sharpen > Sharpen.
>
02. Then I duplicate the layer and set the second one to Screen. It looks too bright so I lower the Fill to 20%. I desaturate the layer completely. Image > Adjustements > Desaturate.
>
03. I duplicate the desaturated layer and set this third copy to Soft Light.
>
04. Now it's time for a texture. For this icon I've chosen one of TRE's beautiful textures. I copy it on top of all the previous layers and set it to Multiply.

>
05. I create a new layer on top of all the others now. CTRL + ALT + SHIFT + E to merge all previous layers into this one. (see image on step 8 of my previous tut if you're having problems with this step). I set the resulting layer to Soft Light.
>
06. I want to add some text now, but it would be hard to read with the current background. I need something smoother so I open again a texture by TRE. It's not an icon texture, so I just cut the part I want and paste it on a new layer on top of all the others like so:
>
07. Finally, I just add the text Feisty Veela. I used Palatino Lynotipe size 6.
>
And that's it, as simple as that. If you have any questions about it, just comment and I'll try to help you as best as I can.
This is what we will be making:
>
01. First of all, I sharpen the image, just once. Filter > Sharpen > Sharpen.
>
02. Then I duplicate the layer and set the second one to Screen. It looks too bright so I lower the Fill to 20%. I desaturate the layer completely. Image > Adjustements > Desaturate.
>
03. I duplicate the desaturated layer and set this third copy to Soft Light.
>
04. Now it's time for a texture. For this icon I've chosen one of TRE's beautiful textures. I copy it on top of all the previous layers and set it to Multiply.
>
05. I create a new layer on top of all the others now. CTRL + ALT + SHIFT + E to merge all previous layers into this one. (see image on step 8 of my previous tut if you're having problems with this step). I set the resulting layer to Soft Light.
>
06. I want to add some text now, but it would be hard to read with the current background. I need something smoother so I open again a texture by TRE. It's not an icon texture, so I just cut the part I want and paste it on a new layer on top of all the others like so:
>
07. Finally, I just add the text Feisty Veela. I used Palatino Lynotipe size 6.
>
And that's it, as simple as that. If you have any questions about it, just comment and I'll try to help you as best as I can.