Tutorial 1: Misa
Level: Medium-Hard, involves Curves and the pen tool
Program: Photoshop CS2, but translatable
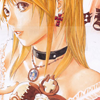
Make
from this.
This is a reproduction, but it seems very close. And please remember, the results will vary with different pictures! Play around with the settings until you get what you like!

First, crop your base to 100x100. Use Auto Levels and Auto Contrast, or any other needed color correction, and sharpen if needed.

Now, duplicate your base layer. Set the first to Overlay 100%. (Yes, I know. It may or may not be disgustingly bright.) Now, if it IS disgustingly bright, duplicate the base again, drag it to the top, and set it to Multiply. Play with the opacity until you get something you like. (I used 69%.)

Make a new layer and flood-fill it with a dark blue color. I used #030821. Set this layer to Exclusion 100%.

Make a new layer and flood-fill it with a light pink color. (Not TOO pale, though.) I used #ffa0ea. Set this layer to Soft Light 100%.

Go to Layer>New Adjustment Layer>Curves. Make a layer with these settings: (Input, Output) RGB: (92, 56) (195, 197) Blue: (87, 59) (219, 229)

Go to Layer>New Adjustment Layer>Color Balance. Make a layer with these settings: Midtones: (+11 -15 -39) Shadows: (+19 -21 +22) Highlights: (+11 +8 +5). And with that, the coloring part is done!

Now, go to the shapes tool and select the rounded rectangle. Near the bottom and to one side of your icon, draw in a background for your text in a dark color taken from your icon. (I used #460d39.)

Now, add text. For me:
"angel of": font Harrington, size 12, #ffd1d0
"death": font LainieDaySH, size 18, #ffd1d0

First, make a stroke of 2px around your icon. Now, using the pen tool, click at each corner, and connect the points into a square. (It helps to zoom in.) Go to your Brush tool, and select the Hard 1px brush under Basic Brushes. Then look up to the top-right corner of your screen and find the brushes palette. Go to Brush Tip Shape. Under Spacing, set it between 300-400%. (I used 308%.) Go back to the pen tool, right-click your image, and select stroke path. On the window that comes up, select Brush and click OK. Right-click again, and select Delete Path. (Note: It really is easier to use a brush, but I figured I'd give you the long way around.) And, you're done!
Join/watch lanciare for future updates!
Program: Photoshop CS2, but translatable
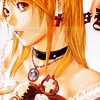
Make

from this.
This is a reproduction, but it seems very close. And please remember, the results will vary with different pictures! Play around with the settings until you get what you like!

First, crop your base to 100x100. Use Auto Levels and Auto Contrast, or any other needed color correction, and sharpen if needed.

Now, duplicate your base layer. Set the first to Overlay 100%. (Yes, I know. It may or may not be disgustingly bright.) Now, if it IS disgustingly bright, duplicate the base again, drag it to the top, and set it to Multiply. Play with the opacity until you get something you like. (I used 69%.)

Make a new layer and flood-fill it with a dark blue color. I used #030821. Set this layer to Exclusion 100%.

Make a new layer and flood-fill it with a light pink color. (Not TOO pale, though.) I used #ffa0ea. Set this layer to Soft Light 100%.

Go to Layer>New Adjustment Layer>Curves. Make a layer with these settings: (Input, Output) RGB: (92, 56) (195, 197) Blue: (87, 59) (219, 229)

Go to Layer>New Adjustment Layer>Color Balance. Make a layer with these settings: Midtones: (+11 -15 -39) Shadows: (+19 -21 +22) Highlights: (+11 +8 +5). And with that, the coloring part is done!

Now, go to the shapes tool and select the rounded rectangle. Near the bottom and to one side of your icon, draw in a background for your text in a dark color taken from your icon. (I used #460d39.)

Now, add text. For me:
"angel of": font Harrington, size 12, #ffd1d0
"death": font LainieDaySH, size 18, #ffd1d0

First, make a stroke of 2px around your icon. Now, using the pen tool, click at each corner, and connect the points into a square. (It helps to zoom in.) Go to your Brush tool, and select the Hard 1px brush under Basic Brushes. Then look up to the top-right corner of your screen and find the brushes palette. Go to Brush Tip Shape. Under Spacing, set it between 300-400%. (I used 308%.) Go back to the pen tool, right-click your image, and select stroke path. On the window that comes up, select Brush and click OK. Right-click again, and select Delete Path. (Note: It really is easier to use a brush, but I figured I'd give you the long way around.) And, you're done!
Join/watch lanciare for future updates!