Tutorial #2
Requested by chrissycakes_xx. Cross-posted at elementheads & icon_tutorial.
Made in Photoshop Elements 4.0
Go from
to
1. I took this cap, sharpened it twice and cropped it to 100 x 100. The icon was still a little blurry, so I sharpened it once more.

2. Duplicate base and set to Screen 100%.
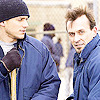
3. Create a new layer - #CCCCCC set to Color Burn 100%.

4. Create a new layer - #001C3A set to Exclusion 100%.

5. Create a new layer - #FDF4DB set to Multiply 40%.

6. Duplicate Base. Drag layer to top, set to Overlay 100% and desaturate it.

7. Flatten image.
8. Go to Enhance -> Adjust Color -> Color Variations. Under Midtones, increase Red once.
9. Duplicate base and erase the background behind the two men. It's subtle, but it'll make them stand out more and the people in the background more blurred.
10. Flatten image and you're done.

I created these the same way, but added a border.

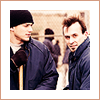
Re-size the icon to 80 x 80 and drag into a new 100 x 100 layer. Flatten image. Pick a colour from the icon using the eyedropper tool, and add a 1px stroke outline.
Made in Photoshop Elements 4.0
Go from

to

1. I took this cap, sharpened it twice and cropped it to 100 x 100. The icon was still a little blurry, so I sharpened it once more.

2. Duplicate base and set to Screen 100%.

3. Create a new layer - #CCCCCC set to Color Burn 100%.

4. Create a new layer - #001C3A set to Exclusion 100%.

5. Create a new layer - #FDF4DB set to Multiply 40%.

6. Duplicate Base. Drag layer to top, set to Overlay 100% and desaturate it.

7. Flatten image.
8. Go to Enhance -> Adjust Color -> Color Variations. Under Midtones, increase Red once.
9. Duplicate base and erase the background behind the two men. It's subtle, but it'll make them stand out more and the people in the background more blurred.
10. Flatten image and you're done.

I created these the same way, but added a border.


Re-size the icon to 80 x 80 and drag into a new 100 x 100 layer. Flatten image. Pick a colour from the icon using the eyedropper tool, and add a 1px stroke outline.