Data Recovery: A Tin Man-themed tutorial
I don't know what I'm doing posting this, but it's done, so it might as well go out into the world. Hopefully both useful and amusing. Here you go:

HARD DRIVE TRAGEDIES: ALL YOUR STUFF IS NOW GONE.
What to do when you suddenly realize you have a LOT more free space now on your PC’s hard drive than you did a minute ago.
A Tin Man-themed tutorial.
This sh*t has happened to my Gateway laptop twice in less than a year, so I’m particularly bitter about it. I know simple data recovery isn’t rocket science and there are guides and tutorials aplenty (way better than this one, too), but I needed to get this out of my system and I’m obsessed with Tin Man, so this is the result. I think a newbie might find it useful, for example all of my IRL friends, who aren’t quite sure what the hell is a hard drive (though ironically I won’t be explaining that here).
This tutorial only applies if the damage is logical, not physical. Alas, if the damage is physical, that is, if your drive made funny clicking noises/got wet/hit/dropped/burnt/eaten and regurgitated by Papay and now appears to be dead, you are kind of screwed and you may have to take it to the experts. Clicking is a hard drive’s death throes. It means it’s only a matter of time before it joins its noble ancestors.
There are questionable tricks, such as freezing the drive to get it running again long enough to get your stuff out ASAP before it really bites it, but this zombiefication of the hard drive is risky and I’ve already got enough of a guilt complex, so I won’t delve into those methods here (if you’re interested go google it). However, if your drive just suddenly wiped out all your files and some programs but went otherwise on its merry way, like mine did, you’re in luck (you can do this if the partition is lost or if the drive has been formatted, too).
DISCLAIMER: If you somehow manage to f-up your drive while doing this I won’t be held responsible! You should read the whole thing first plus a few more tutorials aside from this one before doing anything in order to get a good idea of how to do this stuff right, in case you’ve never done it before.
Oh, and spoilers for SyFy’s Tin Man, if you haven’t seen it. I won’t be blamed for that, either!
1. THE FIRST STEP.

Woe and despair, your hard drive glitched, and it glitched hard. You are horrified. Everything’s gone. GONE! Your IRL work (school or otherwise), your fic, your fanart, your Sunseeder schematics and of course that secret folder containing all your pr0n that you wouldn’t want anyone to see. Worst of all, there’s no backup. In the words of the immortal Hitchhiker’s Guide to the Galaxy:
DON’T PANIC.
Most of your stuff is still there, you just can’t see it. The first thing you need to do is to avoid saving anything else to the hard drive. If you had some documents open at the time disaster struck and your computer is still running (it's just your user folders that are all empty), chances are your docs stayed open. This is your chance to save them, but whatever you do, do not save them to the hard drive. Save them to a flash drive instead. If you were on the Internets and had lots of tabs open, save the session to the flash drive, or take pictures. Anything new that gets saved to your hard disk drive at this point may and will overwrite the now invisible documents that appear to be gone, and then you really might lose them forever. Even web browsing adds useless files to the cache. Just stop using your comp altogether.
Save whatever stuff you had open to your flash drive (if it’s really important), turn off the computer, unplug it and take out the battery (if it’s a laptop).
2. WHAT YOU WILL NEED:
3. GETTING YOUR HANDS DIRTY.
Once you have all the stuff you need at hand, the fun begins. So you really needed the plans to the Sunseeder and your comp made them go bye bye. Bummer, right?
Never fear: We’ll just reach in and take them ourselves!
Yes, I’m afraid it’s time to remove the hard drive.

Some people are afraid to take a screwdriver to such a delicate piece of equipment. I recommend you just channel your inner Raynz and get it over with.
The computer may beg for mercy and claim many times over that removing the brain hard drive won’t work. Do not listen to it. It will work! Also, if the computer does talk at this point, consider taking medication.
Now, it is very important that before touching the hard drive with your grubby hands you make sure all static charges are drained to the ground. A little bit of static electricity might accidentally fry your drive. This is where the anti-static wristband comes into play. Personally I use an LCD static discharger.
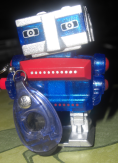
Random robot models the discharger for us.
If you don’t have either one, you just have to ground yourself by keeping one hand in contact with a grounded metal thing (PC frames work fine). Just make sure you’re grounded so you don’t kill your drive. And don’t drop it, push on the top cover or attempt to remove any of the stickers, either! Slide it out and treat it gently as if it were an actual brain.
If you don’t know where your hard drive is, just google your computer model. You might even find a tutorial to extract the drive. In most laptops it can be accessed from the bottom. It will be rectangle-shaped and about the length of a CD case but not as wide. Sometimes it will even have a few ridges on the cover so you’ll be able to slide it out easily after you’ve unscrewed it.
Oh, and make sure to store those little screws in a safe place. You’ll need them once you’re done. It’s important to remember where every one of them went in order to avoid screwing up when it’s time for your computer to get its marbles back.
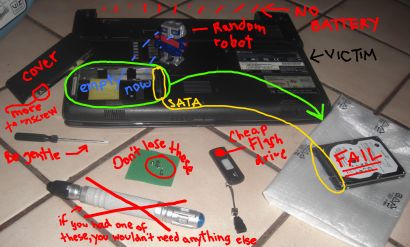
IRL
4. GETTING READY TO DIVE IN.

Now that the damn thing is out, we need to plug it to the second computer. If you haven’t yet installed the recovery software on the second comp, now’s your chance.
I bought the goddamn $20 cable and wasted like a week trying to get it to work. After only a couple of hours it was already giving me a million read errors. I feared the drive had really bought the farm this time.
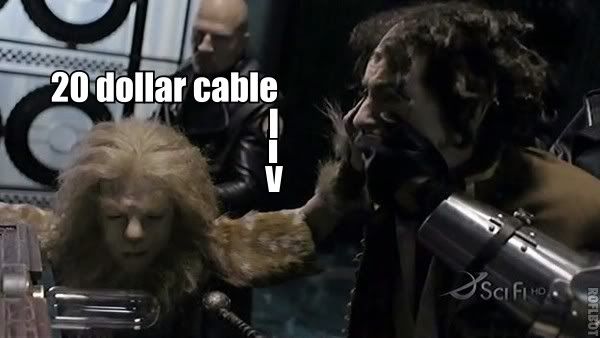
So I went to Best Buy and spent big bucks on a hard drive docking station. This is what I used the last time I had this problem and it worked like a charm; no errors whatsoever. If you can’t borrow the cable or dock, I recommend getting it on eBay for cheap, if you can manage the wait. I also went to STEREN but they only had IDE adapters. Just make sure whatever you get is compatible with your type of drive (mine is a 2.5”SATA drive).
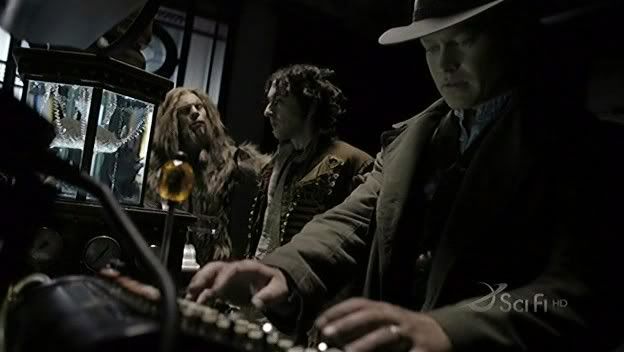
Awesome docking station
We should now have the USB end connected to the second computer, and our faily drive plugged to the SATA (or IDE, or whatever) end. The cable/docking station needs power too in order to run the drive so make sure you get all the connections right.
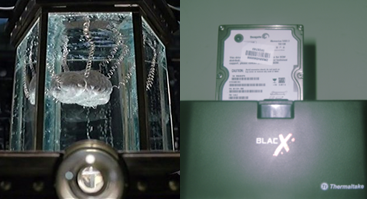
Powered by alchemy
Depending on what you’re using (cable or dock) you might need to turn the device on or just plug it into a socket. We’re assuming your borrowed computer is already on.
5. DIGGING UP THOSE TERRIBLE SEKRITS.
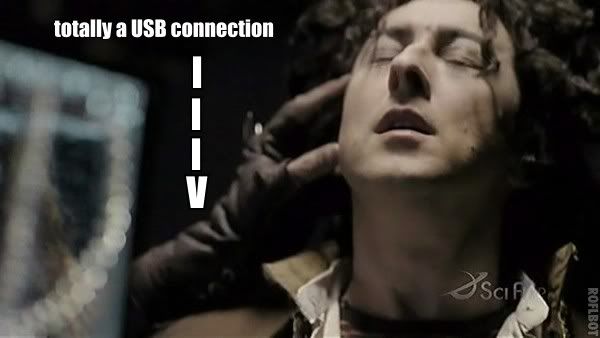
Fire up the software, let it detect all drives and then select your partition. It should be easy to recognize because of the size in GBs and the fact that the drive is plugged via USB and will tell you so (newbies: it’s usually C:\). If the partition has vanished without a trace, choose the device, full scan. This whole recovery procedure is read-only so it won’t cause any further damage to your files. I’m a bad-news-first kind of person so I like going for the deep scan first (if you do this you’ll have to choose the file types more relevant to your search). If you’re more practical, though, the advanced scan will definitely find things the deep scan didn’t, and the results are way easier to handle, so don’t forget to try that too (and viceversa).

Advanced scan
This might take anywhere from a few hours to a couple of days, depending on the efficiency of your minions USB speed and the size of your drive. I’m using an ancient desktop computer so it takes a couple of days to scan my 160 GB drive. Save the results once you’re done, that way you won’t have to scan each time, you can just load the scan results and start digging around the sad remains of your files.
I warn you, if you use the deep scan, some of the stuff you find might be ugly. I’ve found some strange pr0n this way, and I’m the only person who uses my computer. This happens because even though it’s not my pr0n the scan will recover a lot of the useless cache, even if you deleted it (yes, this is a great way to find very deleted files, too). I’m not saying your deadish drive is gonna goatse you from beyond the grave, or that you’re magically gonna find a German schizer video collection (unless you willfully put it there), but if you browse Encyclopedia Dramatica or places with similar advertising you can definitely expect some unexpected nudity. Some of it will be hot. Some of it… won’t.
Have some brain-bleach at the ready
6. “WTF is it?” “I don’t know but it sounds cool.”
One of the most irksome things you’ll have to deal with once the deep scan is finished is the fact that all your files are now renamed something like “Recovered_X_file_(13453).x” where X is the file extension (sorry to disappoint, X-files fans). It’s a nightmare. They have no dates, either, so you’ll just have to save them to some folder in the good hard drive (the one on the second computer) and go through each of them to find out what they are, because they sure as hell won’t tell you.

Facepalming: You'll be practicing this move a lot.
This is another reason to choose the advanced scan first: Everything will keep its name and date and you’ll find it in the right folder. BTW, just as a precaution, in case you’re recovering to someone else’s computer you should make sure your buddy who let you borrow it: a) Won’t make fun of your German Schizer videos, or b) Is not a nosy bitch.

Power Data Recovery will let you preview some files before you save them, but it only previews documents and pics, and only if the files are under a certain size. For the rest it looks like this:
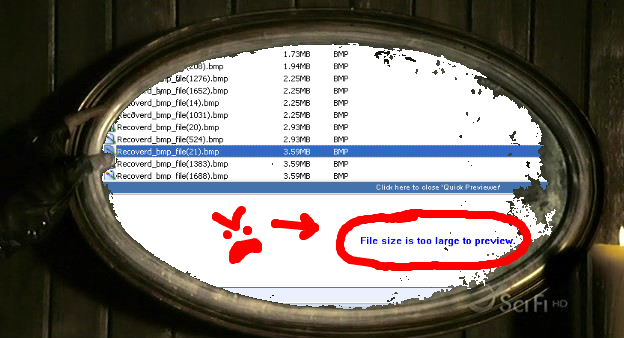
FAIL
I just save all of it and delete whatever I don’t need later. Once it’s all safely stored in the good drive, sort the saved files by size or dimensions (if you’re perusing the nameless deep scan results) and delete the ones too tiny to be anything important (preview a couple of them first to make sure they’re really unimportant). PDR has a filter feature that might help. Be warned: this will still be a hugetastic but necessary waste of time.
Much like this tutorial, I suspect.
Another terrible thing after you finish scanning (deep or advanced scan) is the fact that some files will be there, but damaged. Priceless documents, images and video might have suffered this unhappy fate. You’ll be like OMG, that’s it!

And then the goddamn thing will tell you that it can’t f*cking access the file.

There are programs that specialize in opening damaged documents, such as this one, so there’s still a bit of hope. Be prepared, though. While most of your stuff will still be there, some of it might really be gone forever.

There, there.
7. IN CONCLUSION.
So that’s it. Sometimes you won’t find exactly what you were looking for, but sometimes you will!

Happiest pic of Az I could find.
If you didn’t find it following this procedure, but it’s really important for you to recover that info and you don’t mind other people going through all that pr0n embarrassing fandom stuff, then you might consider taking the brain drive to an expert. Another option is to try different software. Like I said, some of them are completely free, and the rest will usually let you scan and preview the recovered files for free as well (but you’ll have to buy to actually save them), so it’s worth a try.
If we were actually a wicked Sorceress and your laptop were a brilliant scientist who refused to give you the schematics for a potential doomsday device, then you would be done by now and you could go have tea and biscuits with yourself on your evil balcony. But since we love our brainless genius, AKA our laptop, we have to put its marbles back in so we can have a happy ending.
SyFy calls this an ending.
Just unzip the skull safely disconnect your faily drive and follow the same instructions for taking it out as before but in reverse (remember to ground yourself before touching it, make sure the battery is out before putting the drive back in, screw it back in place gently, etc.). If all goes well this time it will not make any empty threats. When you turn it on again (assuming it was running okay even after it glitched) some of your programs might be damaged because they’ll be missing crucial files (or they’ll be gone altogether), so I suggest reformatting and starting fresh as a powdered baby’s behind.

Only pic of bandaged Alan Ambrose on the Internets (maybe).
Fact: Just like some people in the Tin Man fandom think the brain is too damaged to be put back in, a lot of tech-savvy people recommend that you stop using that POS hard drive that crapped out on you and just get a new one.

CAIN SAYS GET A NEW ONE
I didn’t listen to this advice and nine months later I lost all my stuff again (most of it is now back, though!). I know this sounds like a tragic Glitch rebraining fic in the making, but the fact is I had no reason to suspect the damage could be physical, so I continued using it without even reformatting (I had a lot of customizations I didn’t want to bother doing again). Both times my HDD has failed, it only has a little over 2 GBs free of hard disk space left and starts complaining about it through annoying little messages. Then out of the blue it just decides it knows too f*cking much and can’t handle it, so it wipes itself blissfully clean before I even get the chance to make some space, which really sucks. See? Total Glitch tragedy.
Well, I hope this tutorial might be useful to someone out there who manages to stumble upon it, and at least somewhat entertaining to Tin Man fans. Advice, comments and criticisms are welcome but not really expected (and yes, I’m aware it’s the CPU that should be the brain, shush). I’m just a layperson, so you should really get advice from several sources before attempting to mess with your computer. Eventually I might do a tutorial about cloning your old hard drive to a shiny new one using a free tool in order to migrate your OS, but only if I can figure out how to relate it to Tin Man. XD
Credits: Most Tin Man screencaps courtesy of tiny_prayers
Warning: Pic heavy; might kill dial-up. If you didn't catch this before the cut, then it's already too late.

HARD DRIVE TRAGEDIES: ALL YOUR STUFF IS NOW GONE.
What to do when you suddenly realize you have a LOT more free space now on your PC’s hard drive than you did a minute ago.
A Tin Man-themed tutorial.
This sh*t has happened to my Gateway laptop twice in less than a year, so I’m particularly bitter about it. I know simple data recovery isn’t rocket science and there are guides and tutorials aplenty (way better than this one, too), but I needed to get this out of my system and I’m obsessed with Tin Man, so this is the result. I think a newbie might find it useful, for example all of my IRL friends, who aren’t quite sure what the hell is a hard drive (though ironically I won’t be explaining that here).
This tutorial only applies if the damage is logical, not physical. Alas, if the damage is physical, that is, if your drive made funny clicking noises/got wet/hit/dropped/burnt/eaten and regurgitated by Papay and now appears to be dead, you are kind of screwed and you may have to take it to the experts. Clicking is a hard drive’s death throes. It means it’s only a matter of time before it joins its noble ancestors.

There are questionable tricks, such as freezing the drive to get it running again long enough to get your stuff out ASAP before it really bites it, but this zombiefication of the hard drive is risky and I’ve already got enough of a guilt complex, so I won’t delve into those methods here (if you’re interested go google it). However, if your drive just suddenly wiped out all your files and some programs but went otherwise on its merry way, like mine did, you’re in luck (you can do this if the partition is lost or if the drive has been formatted, too).
DISCLAIMER: If you somehow manage to f-up your drive while doing this I won’t be held responsible! You should read the whole thing first plus a few more tutorials aside from this one before doing anything in order to get a good idea of how to do this stuff right, in case you’ve never done it before.
Oh, and spoilers for SyFy’s Tin Man, if you haven’t seen it. I won’t be blamed for that, either!
1. THE FIRST STEP.

Woe and despair, your hard drive glitched, and it glitched hard. You are horrified. Everything’s gone. GONE! Your IRL work (school or otherwise), your fic, your fanart, your Sunseeder schematics and of course that secret folder containing all your pr0n that you wouldn’t want anyone to see. Worst of all, there’s no backup. In the words of the immortal Hitchhiker’s Guide to the Galaxy:
DON’T PANIC.
Most of your stuff is still there, you just can’t see it. The first thing you need to do is to avoid saving anything else to the hard drive. If you had some documents open at the time disaster struck and your computer is still running (it's just your user folders that are all empty), chances are your docs stayed open. This is your chance to save them, but whatever you do, do not save them to the hard drive. Save them to a flash drive instead. If you were on the Internets and had lots of tabs open, save the session to the flash drive, or take pictures. Anything new that gets saved to your hard disk drive at this point may and will overwrite the now invisible documents that appear to be gone, and then you really might lose them forever. Even web browsing adds useless files to the cache. Just stop using your comp altogether.
Save whatever stuff you had open to your flash drive (if it’s really important), turn off the computer, unplug it and take out the battery (if it’s a laptop).
2. WHAT YOU WILL NEED:
- A sonic screwdriver.
- An anti-static wristband or an LCD static discharger (not essential but useful).
- A decent USB to SATA (or IDE, just check this guide here to determine the type of interface of your faily drive and where it is) cable or docking station. These are usually $20 to $60. Borrow it if you can. You could also connect the drive to the motherboard, but USB is simpler if you’re new to all this.
- Good data recovery software (to be installed on a second computer). I’ll be using Power Data Recovery. You can find one that suits your needs online. Here’s a top ten list of shareware to get you started. Here’s a top ten list of freeware, too. A lot of recovery software has a trial period and lets you scan and preview your files, but you can’t save them unless you buy it (it can go from about $50 to over $100). If you’re on a budget you can just use the free ones.
- Another computer with enough free hard disk space to save your stuff (this is where you’ll be installing the recovery software). You’re gonna need a really good friend to help you with this if you don’t own two computers. The scan may take hours and even days, so the borrowed computer has to stay put during that time. It can be used to do other stuff while the scan continues in the background, but it has to stay put because the less you move your faily drive around the better. Some software (not PDR) will let you save the scan progress and continue it later, so if you don’t mind you can do it in several sessions.
3. GETTING YOUR HANDS DIRTY.
Once you have all the stuff you need at hand, the fun begins. So you really needed the plans to the Sunseeder and your comp made them go bye bye. Bummer, right?
Never fear: We’ll just reach in and take them ourselves!
Yes, I’m afraid it’s time to remove the hard drive.

Some people are afraid to take a screwdriver to such a delicate piece of equipment. I recommend you just channel your inner Raynz and get it over with.

The computer may beg for mercy and claim many times over that removing the brain hard drive won’t work. Do not listen to it. It will work! Also, if the computer does talk at this point, consider taking medication.
Now, it is very important that before touching the hard drive with your grubby hands you make sure all static charges are drained to the ground. A little bit of static electricity might accidentally fry your drive. This is where the anti-static wristband comes into play. Personally I use an LCD static discharger.

Random robot models the discharger for us.
If you don’t have either one, you just have to ground yourself by keeping one hand in contact with a grounded metal thing (PC frames work fine). Just make sure you’re grounded so you don’t kill your drive. And don’t drop it, push on the top cover or attempt to remove any of the stickers, either! Slide it out and treat it gently as if it were an actual brain.
If you don’t know where your hard drive is, just google your computer model. You might even find a tutorial to extract the drive. In most laptops it can be accessed from the bottom. It will be rectangle-shaped and about the length of a CD case but not as wide. Sometimes it will even have a few ridges on the cover so you’ll be able to slide it out easily after you’ve unscrewed it.
Oh, and make sure to store those little screws in a safe place. You’ll need them once you’re done. It’s important to remember where every one of them went in order to avoid screwing up when it’s time for your computer to get its marbles back.

IRL
4. GETTING READY TO DIVE IN.

Now that the damn thing is out, we need to plug it to the second computer. If you haven’t yet installed the recovery software on the second comp, now’s your chance.
I bought the goddamn $20 cable and wasted like a week trying to get it to work. After only a couple of hours it was already giving me a million read errors. I feared the drive had really bought the farm this time.

So I went to Best Buy and spent big bucks on a hard drive docking station. This is what I used the last time I had this problem and it worked like a charm; no errors whatsoever. If you can’t borrow the cable or dock, I recommend getting it on eBay for cheap, if you can manage the wait. I also went to STEREN but they only had IDE adapters. Just make sure whatever you get is compatible with your type of drive (mine is a 2.5”SATA drive).

Awesome docking station
We should now have the USB end connected to the second computer, and our faily drive plugged to the SATA (or IDE, or whatever) end. The cable/docking station needs power too in order to run the drive so make sure you get all the connections right.

Powered by alchemy
Depending on what you’re using (cable or dock) you might need to turn the device on or just plug it into a socket. We’re assuming your borrowed computer is already on.
5. DIGGING UP THOSE TERRIBLE SEKRITS.

Fire up the software, let it detect all drives and then select your partition. It should be easy to recognize because of the size in GBs and the fact that the drive is plugged via USB and will tell you so (newbies: it’s usually C:\). If the partition has vanished without a trace, choose the device, full scan. This whole recovery procedure is read-only so it won’t cause any further damage to your files. I’m a bad-news-first kind of person so I like going for the deep scan first (if you do this you’ll have to choose the file types more relevant to your search). If you’re more practical, though, the advanced scan will definitely find things the deep scan didn’t, and the results are way easier to handle, so don’t forget to try that too (and viceversa).

Advanced scan
This might take anywhere from a few hours to a couple of days, depending on the efficiency of your minions USB speed and the size of your drive. I’m using an ancient desktop computer so it takes a couple of days to scan my 160 GB drive. Save the results once you’re done, that way you won’t have to scan each time, you can just load the scan results and start digging around the sad remains of your files.
I warn you, if you use the deep scan, some of the stuff you find might be ugly. I’ve found some strange pr0n this way, and I’m the only person who uses my computer. This happens because even though it’s not my pr0n the scan will recover a lot of the useless cache, even if you deleted it (yes, this is a great way to find very deleted files, too). I’m not saying your deadish drive is gonna goatse you from beyond the grave, or that you’re magically gonna find a German schizer video collection (unless you willfully put it there), but if you browse Encyclopedia Dramatica or places with similar advertising you can definitely expect some unexpected nudity. Some of it will be hot. Some of it… won’t.

Have some brain-bleach at the ready
6. “WTF is it?” “I don’t know but it sounds cool.”
One of the most irksome things you’ll have to deal with once the deep scan is finished is the fact that all your files are now renamed something like “Recovered_X_file_(13453).x” where X is the file extension (sorry to disappoint, X-files fans). It’s a nightmare. They have no dates, either, so you’ll just have to save them to some folder in the good hard drive (the one on the second computer) and go through each of them to find out what they are, because they sure as hell won’t tell you.

Facepalming: You'll be practicing this move a lot.
This is another reason to choose the advanced scan first: Everything will keep its name and date and you’ll find it in the right folder. BTW, just as a precaution, in case you’re recovering to someone else’s computer you should make sure your buddy who let you borrow it: a) Won’t make fun of your German Schizer videos, or b) Is not a nosy bitch.

Power Data Recovery will let you preview some files before you save them, but it only previews documents and pics, and only if the files are under a certain size. For the rest it looks like this:

FAIL
I just save all of it and delete whatever I don’t need later. Once it’s all safely stored in the good drive, sort the saved files by size or dimensions (if you’re perusing the nameless deep scan results) and delete the ones too tiny to be anything important (preview a couple of them first to make sure they’re really unimportant). PDR has a filter feature that might help. Be warned: this will still be a hugetastic but necessary waste of time.

Much like this tutorial, I suspect.
Another terrible thing after you finish scanning (deep or advanced scan) is the fact that some files will be there, but damaged. Priceless documents, images and video might have suffered this unhappy fate. You’ll be like OMG, that’s it!

And then the goddamn thing will tell you that it can’t f*cking access the file.

There are programs that specialize in opening damaged documents, such as this one, so there’s still a bit of hope. Be prepared, though. While most of your stuff will still be there, some of it might really be gone forever.

There, there.
7. IN CONCLUSION.
So that’s it. Sometimes you won’t find exactly what you were looking for, but sometimes you will!

Happiest pic of Az I could find.
If you didn’t find it following this procedure, but it’s really important for you to recover that info and you don’t mind other people going through all that pr0n embarrassing fandom stuff, then you might consider taking the brain drive to an expert. Another option is to try different software. Like I said, some of them are completely free, and the rest will usually let you scan and preview the recovered files for free as well (but you’ll have to buy to actually save them), so it’s worth a try.
If we were actually a wicked Sorceress and your laptop were a brilliant scientist who refused to give you the schematics for a potential doomsday device, then you would be done by now and you could go have tea and biscuits with yourself on your evil balcony. But since we love our brainless genius, AKA our laptop, we have to put its marbles back in so we can have a happy ending.

SyFy calls this an ending.
Just unzip the skull safely disconnect your faily drive and follow the same instructions for taking it out as before but in reverse (remember to ground yourself before touching it, make sure the battery is out before putting the drive back in, screw it back in place gently, etc.). If all goes well this time it will not make any empty threats. When you turn it on again (assuming it was running okay even after it glitched) some of your programs might be damaged because they’ll be missing crucial files (or they’ll be gone altogether), so I suggest reformatting and starting fresh as a powdered baby’s behind.

Only pic of bandaged Alan Ambrose on the Internets (maybe).
Fact: Just like some people in the Tin Man fandom think the brain is too damaged to be put back in, a lot of tech-savvy people recommend that you stop using that POS hard drive that crapped out on you and just get a new one.

CAIN SAYS GET A NEW ONE
I didn’t listen to this advice and nine months later I lost all my stuff again (most of it is now back, though!). I know this sounds like a tragic Glitch rebraining fic in the making, but the fact is I had no reason to suspect the damage could be physical, so I continued using it without even reformatting (I had a lot of customizations I didn’t want to bother doing again). Both times my HDD has failed, it only has a little over 2 GBs free of hard disk space left and starts complaining about it through annoying little messages. Then out of the blue it just decides it knows too f*cking much and can’t handle it, so it wipes itself blissfully clean before I even get the chance to make some space, which really sucks. See? Total Glitch tragedy.
Well, I hope this tutorial might be useful to someone out there who manages to stumble upon it, and at least somewhat entertaining to Tin Man fans. Advice, comments and criticisms are welcome but not really expected (and yes, I’m aware it’s the CPU that should be the brain, shush). I’m just a layperson, so you should really get advice from several sources before attempting to mess with your computer. Eventually I might do a tutorial about cloning your old hard drive to a shiny new one using a free tool in order to migrate your OS, but only if I can figure out how to relate it to Tin Man. XD
Credits: Most Tin Man screencaps courtesy of tiny_prayers
Warning: Pic heavy; might kill dial-up. If you didn't catch this before the cut, then it's already too late.