VLC automatic screencapping tutorial
Welcome everyone to my humble graphics journal! Tonight we will go literally step by step as I teach you how to automatically screencap with VLC. (i.e., the computer does it for you.)
If you have any questions, feel free to ask me; I'll try my best to answer them.
So to start off with, open VLC. You should get a screen similar to this:

See where it says “Settings” near the top? Click that and a pop down window will appear; scroll down until you see “Preferences” and click on that.
You will be acquainted with a window such as this:
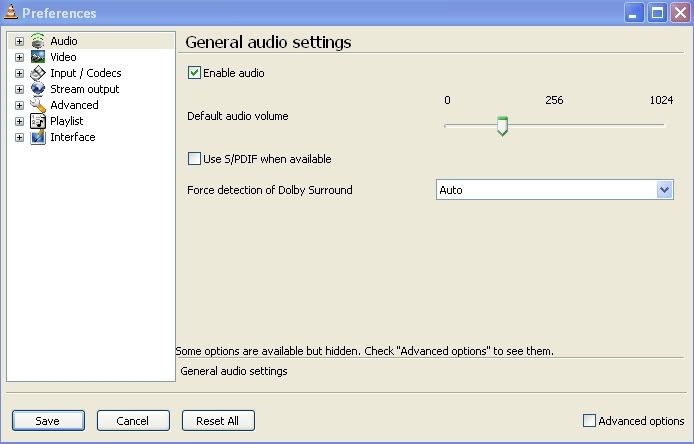
See where it says “Video” on the left hand panel? Click on it; then click the “+” to the left of it to expand the options in the panel.
You should get a window such as this:
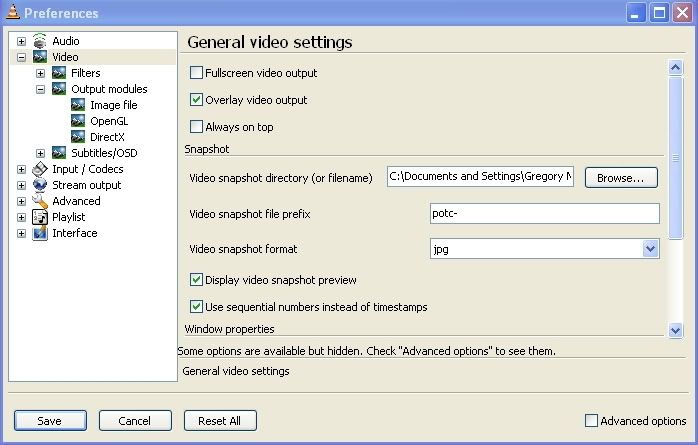
Now click on “Output modules” on the left hand panel underneath “Filters” underneath “Video” Click on it, then click the “+” to the left of it to expand the options in the panel. You should get something like this:
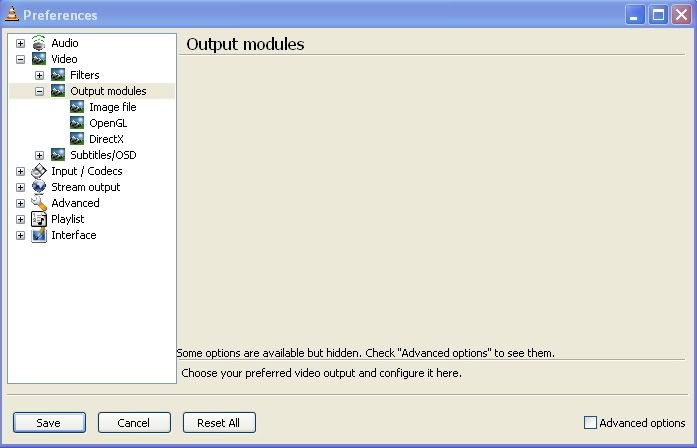
See the little “Advanced Options” text near the bottom right of the panel? Click the check-box next to it and this is what you should see:
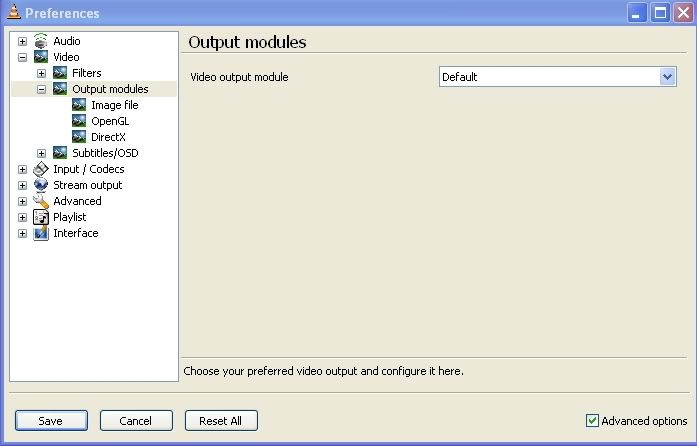
See near the top where it says, “Video Output Module” and says, “Default” in the drop down window? Click the drop down window and change it to “Image Video Output”, giving you this screen:
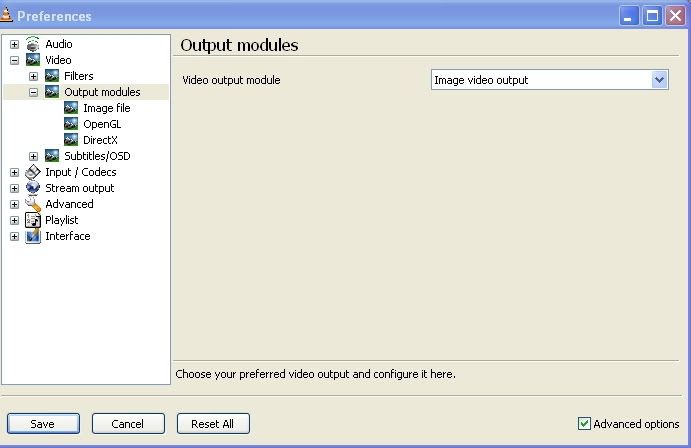
Now see on the left hand panel underneath “Output Modules” it says, “Image file”? Click on that and you should see a screen with multiple options.
I would show you this screen but I don’t know what the original options were, so thus I cannot. Do not be shocked as if I skipped a step when I show you the next picture. xD
Change “Image Format” to “PNG” or keep it as is; change the “Recording Ratio” to whatever you desire, though 20-25 or more is usually good. Finally, change the file name prefix to whatever you prefer; I change it depending on the movie I’m capping; for instance right now I’m capping Dead Man’s Chest and so for my prefix I wrote “dmc-” Do not forget to add the dash or else your image files are one big sloppy mess.
This is what my screen looked like after I changed all the options applicable:

So finally click “Save” at the bottom left and you should be back to this screen:

Now see where it says, “File” at the top of the screen? Click that and then scroll down to “Open Disc” when a pop down menu appears. You should be greeted with this screen:
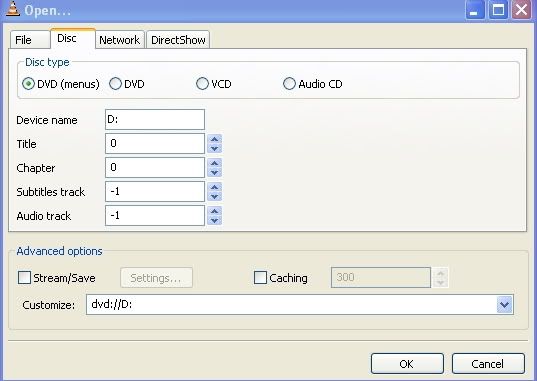
See where it says “File” again near the top as the left-most tab? Click that and you should see this screen:
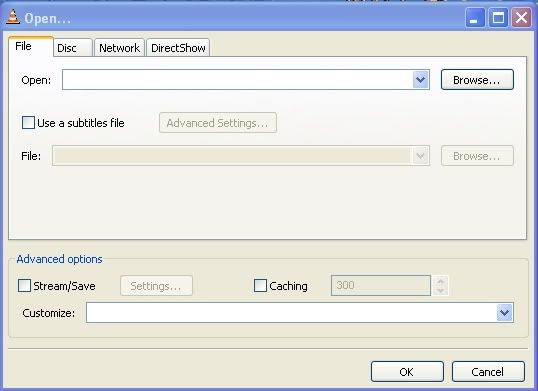
See where it says, “Open” then to the right says “Browse”? Click “Browse” and you should be greeted with a screen similar to this IF YOU HAVE A PC! If you have a Mac, I’m not sure what the exact screen should look like; though probably something similar to this:
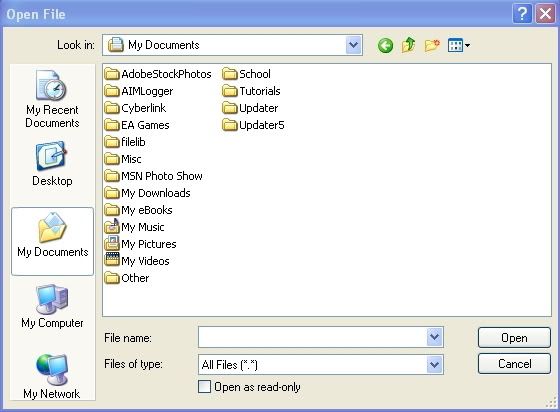
***NOTE: For MAC users: A heads up, with the latest version, on a Mac, VLC will save the file to the 'Macintosh HD' instead of within VLC files.
For WINDOWS users: Click “My Computer” and you should see something similar to this (MAKE SURE THE DISC YOU WANT TO CAP IS IN THE DRIVE!):
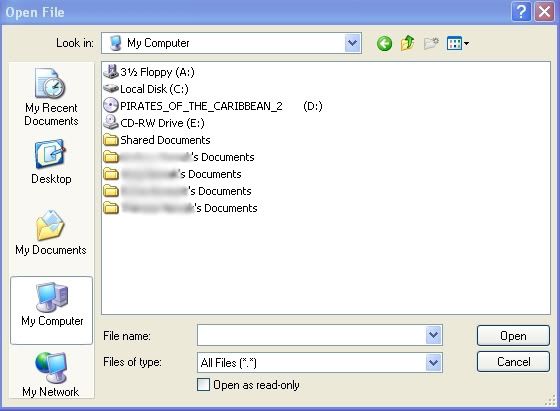
Click on your disc; as in this case I clicked the one that says, “PIRATES_OF_THE_CARIBBEAN_2” It should come up with a window that has two folders; one labeled “AUDIO_TS” and the other labeled “VIDEO_TS”. Obviously we are clicking on “VIDEO_TS” and you should get something similar to this:
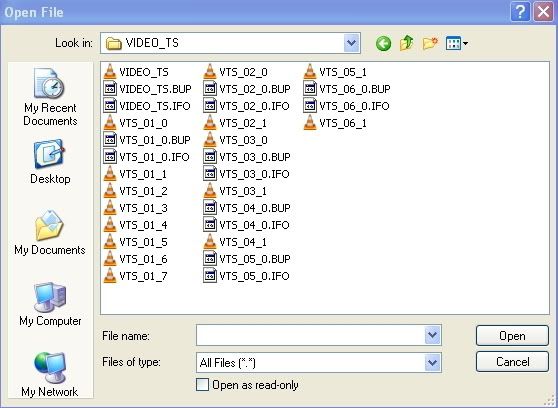
See where it says, “VIDEO_TS” again near the top, only this time as an icon with a little traffic cone next to it? Click on THIS not anything else or it will NOT work. (Believe me; I’ve made this mistake multiple times.)
After you clicked on that icon you should be greeted with this screen:
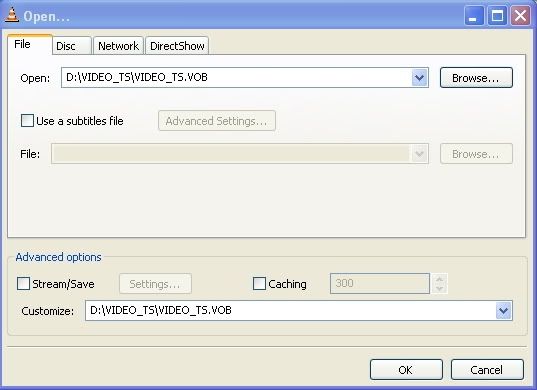
See where it says, “Disc” near the top, the second most left tab? Click on that and you should be greeted with a window.
Again, I did not take a picture of this window but fear not; it just is a window with a lot of options; just follow my next instructions and you should be fine. :)
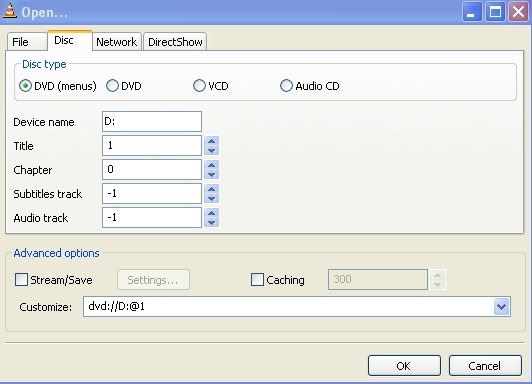
*Do not change ANY of the options except for “Title” to “1” on EVERYTHING and ONLY change “Chapter” for Avatar or other EPISODE related DVD’s; for MOVIES keep the “Chapter” at 0 or else you will only screencap THAT scene and the movie and screencapping will stop; believe me I’ve done this and it took me awhile to figure out what I was doing wrong so don’t repeat my mistake. (Example: If you are screencapping Avatar and want to screencap the 3rd episode of that DVD; change “Chapter” to 3)
***NEW NOTE (12/28/08)** I just realized that some DVDs are REALLY stupid and just opening the video does not guarantee screencaps---I had to go to Windows Media Player and play the video to figure out that The Chronicles of Narnia: Prince Caspian doesn't really start until Title 58. And I spent over an HOUR trying to figure out where it capped, only to fail ever time, trying title 0 and 1 and variations of that with different chapters and so forth.
So opening the video in Windows Media Player (FIRST) will guarantee you where the video actually is first before you waste time in VLC--that'll probably help a bunch of people; I know it helped me.
These were the options I ended up with; yours may be different depending on whether or not you're capping a movie like I am or an episode such as one in Avatar or something:
Finally click “Ok” and your movie/episode should start in about 30 or so seconds; be patient as depending on how fast your computer is it will be faster or slower.
And one last note: DO NOT FREAK OUT IF YOU ONLY HAVE AUDIO AFTER GOING THROUGH ALL THESE STEPS-that is how it is; only audio plays when VLC screencaps things.
Finally, again, if something doesn’t work or if you have any questions, feel free to ask me.
------------
EDIT: Here are some added things that I forgot the first time around; thanks to all who helped me with these! :)
::::::SCREENCAPS::::::
So basically--if you have a Mac it'll be different--you have a "C" drive (mine's under "my computer"), right, with all your program files? And you can go under program files and see all the programs that are on your computer with their respective folders, right?
Well, go all the way down till you see "Video LAN"; click on it, then click, "VLC".
THAT is where all your automatic caps go; and THAT is the only place they go.
(You should see all your screencaps there; cap again and they will all pop up there You can move them to a different folder if you like or delete them once you're done with them.)
:::::SIZES OF CAPS:::::
If you put the size you want the caps to be into the image width & image heigth, it comes out that size instead of the 720x480. I did this cap of how I did it, with the DVD I am currently capping. (It also makes it so you can make the caps bigger than the aspect ratio)
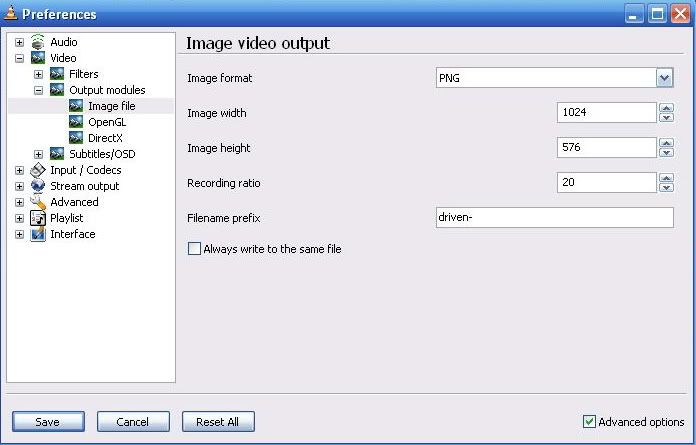
i.e., see the "Image Width/Image Height" then see the little drop down box that says "1024" and "576" in the screencap above? That's what you change--if you want the default settings back, put "-1" in both of the boxes. (That makes the size of the caps whatever the normal size of video is.)
::::VOLUME:::::
Just click the speaker to mute it I think, or click one of the green bars closest to the right on the main screen of VLC to either lower or mute the volume if you don't want to listen to the movie when it's automatically capping/rather prefer listening to other music and so forth.
::::A VID TUTORIAL FOR MAC USERS USING .AVI FILES::::
LINK. By adela_nightmoon.
Anything I missed? Be sure to tell me so I can add it to this tutorial! Any questions? Just ask and I'll try to help you as best as I can.