ashkt
in
icondeliria
Icon Tutorial
My first tutorial.

to
using PSCS2
Using Selective Colors and Curves
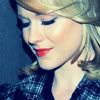
We're going from
to
Step 1. Crop your base. Screen or multiply according to how dark or light your base is. Here I duplicate it and set it to screen 30%.
Step 2. New layer - c8c36e - Soft Light 100%

to
Step 3. Layer - New Adjustment Layer - Selective Color
(Reds)
Cyan : -100
Yellow : +33
(Yellows)
Yellow : -35
(Whites)
Yellow : -35
(Neutrals)
Cyan : +22
Magenta : -7
Yellow : -27

to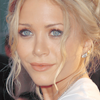
Step 4. Layer - New Adjustment Layer - Curves
(Green)
Input 0; Output 121
(Blue)
Input 0; Output 179
This Layer - Color Burn 58%

to
Step 5. Layer - New Adjustment Layer - Selective Color
(Reds)
Cyan : -100
Magenta : -26
Yellow : +8
Black : +44
(Yellows)
Cyan : -100
Magenta : +16
Yellow : -23

to
Step 6. Layer - New Adjustment Layer - Selective Color
(Reds)
Cyan : -42
(Neutrals)
Cyan : +16
This Layer - Opacity 29%

Merge and u have the finished product. Hopefully this is of some help since it's my first tutorial.
Remember to adjust your settings for different images. I'll love to see what u come up with!
Other icons made with the same technique :

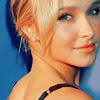
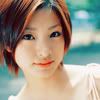
---------------------

to
using PSCS2.
Using selective colors and curves.
Step 1. Crop your base. Screen or multiply according to how dark or light your base is. Here I duplicate it and set it to screen 20%.
Step 2. New layer - 100a49 - Exclusion 100%

->
Step 3. Layer - New Adjustment Layer - Selective Color
(Reds)
Cyan : -70
Magenta : +20
Yellow: +80
(Neutrals)
Cyan : +15
Magenta : -10
Yellow : -14
Black : -4

->
Step 4. Layer - New Adjustment Layer - Selective Color
(Reds)
Cyan : -100
Black : +14
(Neutrals)
Cyan : +8
Magenta : -7
(Blacks)
Black : +10

->
Step 5. Layer - New Adjustment Layer - Curves
(Blue)
Input 0; Output 182
This Layer - Color Burn 30%

->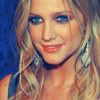
Step 6. New layer - abccda - Soft light 100%

->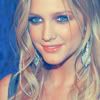
Lastly, duplicate the base and drag it to the top. Set to Soft Light 100%.
Go to Hue/Saturation and increase the saturation to +4

Merge and u have the finished product. Remember to adjust your settings for different images.
I'll love to see what u come up with!
Other icons made with the same technique :


to

using PSCS2
Using Selective Colors and Curves
We're going from

to

Step 1. Crop your base. Screen or multiply according to how dark or light your base is. Here I duplicate it and set it to screen 30%.
Step 2. New layer - c8c36e - Soft Light 100%

to

Step 3. Layer - New Adjustment Layer - Selective Color
(Reds)
Cyan : -100
Yellow : +33
(Yellows)
Yellow : -35
(Whites)
Yellow : -35
(Neutrals)
Cyan : +22
Magenta : -7
Yellow : -27

to

Step 4. Layer - New Adjustment Layer - Curves
(Green)
Input 0; Output 121
(Blue)
Input 0; Output 179
This Layer - Color Burn 58%

to

Step 5. Layer - New Adjustment Layer - Selective Color
(Reds)
Cyan : -100
Magenta : -26
Yellow : +8
Black : +44
(Yellows)
Cyan : -100
Magenta : +16
Yellow : -23

to

Step 6. Layer - New Adjustment Layer - Selective Color
(Reds)
Cyan : -42
(Neutrals)
Cyan : +16
This Layer - Opacity 29%

Merge and u have the finished product. Hopefully this is of some help since it's my first tutorial.
Remember to adjust your settings for different images. I'll love to see what u come up with!
Other icons made with the same technique :


---------------------

to

using PSCS2.
Using selective colors and curves.
Step 1. Crop your base. Screen or multiply according to how dark or light your base is. Here I duplicate it and set it to screen 20%.
Step 2. New layer - 100a49 - Exclusion 100%

->

Step 3. Layer - New Adjustment Layer - Selective Color
(Reds)
Cyan : -70
Magenta : +20
Yellow: +80
(Neutrals)
Cyan : +15
Magenta : -10
Yellow : -14
Black : -4

->

Step 4. Layer - New Adjustment Layer - Selective Color
(Reds)
Cyan : -100
Black : +14
(Neutrals)
Cyan : +8
Magenta : -7
(Blacks)
Black : +10

->

Step 5. Layer - New Adjustment Layer - Curves
(Blue)
Input 0; Output 182
This Layer - Color Burn 30%

->

Step 6. New layer - abccda - Soft light 100%

->

Lastly, duplicate the base and drag it to the top. Set to Soft Light 100%.
Go to Hue/Saturation and increase the saturation to +4

Merge and u have the finished product. Remember to adjust your settings for different images.
I'll love to see what u come up with!
Other icons made with the same technique :


