(no subject)

to
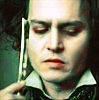
Photoshop only
1) Duplicate your image and set it to screen
2) Duplicate the previous layer
3) If your image is still a little too dark you can duplicate the last layer and set it to 20% opacity
4) New color balance layer
Midtones: 21, -19, -17
Shadows: -3, 0, 0
Highlights: -21, -47, -3
Be sure to put this layer between your first and second layer
5) New selective color layer
Reds: -100, 100, 100, 100
Whites: -70, 32, 24, -8
Neutrals: 25, 6, 10, 5
6) Another selective coloring layer!
Reds: -100, 100, 100, 100
Neutrals: -4, 10, 16, 6
7) Curves layer
RGB:
First dot - 183, 196
Second dot - 52, 48
8) Hue/ Saturation layer
Saturation: 20
9) Brightness/ Contrast layer
Brightness: 3
Contrast: 3
10) Selective color layer
Reds: 47, 0, 54, 26
Neutrals: 15, -5, 10, -2
11) New fill layer with #ffee2b set to color burn 100%
12) Selective color layer
Reds: -18, -23, 0, 12
Yellows: 98, 14, -78, -18
13) Brightness/ Contrast layer
Contrast: 4
You can sharpen your image if you’d like but otherwise you’re done!
Hope it looks okay ^^ I’d love to see what you come up with