Stock Tutorial
From this: 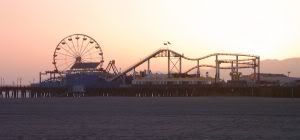
to this:
Made in GIMP, involves Hue/Saturation, Color Layers, Curves, and Brightness/Contrast.
Translatable.
I got this lovely image from www.sxc.hu. :)
I cropped it and made sure it was 100x100.
I sharpened it to 30.
I duplicated my base and set it to screen at 80% and then again at soft light 100.
Flatten.
For the next ste in GIMP you have to right click on your image and click add alpha channel. This will allow you to move it around.
I made a new layer of c9c3b1 and put it under my background image on normal at 100
Then I made a layer of d5f3e6 and it between my base and the grey layer on normal at 40
Put your base on burn at 100.
Flatten Image.
I took a cloud texture: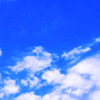
, flipped it vertically, and put it at Grain Extract at 70. The image will be really yellowy, but we'l fix that.
Duplicate base and putat top at soft light 100
Flatten
Up the main saturation 50, and the clue and cyan all the way.
I went on curves and found the blue in the clouds that I wanted to enhance, and clicked it. This added a vertical guide on the curves display. In the blue range I went to the top of the line and clicked to make a point and then I played around with the reds and greens until I got about what I wanted.
Brightness/Contrast: -20/30 or so
Up the saturation again
Add Text, brushes, whatever you want.
And you're done! :)