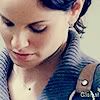
Brooke Davis icon tutorial
Hi everyone this is my first tutorial,hope you like it :)
Going from
to
In 7 easy steps for Photoshop 7,but i'm sure it's translatable.
So we're gonna turn this
into this
In 7 easy steps.
1.Sharpen your base and all that jazz.
2.Duplicate your base 2 times.Now your icon looks like this:
3.After that you add from Layer/New Fill Layer/Solid Color #95E9F5 and set to Color Burn.
4.Then you add #151227 ans set to Exclusion.
Your icon should look like this:
5.Add New Adjustment Layer/Hue/Saturation - Saturation +40
6.Also add New Adjustment Layer/Curves
Red
Input:96
Output:142
You should have this:
Now you can stop here or you can add the heart like I did.
7.From Custom Shape Tool
you select the heart
and you can make it as big as you like.Right click on the heart layer and select Blending Options.I used Drop Shadow,Bevel and Emboss and Stroke with #A78282.
And there you go.

Other icons made by using this tutorial:


I'd love to see your results :)
Going from

to

In 7 easy steps for Photoshop 7,but i'm sure it's translatable.
So we're gonna turn this

into this

In 7 easy steps.
1.Sharpen your base and all that jazz.
2.Duplicate your base 2 times.Now your icon looks like this:

3.After that you add from Layer/New Fill Layer/Solid Color #95E9F5 and set to Color Burn.
4.Then you add #151227 ans set to Exclusion.
Your icon should look like this:

5.Add New Adjustment Layer/Hue/Saturation - Saturation +40
6.Also add New Adjustment Layer/Curves
Red
Input:96
Output:142
You should have this:

Now you can stop here or you can add the heart like I did.
7.From Custom Shape Tool

you select the heart

and you can make it as big as you like.Right click on the heart layer and select Blending Options.I used Drop Shadow,Bevel and Emboss and Stroke with #A78282.
And there you go.

Other icons made by using this tutorial:


I'd love to see your results :)