(no subject)
My first tutorial. ^-^
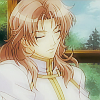
From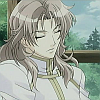
to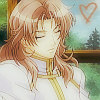
in 5 easy steps!
I used Photoshop CS2. I'm not sure if it is translatable or not, since I haven't use PSP before.
*Contains Filter and Selective Colouring*
1. Resize your base image to 100x100. Sharpen as needed. Duplicate 2 times.
2. Set the top duplicate to Hard Light at 60% opacity.
3. Set the middle duplicate to 80% opacity. Now go to Filter >> Blur >> Shape Blur. Click on the paw print and set the radius to 5 pixels. Looks kinda cool, doesn't it?
4. This step is to give some colour to it. Go to Layer >> New Adjustment Layer >> Selective Colour. Set the following in.
Yellows ~ -100, -100, 100, 100
Cyans ~ 0, -100, -100, 0
Neutrals ~ 0, 50, 50, 0
Then set that layer to Color.
5. Decorate as wanted. ^-^
~*~I hope the tutorial helped anyone! ^o^~*~
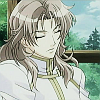
From
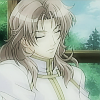
to
in 5 easy steps!
I used Photoshop CS2. I'm not sure if it is translatable or not, since I haven't use PSP before.
*Contains Filter and Selective Colouring*
1. Resize your base image to 100x100. Sharpen as needed. Duplicate 2 times.
2. Set the top duplicate to Hard Light at 60% opacity.
3. Set the middle duplicate to 80% opacity. Now go to Filter >> Blur >> Shape Blur. Click on the paw print and set the radius to 5 pixels. Looks kinda cool, doesn't it?
4. This step is to give some colour to it. Go to Layer >> New Adjustment Layer >> Selective Colour. Set the following in.
Yellows ~ -100, -100, 100, 100
Cyans ~ 0, -100, -100, 0
Neutrals ~ 0, 50, 50, 0
Then set that layer to Color.
5. Decorate as wanted. ^-^
~*~I hope the tutorial helped anyone! ^o^~*~