(no subject)
Hallo thur! I have an icon tutorial, requested by
xx_housecat_xx .
We will be going from this:
to this: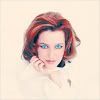
. Yayyy!
-Uses curves and selective colouring.
Grab your base (this tutorial works best with brighter images).
New Adjustment Layer: Curves.
RGB:
I: 30
O: 65
I: 90
O: 155
I: 175
O: 213
I: 235
O: 247
New Fill Layer: Solid Colour.
#F7A24F
Set to Multiply on 15% (depending on how dark/light you want your icon, you may want to change this).
New Fill Layer: Solid Colour.
#00000A
Set to Exclusion on 80% (same goes for this layer).
New Adjustment Layer: Selective Colour.
REDS:
C: -90
M: +28
Y: +32
YELLOWS:
M: +35
Y: +25
CYANS:
C: +100
M: -100
Y: -100
NEUTRALS:
C: -13
M: +31
Y: +12
New Adjustment Layer: Selective Colour.
REDS:
C: -8
M: +25
Y: +4
B: +10
GREENS: (this one may or may not be completely unnecessary :p)
C: +100
M: -100
Y: +100
CYANS: (this one too)
C: +100
M: +100
Y: -100
NEUTRALS:
C: +2
M: -76
Y: -82
B: +100
Aaaaand you're done :]
.