Tutorial Veronica Mars
It's a tutorial for PHOTOSHOP users.
We'll be going from
to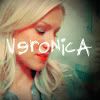
1. We'll be starting with this base:
2. Duplicate backgroundlayer and set it to screen at 30 opacity.
RESULT:
3. Create new adjustment layer->curves
RGB: input:44; output:72
RED: input:249; output:251
RESULT:
4. Create another new adjustment layer->curves (this step is optional if your base is very light you can just skip it)
RGB: input:50; output:80
RESULT:
5. New adjustment layer->selective color
REDS: -100,+40,+40,+5
YELLOWS: -30,-40,-80,0
NEUTRALS: +30,+10,+10,-30
RESULT:
6. New adjustment layer->selective color
REDS: -100,+50,+60,0
NEUTRALS: +70,-30,-30,-10
RESULT:
7. New adjustment layer->color balance
MIDTONES: -30,-15,-20
SHADOWS: -15,+5,+20
HIGHLIGHTS: -3,+2,-5
RESULT:
8. We'll be using this texture: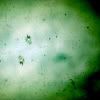
Past it on your icon and go to Image->Adjustments->Desaturate
RESULT: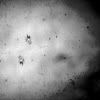
9. Set texture to multiply opacity 100%
RESULT:
10. Now with eraser get rid off parts that are covering importnat parts of your icon. I recomend you to use a big soft round brush at low opacity, I used 31%
RESULT: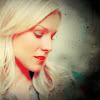
11. Paste this texture on your icon: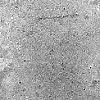
Set it to multiply opacity 50% and again with round brush erase it from important parts use just a little bit new a black border from the previous texture
RESULT:
12. New adjustment layer->selective color (I'm using it because my icon looks a little bit washed out, if yours look ok then just skip this step.)
NEUTRALS: 0,0,0,+10
RESULT:
13. Just add some text if you want. I used font diediedie and I wrote: "Veronica"
RESULT: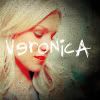
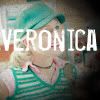
Other icons made with this tutorial:


We'll be going from

to

1. We'll be starting with this base:

2. Duplicate backgroundlayer and set it to screen at 30 opacity.
RESULT:

3. Create new adjustment layer->curves
RGB: input:44; output:72
RED: input:249; output:251
RESULT:

4. Create another new adjustment layer->curves (this step is optional if your base is very light you can just skip it)
RGB: input:50; output:80
RESULT:

5. New adjustment layer->selective color
REDS: -100,+40,+40,+5
YELLOWS: -30,-40,-80,0
NEUTRALS: +30,+10,+10,-30
RESULT:

6. New adjustment layer->selective color
REDS: -100,+50,+60,0
NEUTRALS: +70,-30,-30,-10
RESULT:

7. New adjustment layer->color balance
MIDTONES: -30,-15,-20
SHADOWS: -15,+5,+20
HIGHLIGHTS: -3,+2,-5
RESULT:

8. We'll be using this texture:

Past it on your icon and go to Image->Adjustments->Desaturate
RESULT:

9. Set texture to multiply opacity 100%
RESULT:

10. Now with eraser get rid off parts that are covering importnat parts of your icon. I recomend you to use a big soft round brush at low opacity, I used 31%
RESULT:

11. Paste this texture on your icon:

Set it to multiply opacity 50% and again with round brush erase it from important parts use just a little bit new a black border from the previous texture
RESULT:

12. New adjustment layer->selective color (I'm using it because my icon looks a little bit washed out, if yours look ok then just skip this step.)
NEUTRALS: 0,0,0,+10
RESULT:

13. Just add some text if you want. I used font diediedie and I wrote: "Veronica"
RESULT:

Other icons made with this tutorial:


