Royalty Icon Tutorial
Royalty Icon Tutorial
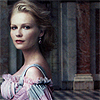
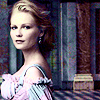
go from this:
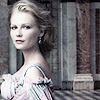
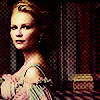
to this:
I used Photoshop CS2, but it's easily translatable.
No Selective Colour/Curves.
Warning: Image Heavy.
the first five steps are taken from this tutorial by
makesomelove.
but i've modified the steps to fit with my icon, so it'll be a little different.
anyways, on with the tutorial.
oo1.
crop your base.
duplicate, set to screen, 60%.
duplicate that layer and desaturate (ctrl+shift+u). leave at 60%.
of course, the opacity depends on how bright your picture is. play around with it.
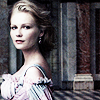
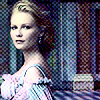
oo2.
duplicate base, bring to top.
set to soft light, 100%.
oo3.
#6d557b.
saturation, 100%.

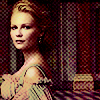
oo4.
paste gradient.
overlay, 100%.


oo5.
paste grid.
set to soft light, 40%.
i erased the parts covering her face, and the brightest areas like her shoulder.
duplicate the layer, set to 20%.

oo6.
#ffb0b0
colour burn, 100%.


oo7.
#dcbe7c
multiply, 100%.
erase parts covering face.
or generally the brightest points of the picture.

oo8.
duplicate base, bring to top.
soft light, 100%.
oo9.
i used this brush, but i really don't know who it's by.
please let me know if it's yours and i will gladly credit.
i used georgia, 8pt, #f7e3bd, letter spacing 200, and typed 'royalty'.
i then duplicated the text to make it clearer.


o1o.
this is optional, but it finishes the icon nicely.
especially if the areas around your icon are in light colours.
add a 2 pixel black border.
set to overlay, 100%.
duplicate it two or three times to really get that burnt kind of effect.

et voila! all done.
:]
try it out and show me your work.
i always love to see how people use my tutorials.
the multiply effect in step oo7. is a really nice one that i discovered with this icon.
it gives a nice glow, but retains the light and dark areas.
try it out on other icons.
:]
and let me know if you have any questions.