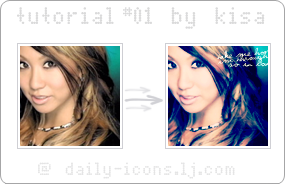
First Tutorial ever~~

» o1. Grab your base, mine is of 倖田來未. Resize and crop. Make sure you don't sharpen your base!

» o2. Duplicate your base and set it to Screen - 100%.

» o3. Make a new layer, flood fill with #6dcff6 & set to Color Burn - 100%


>>

» o4. Make a new layer, flood fill with #001c32 & set this one to Exclusion - 100%

>>

» o5. Now duplicate your base, move it to the top and set it to Soft light - 100%

» o6. Make a new layer, flood fill with #f771d6 & set this one to Soft light - 100%

>>

» o7. Make another new layer again (yes, I know it's annoying but we're almost finish), flood fill with #6dcff6 & set it to Color Burn - 100%

» o8. New adjustment layer. Layers >> New Adjustment Layer >> Curves. Put in the following settings in RGB:
1st click:
Input: 192
Output: 182
2nd click:
Input: 129
Output: 130
3nd click:
Input: 67
Output: 98
Here's what it should look like ---» click!

o9. Add text and brushes or leave it as it is ^^

Hope you guys liked the tutorial!
please, don't follow this EXACTLY. Try to experiment~