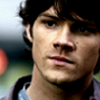
first tutorial :)
ok, this is my first tutorial, so i hope it's easy to understand. we're going from

to
i am using PSP7, but i'm pretty sure it's transferable.
the icon was taken from a screencap of the TV show Supernatural.
prep. crop, sharpen, and setup your base.
one. duplicate you base and set to soft light 64%
two. make a new fill/raster layer and fill with #43ECFB, a light blue; set to burn 45%
three. make another new fill/raster layer and fill with #1A3B68 (a dark navy blue), setting to exclusion 28%
four. new layer and fill with #1A3B68, a brownish color, and set to soft light 100%
five. now for a curves layer. go to layers >> new adjusment layer >> curves. make a dot somewheare and put in INPUT: 153 OUTPUT: 178. make another point. INPUT: 44 OUTPUT: 41. click ok. this may be different for your icon, so work with it a little.
six. new fill layer and fill with #11d9f7. set to soft light 36%.
seven. yet another new fill layer. flood fill #A4693A and set to hard light 30%.
eight. and thats it! know just merge layers (layers >> merge visible) and save it.
NOTE: this is just a guide!! experiment on your own! i'd like to see your results :)

to

i am using PSP7, but i'm pretty sure it's transferable.
the icon was taken from a screencap of the TV show Supernatural.
prep. crop, sharpen, and setup your base.
one. duplicate you base and set to soft light 64%
two. make a new fill/raster layer and fill with #43ECFB, a light blue; set to burn 45%
three. make another new fill/raster layer and fill with #1A3B68 (a dark navy blue), setting to exclusion 28%
four. new layer and fill with #1A3B68, a brownish color, and set to soft light 100%
five. now for a curves layer. go to layers >> new adjusment layer >> curves. make a dot somewheare and put in INPUT: 153 OUTPUT: 178. make another point. INPUT: 44 OUTPUT: 41. click ok. this may be different for your icon, so work with it a little.
six. new fill layer and fill with #11d9f7. set to soft light 36%.
seven. yet another new fill layer. flood fill #A4693A and set to hard light 30%.
eight. and thats it! know just merge layers (layers >> merge visible) and save it.
NOTE: this is just a guide!! experiment on your own! i'd like to see your results :)