Colo Tutorial
This is my first Colorization tutorial, so I'm sorry if you find it a bit dodgy, but I do get a lot of great comments on my colos, so I thought I'd share my methods with everyone. I use PS7.
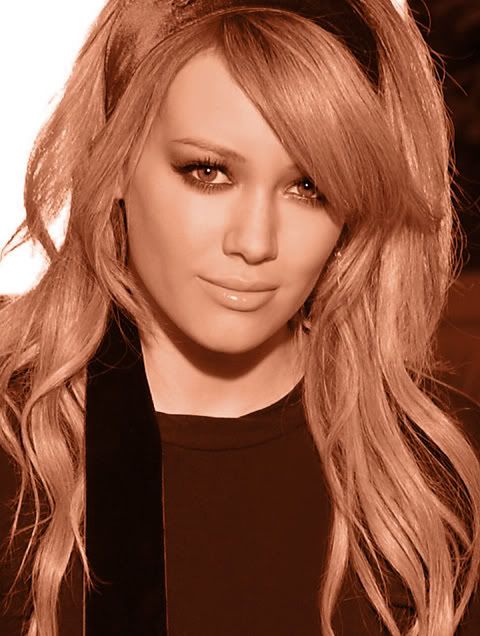
Today I'll be teaching you how to go from:
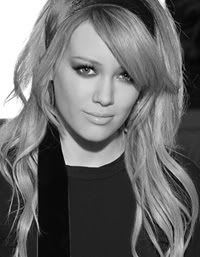
to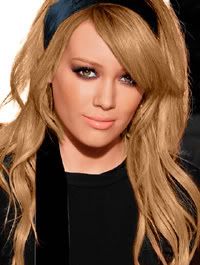
In this tutorial using PS7, you will learn how to color this photo of Hilary Duff as well as other black and white images.
**Side note: In the end, I decided to use example photos and I did them quickly, so some of the erasing is done poorly, but don't judge the tutorial on that!! :-D**
1. Take an image that you want to color, go to Image>Adjustments>Desaturate.
2. New Layer > Set to Color and at 70% > Fill the layer with #892C07
Click.
3. New Layer > Set to Soft Light at 25% > Fill the layer with #893B07
Click.
4. New Layer > Set to color at 100% > Use the brush tool with color #FFFFFF to remove any color in the background > Don't erase anything on the person you're coloring except for clothing. If you make a mistake, you can use the eraser tool to correct it! (After this if you think you're getting too many layers, you can merge them)
Click.
5. New Layer > Set to color at 100% still using #FFFFFFF, use the brush tool again to color the whites of the eyes and/or teeth white (in this case though, her teeth don't show).
6. In the layers window, select the layer you just created and drag it to the "new layer" icon. It will clone the layer you just made. Set the new clone layer to "Soft light" and set it to 25%.
Click.
7.New Layer > Set to Color at 100% > Using #E1BA82, start coloring her hair...it may seem a little green but you can fix that. When you're finished, go to "Image > Adjustments > Color Balance." Playing with the controls there, you can make her hair color as realistic as you want it to be.
Click.
8. New Layer >Set to Color as 100% > Using #572809, I colored her eyes (but you can use any color) And for some extra effects to the light reflected in her eyes, i used the burn and dodge tool (you can play around with this effect if you like, but it's not necessary).
Click.
9. This part is very detailed.... New Layer > Set to color 40% using #FFFFFF, zoom into her eyes and use a feathered brush tool to get rid of some of the coloring on her eyemakeup so that it will appear more black than red/pink. After this you can color the shadow any way you like in a new soft light layer...in this instance i'll use purple.
Click.
and
Click.
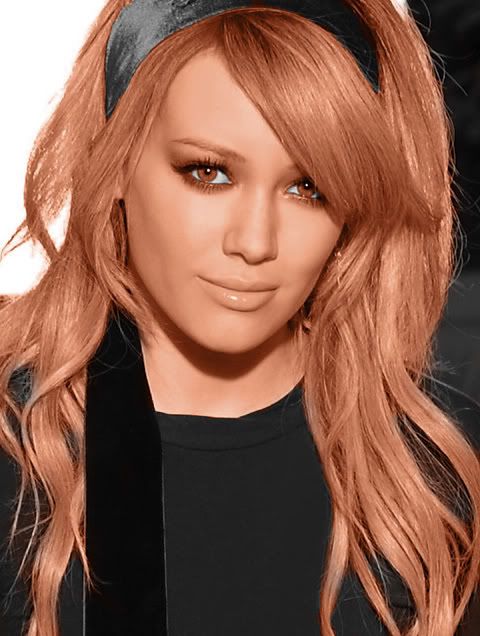
10. New Layer > set to Color at 100% > Using #CB5F4D color in the lips and erase if there are any mistakes.
Click.
11. (Optional) You can add a spot of blush by adding a New Layer, set it to Soft Light at 30% using #8E2B00 and adding just one click on each cheek with a feathered brush at about 75 pixels.
Click.
12. Merge all layers
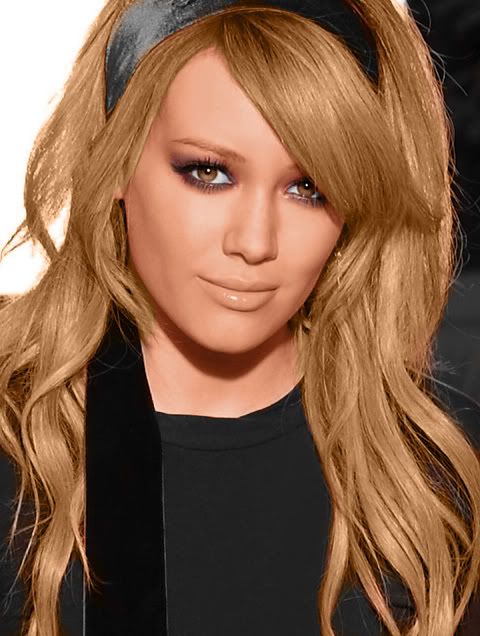
13. You can color the clothing any way you like using a new color layer. In this instance I wanted to keep her outfit black, so All I did was leave it desaturated, Went to Image > Adjustments > Selective Color > Blacks > Blacks +10. This will also help the eyes and darker parts of the image stand out more giving you a more realistic colo. I also colored her headband blue by using a multiply layer.
And this is what we get!
Click.
If you got something out of this tutorial, let me know...and if you have questions, feel free to ask!!!!
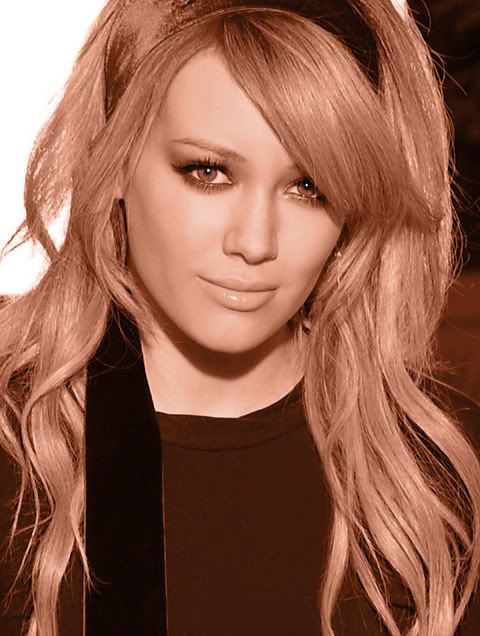
(Here's another colo I did using this tutorial:)
Today I'll be teaching you how to go from:
to
In this tutorial using PS7, you will learn how to color this photo of Hilary Duff as well as other black and white images.
**Side note: In the end, I decided to use example photos and I did them quickly, so some of the erasing is done poorly, but don't judge the tutorial on that!! :-D**
1. Take an image that you want to color, go to Image>Adjustments>Desaturate.
2. New Layer > Set to Color and at 70% > Fill the layer with #892C07
Click.
3. New Layer > Set to Soft Light at 25% > Fill the layer with #893B07
Click.
4. New Layer > Set to color at 100% > Use the brush tool with color #FFFFFF to remove any color in the background > Don't erase anything on the person you're coloring except for clothing. If you make a mistake, you can use the eraser tool to correct it! (After this if you think you're getting too many layers, you can merge them)
Click.
5. New Layer > Set to color at 100% still using #FFFFFFF, use the brush tool again to color the whites of the eyes and/or teeth white (in this case though, her teeth don't show).
6. In the layers window, select the layer you just created and drag it to the "new layer" icon. It will clone the layer you just made. Set the new clone layer to "Soft light" and set it to 25%.
Click.
7.New Layer > Set to Color at 100% > Using #E1BA82, start coloring her hair...it may seem a little green but you can fix that. When you're finished, go to "Image > Adjustments > Color Balance." Playing with the controls there, you can make her hair color as realistic as you want it to be.
Click.
8. New Layer >Set to Color as 100% > Using #572809, I colored her eyes (but you can use any color) And for some extra effects to the light reflected in her eyes, i used the burn and dodge tool (you can play around with this effect if you like, but it's not necessary).
Click.
9. This part is very detailed.... New Layer > Set to color 40% using #FFFFFF, zoom into her eyes and use a feathered brush tool to get rid of some of the coloring on her eyemakeup so that it will appear more black than red/pink. After this you can color the shadow any way you like in a new soft light layer...in this instance i'll use purple.
Click.
and
Click.
10. New Layer > set to Color at 100% > Using #CB5F4D color in the lips and erase if there are any mistakes.
Click.
11. (Optional) You can add a spot of blush by adding a New Layer, set it to Soft Light at 30% using #8E2B00 and adding just one click on each cheek with a feathered brush at about 75 pixels.
Click.
12. Merge all layers
13. You can color the clothing any way you like using a new color layer. In this instance I wanted to keep her outfit black, so All I did was leave it desaturated, Went to Image > Adjustments > Selective Color > Blacks > Blacks +10. This will also help the eyes and darker parts of the image stand out more giving you a more realistic colo. I also colored her headband blue by using a multiply layer.
And this is what we get!
Click.
If you got something out of this tutorial, let me know...and if you have questions, feel free to ask!!!!
(Here's another colo I did using this tutorial:)