Hagrid icon
Go from
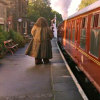
to
in 12 steps. Made in PSP.
Degree of difficulty: medium
As Hagrid would say...
We'll be using a screencap of Hagrid from the Harry Potter series. Found at Mugglenet.
1. Sharpen your 100x100 base.

2. Duplicate the base twice.
- Set top one to 'SCREEN' at 30% opacity.
- Set lower one to 'SCREEN' at 100% opacity.
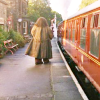
3. Create new raster layer. ('LAYERS'--'NEW RASTER LAYER')
4. Flood fill w/ #E0E0E0.

Set layer to 'BURN' at 100% opacity.
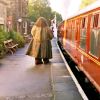
5. Create new raster layer.
6. Flood fill w/ #0A4CC6.

Set to 'EXCLUSION' at 30% opacity.
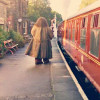
7. Create a new raster layer.
8. Flood fill with same color from step 6, #0A4CC6.

Set to 'BURN' at 40% opacity.

9. Duplicate the base, drag it to the top and set to 'OVERLAY' at 30%.
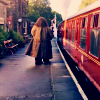
10. Go to 'LAYERS'--'NEW ADJUSTMENT LAYER'--'BRIGHTNESS/CONTRAST'.
- Brightness:9
- Contrast: 15
You can play around with those numbers depending on your personal tastes.
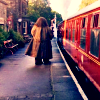
** It's almost good enough at this point, but I like to play around with the coloring a bit more. You can stop right here, but if you prefer bolder coloring, then you should probably continue...**
Don't let the last two steps intimidate you, they're really quite easy! :)
11. Go to 'LAYERS'--'NEW ADJUSTMENT LAYER'--'COLOR BALANCE'.
- Where it says 'Tone Balance', click 'Shadows'.
- Then go back up to the top where it says 'Color Levels'.
- In the first box, type 17.
- Leave the second box at 0.
- In the third box, type 8.
- Now go back down to the bottom where it says 'Tone Balance'--select 'Highlights'.
- Then go back up to 'Color Levels' and type 15 in the first box.
- Make sure 'Preserve Luminance' box is checked.
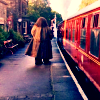
12. Go to 'LAYERS'--'NEW ADJUSTMENT LAYER'--'LEVELS'
- Channel: RGB
- Input Levels: 0 - 1 - 238
then
Channel: Red
Input Levels: 0 - 0.67 - 242
Click 'OK'.
And here's your finished product...

Try not to copy this exact icon, play around with the various opacities and make it your own.
If you found this helpful, please comment. I'd love to see what you created!
X-posted.

to

in 12 steps. Made in PSP.
Degree of difficulty: medium
As Hagrid would say...
We'll be using a screencap of Hagrid from the Harry Potter series. Found at Mugglenet.
1. Sharpen your 100x100 base.

2. Duplicate the base twice.
- Set top one to 'SCREEN' at 30% opacity.
- Set lower one to 'SCREEN' at 100% opacity.

3. Create new raster layer. ('LAYERS'--'NEW RASTER LAYER')
4. Flood fill w/ #E0E0E0.

Set layer to 'BURN' at 100% opacity.

5. Create new raster layer.
6. Flood fill w/ #0A4CC6.

Set to 'EXCLUSION' at 30% opacity.

7. Create a new raster layer.
8. Flood fill with same color from step 6, #0A4CC6.

Set to 'BURN' at 40% opacity.

9. Duplicate the base, drag it to the top and set to 'OVERLAY' at 30%.

10. Go to 'LAYERS'--'NEW ADJUSTMENT LAYER'--'BRIGHTNESS/CONTRAST'.
- Brightness:9
- Contrast: 15
You can play around with those numbers depending on your personal tastes.

** It's almost good enough at this point, but I like to play around with the coloring a bit more. You can stop right here, but if you prefer bolder coloring, then you should probably continue...**
Don't let the last two steps intimidate you, they're really quite easy! :)
11. Go to 'LAYERS'--'NEW ADJUSTMENT LAYER'--'COLOR BALANCE'.
- Where it says 'Tone Balance', click 'Shadows'.
- Then go back up to the top where it says 'Color Levels'.
- In the first box, type 17.
- Leave the second box at 0.
- In the third box, type 8.
- Now go back down to the bottom where it says 'Tone Balance'--select 'Highlights'.
- Then go back up to 'Color Levels' and type 15 in the first box.
- Make sure 'Preserve Luminance' box is checked.

12. Go to 'LAYERS'--'NEW ADJUSTMENT LAYER'--'LEVELS'
- Channel: RGB
- Input Levels: 0 - 1 - 238
then
Channel: Red
Input Levels: 0 - 0.67 - 242
Click 'OK'.
And here's your finished product...

Try not to copy this exact icon, play around with the various opacities and make it your own.
If you found this helpful, please comment. I'd love to see what you created!
X-posted.