1st tutorial Smallville
From:
To:
P.S. I use PS7, but I'm pretty sure it'll work on others. [edit:has selective coloring!]
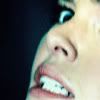
Crop your base to your liking
Next what I like to do is I use Curves to brighten up the base and give it some contrast.
If you prefer not to use curves, since I still barely know how to use it,
you can either duplicate the base many times on Screen.
Or you can use Brightness/Contrast. Which ever you like.
RGB: (156, 217) [see picture here]
so far...
Next Open ColorBalance
For Midtones
Color Levels: -38, 0, 28 [see picture here]
For Shawdows
Color Levels: -36, 6, -37 [see picture here]
so far...
Create a New Layer.
Well, for PS7, the command is [Shift+Ctrl+Alt+E]
I don't know how I found it. But if this doesn't work, you can just
Merge all the layers and duplicate the new base.
Set that layer on Screen at 47% Opacity
so far...
Create a New Layer

on ColorBurn at 34% Opacity [#99DDF7]
Open Selective Coloring
Greens:
Create a New Layer

on Multiply at 100% Opacity [#F3EFB6]
Create a New Layer

on Exclusion at 100% Opactiy [#0A0821]
Create a New Layer

on Overlay at 100% Opactiy [#C2C2C2]
NOTE: This makes the icon really bright. In the end product, if it looks funny, erase the spots [ie:faces] that are way too bright.
Or when the icon you are dealing with is too dark, it'll look all pixel-y, you can try lowering the opacity,
but if it doesn't look right still...you're better off not using this step.
Duplicate the base that is set on Screen
Move this copy to the top at set it on Overlay 75%
so far...
If you like your icon like this, you can keep it like this. But I felt that this icon needed some reds.
So I opened Color Balance
For Midtones:
Color Levels: 33, -100, -100 [see picture here]
The red was a little too overpowering so I set it to 37% Fill. [Normal]
so far...
Almost there! One more thing!
Icon is a little blurry. So highlight the base copy that is on Overlay. [on the Layer Menu]
Then Filter>Sharpen>Unsharp Mask.
Phew!!! All done!!!
Now you can do whatever with your icon. I'd add text, but text doesn't like me. Hehe.
I'd love to see what you came up with!
If you have a question or problem, don't hesitate, just ask!
I won't mind!
Other Examples Used With This Tutorial

.
.
[hehe. lovin the smallville & superman]
got [smallville/superman returns] caps here
this site isn't in English... but it's pretty obvious how to navigate.
EDIT: I'm so so so so so so SORRY! I tried fixing the broken weird link, but the cut was being really picky. so I had to erase it. So I fixed it. And I couldn't say anymore but sorry.
To:
P.S. I use PS7, but I'm pretty sure it'll work on others. [edit:has selective coloring!]
Crop your base to your liking
Next what I like to do is I use Curves to brighten up the base and give it some contrast.
If you prefer not to use curves, since I still barely know how to use it,
you can either duplicate the base many times on Screen.
Or you can use Brightness/Contrast. Which ever you like.
RGB: (156, 217) [see picture here]
so far...
Next Open ColorBalance
For Midtones
Color Levels: -38, 0, 28 [see picture here]
For Shawdows
Color Levels: -36, 6, -37 [see picture here]
so far...
Create a New Layer.
Well, for PS7, the command is [Shift+Ctrl+Alt+E]
I don't know how I found it. But if this doesn't work, you can just
Merge all the layers and duplicate the new base.
Set that layer on Screen at 47% Opacity
so far...
Create a New Layer
on ColorBurn at 34% Opacity [#99DDF7]
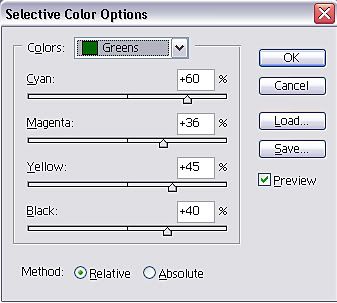
Open Selective Coloring
Greens:
- Cyans: 60%
- Magenta: 36%
- Yellow: 45%
- Black: 40% [see picture here]
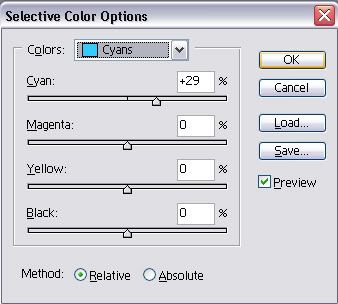
- Cyans: 29% [see picture here]
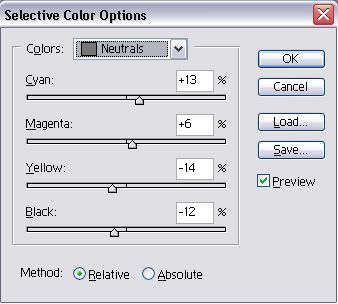
- Cyans: 13%
- Magenta: 6%
- Yellow: -14%
- Black: -12% [see picture here]
Create a New Layer
on Multiply at 100% Opacity [#F3EFB6]
Create a New Layer
on Exclusion at 100% Opactiy [#0A0821]
Create a New Layer
on Overlay at 100% Opactiy [#C2C2C2]
NOTE: This makes the icon really bright. In the end product, if it looks funny, erase the spots [ie:faces] that are way too bright.
Or when the icon you are dealing with is too dark, it'll look all pixel-y, you can try lowering the opacity,
but if it doesn't look right still...you're better off not using this step.
Duplicate the base that is set on Screen
Move this copy to the top at set it on Overlay 75%
so far...
If you like your icon like this, you can keep it like this. But I felt that this icon needed some reds.
So I opened Color Balance
For Midtones:
Color Levels: 33, -100, -100 [see picture here]
The red was a little too overpowering so I set it to 37% Fill. [Normal]
so far...
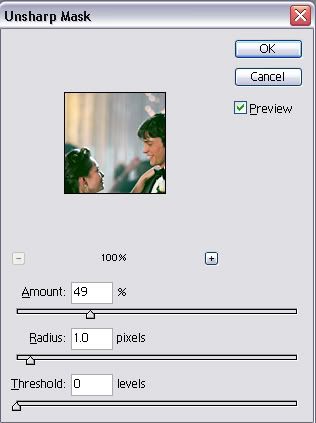
Almost there! One more thing!
Icon is a little blurry. So highlight the base copy that is on Overlay. [on the Layer Menu]
Then Filter>Sharpen>Unsharp Mask.
- Amount: 49%
- Radius: 1.0px
- Threshold: 0 [see picture here]
Phew!!! All done!!!
Now you can do whatever with your icon. I'd add text, but text doesn't like me. Hehe.
I'd love to see what you came up with!
If you have a question or problem, don't hesitate, just ask!
I won't mind!
Other Examples Used With This Tutorial
.
.
[hehe. lovin the smallville & superman]
got [smallville/superman returns] caps here
this site isn't in English... but it's pretty obvious how to navigate.
EDIT: I'm so so so so so so SORRY! I tried fixing the broken weird link, but the cut was being really picky. so I had to erase it. So I fixed it. And I couldn't say anymore but sorry.