(no subject)
I had a friend that wanted to know how I did this and of what I've see nobody's used this technic, so I decided to post it.
Go from THIS to this>>
and then possibly this>>
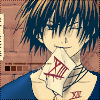
Step 1: Crop, Resize, Sharpen. The obvious stuff. I'd recomend using the sharpen brush on Trian's XII tatto and eye so they show and the outline of the jaket, seeing how hard it is to see. I like to keep my images fairly blurred.

Step 2: Right away we go strait to coloring. I like to keep each color on a separate layer to keep things clean. Take a brush about size 10 and color the areas with their coresponding color. (NOTE: A picture to refrence is a good idea, but I wouldn't recommened eyedropping it, it looks kinda funny, then.) SEt each layer to multiply, don't have a cow about keeping in the lines a the moment, we just want color. Hide the layers as you finish them

MY COLORS:
Hair: #733f03
Outside Jakent: #0e256e
Inside Jacket: #172a65
Skin: #fcebd6
Bell: #ffff95
Tattoo and Coller: #a20000 (this is a screen layer)
Blood: #500000 (also screen)
Eyes: #f6de6c
If you happen to be making color Train, feel free to use these, but I'd stray from that
When you have all the colors in, if you were to make all the layers visible, is will look alittle like this.

Messy, Eh? Don't worry. Hide all but one layer again
Step 3: Ok, so I've hidden all but Train's hair. There's two ways to get rid of extra color. One for big white spots and one for detailed.
Big: Select the white area behind Train (be sure 'use all layers' is off and you have the base selected) with the magic wand (under the arrow of the 3rd icon), SETTINGS: Match Mode: Brightness, Tolerance: less than 50 (I like 30-40). Select the layer with Trains hair and delete. Repeat with the face. After this you'll have ot follow Small.

Small: Select the eraser. Shape: Circle, Size: 5. Zoom in on the hair and slowly start erasting around the hair.. To avoide a pixely look zoom out ocassionally and see what looks funny and wrk with that.
TIP: Right clicking will bring back and old color previously erased, but if nothing was there it would become black.
Train's hair is probably kinda dificule because its go somany black and white spaces it hard to know what's were and such.

After thats done, work on the other layers till it's all colored and such using the same steps. Also bring the coller and tatto layer down a little.
NOTE: the screen layers my be hard to work with, tyr to make the colors blend nicely using the small technic. Also don't forget eyes are white, not skin colored.
Step 4: Ok, if you've made a large image that you might want to edit later on, I'd save this a .psp so it saves everything, and hit shift+d so it opens the same image in another frame. If not, then merge and get ready for Shading.
Open brush and Put it to these settings: Shape: Circle, Size: 5, Hardness: 0, Step: 0, Opacity, 100, Color: Black. New layer, ( RECOMMENDED: NAME it 'skin shading' it keeps things organized cut its hard ot tell the difference ) and set the layer to Luminance (reg or L). Mentally choose a light sorce (I'm picking behind him) and start shadin the skin (skin is seperate from the rest because its so bright, unless of corse you're character has dark skin, but i just liket o keep it seperate). After Shink Shadin is done, Duplicate the layer and Blur it (Adjust>Blur>Gaussiant Blur) to 2.00. This smooths out the shadow.

Step 5: Not to shade the rest. New layer (RECOMMENDED: Name: Main Shading) set to Luminance (L or reg). Again shade what you think would be shaded, use the brush a few time over the same spot a few times to make an area darker. (areas i shaded: Hair away from light and inside jaket). Soften the layer (Adjust>Soften>Soften) or use the soften brush (11th on the list under the arrow). OPTIONAL: Duplicate the layer again and blur, opacity if it's too dark just lower it.
NOTE: If you got sloppy and shaded somthing not ment to be, just erase it, I normally don't, but that's because I'm lazy, ^^"

Step 6: HIGHLIGHTS!!! YAY, ^^. Of corse, you don't HAVE to highlight, but it just nice ot have them around. New layer (Name: Highlights) Set to dogde or Luminance (L or reg). Have the brush at the same settings but Color: white. Scribble over what you think is highlighted. Highlightin is just like shading, so dont' freak. After all that, MERGE!!! ^^

TAH-DA!!! Color Train! ^^ YAY~
From here you can stop, do some other effect, OR follow along!!!
Step 7: Paste a texture to the image and set it to multiply. Erase the area covering Train.


(I have no idea who made this texture, x-x)
Step 8: New layer; Fill with #000e38 and set it to Exclusion.


Step 9: Add text!!! ^^

(FONT: Dear Joe, Dafont.com)
DONE!!! If there's any problems your having bring it up and I'll see if I can help or questions and I'll explain. Also I'd LOVE to see what comes out of this if it helped anybody.
Other icons from this coloring style (different effects)~


Go from THIS to this>>

and then possibly this>>

Step 1: Crop, Resize, Sharpen. The obvious stuff. I'd recomend using the sharpen brush on Trian's XII tatto and eye so they show and the outline of the jaket, seeing how hard it is to see. I like to keep my images fairly blurred.

Step 2: Right away we go strait to coloring. I like to keep each color on a separate layer to keep things clean. Take a brush about size 10 and color the areas with their coresponding color. (NOTE: A picture to refrence is a good idea, but I wouldn't recommened eyedropping it, it looks kinda funny, then.) SEt each layer to multiply, don't have a cow about keeping in the lines a the moment, we just want color. Hide the layers as you finish them

MY COLORS:
Hair: #733f03
Outside Jakent: #0e256e
Inside Jacket: #172a65
Skin: #fcebd6
Bell: #ffff95
Tattoo and Coller: #a20000 (this is a screen layer)
Blood: #500000 (also screen)
Eyes: #f6de6c
If you happen to be making color Train, feel free to use these, but I'd stray from that
When you have all the colors in, if you were to make all the layers visible, is will look alittle like this.

Messy, Eh? Don't worry. Hide all but one layer again
Step 3: Ok, so I've hidden all but Train's hair. There's two ways to get rid of extra color. One for big white spots and one for detailed.
Big: Select the white area behind Train (be sure 'use all layers' is off and you have the base selected) with the magic wand (under the arrow of the 3rd icon), SETTINGS: Match Mode: Brightness, Tolerance: less than 50 (I like 30-40). Select the layer with Trains hair and delete. Repeat with the face. After this you'll have ot follow Small.

Small: Select the eraser. Shape: Circle, Size: 5. Zoom in on the hair and slowly start erasting around the hair.. To avoide a pixely look zoom out ocassionally and see what looks funny and wrk with that.
TIP: Right clicking will bring back and old color previously erased, but if nothing was there it would become black.
Train's hair is probably kinda dificule because its go somany black and white spaces it hard to know what's were and such.

After thats done, work on the other layers till it's all colored and such using the same steps. Also bring the coller and tatto layer down a little.
NOTE: the screen layers my be hard to work with, tyr to make the colors blend nicely using the small technic. Also don't forget eyes are white, not skin colored.
Step 4: Ok, if you've made a large image that you might want to edit later on, I'd save this a .psp so it saves everything, and hit shift+d so it opens the same image in another frame. If not, then merge and get ready for Shading.
Open brush and Put it to these settings: Shape: Circle, Size: 5, Hardness: 0, Step: 0, Opacity, 100, Color: Black. New layer, ( RECOMMENDED: NAME it 'skin shading' it keeps things organized cut its hard ot tell the difference ) and set the layer to Luminance (reg or L). Mentally choose a light sorce (I'm picking behind him) and start shadin the skin (skin is seperate from the rest because its so bright, unless of corse you're character has dark skin, but i just liket o keep it seperate). After Shink Shadin is done, Duplicate the layer and Blur it (Adjust>Blur>Gaussiant Blur) to 2.00. This smooths out the shadow.

Step 5: Not to shade the rest. New layer (RECOMMENDED: Name: Main Shading) set to Luminance (L or reg). Again shade what you think would be shaded, use the brush a few time over the same spot a few times to make an area darker. (areas i shaded: Hair away from light and inside jaket). Soften the layer (Adjust>Soften>Soften) or use the soften brush (11th on the list under the arrow). OPTIONAL: Duplicate the layer again and blur, opacity if it's too dark just lower it.
NOTE: If you got sloppy and shaded somthing not ment to be, just erase it, I normally don't, but that's because I'm lazy, ^^"

Step 6: HIGHLIGHTS!!! YAY, ^^. Of corse, you don't HAVE to highlight, but it just nice ot have them around. New layer (Name: Highlights) Set to dogde or Luminance (L or reg). Have the brush at the same settings but Color: white. Scribble over what you think is highlighted. Highlightin is just like shading, so dont' freak. After all that, MERGE!!! ^^

TAH-DA!!! Color Train! ^^ YAY~
From here you can stop, do some other effect, OR follow along!!!
Step 7: Paste a texture to the image and set it to multiply. Erase the area covering Train.


(I have no idea who made this texture, x-x)
Step 8: New layer; Fill with #000e38 and set it to Exclusion.


Step 9: Add text!!! ^^

(FONT: Dear Joe, Dafont.com)
DONE!!! If there's any problems your having bring it up and I'll see if I can help or questions and I'll explain. Also I'd LOVE to see what comes out of this if it helped anybody.
Other icons from this coloring style (different effects)~