(no subject)
a couple people requested these tuts not to long ago and instead of e-mailing all of them (since i forget their e-mails) i'm just going to post it here, and hope they find them! Now i always save my icons as a jpg and as a photoshop image (so i can see the layers and what they're set to) so i can re-create them. I'm sorry if this is similar to anyone elses tutorial, but i assure you that was not my goal (i just want to let this be argument FREE!) ^_^
tutorial #1 where we will make:
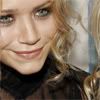
to
Tutorial #1
1. Ok i have my picture, i crop it and resize it (all the basics) and i also sharpen it, it was very blurry.
2. Duplicate your base and set the duplicated layer to screen (if you have a bright base just lower the opacity to make it less harsh!)
3. Once again, duplicate your base (drag it to the top) and set the layer to softlight
4. You then make a new layer and fill it w/ #CDCDCD, set it to color burn @ 100%

5. You then make a new layer and fill it w/ #001033, set it to exculsion @ 100%

6. You then make a new layer and fill it w/ #A4DDF4, set it to color burn @ 100%

7. Once again, duplicate your base (drag it to the top) and set the layer to softlight

8. ok, this part is a little tricky but here it goes:
go to LAYERS > NEW ADJUSTMENT LAYER >> GRADIENT >>> and set the gradient like so - one side is #000000 and the other side is #FFFFFF, in the end it will give you a nicer look black and white look to your base (if this is too confusing simply duplicate your base, drag it to the top, desaturate it and set it to softlight), you then set the layer to soft light - this way looks nicer than simply desaturating the image (much nicer!)
AND WE'RE DONE!
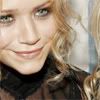
and finally tutorial #2:

to
Tutorial #2
1. Ok, start w/ your base. Mine is very bright (normallY) so i'll skip the parts where you duplicate your layer set the layer to screen, then duplicate your base again, drag it to the top and set it to soft light (hm... well it wasn't REALLY skipping was it?) - just prep your base :D
2. You then make a new layer and fill it w/ #1B2E4F, set it to exculsion @ 100%

3. You then make a new layer and fill it w/ #87C0E7, set it to soft light @ 100%

4. Now select all (ctrl - A) and copy the image as a merged image (ctrl - shift - C) and then paste (ctrl - V). Or, if it is easier, merge everything and then duplicate your new base.

Once you have picked one of these options set your newest top layer to color burn.
5.ok, this part is a little tricky but here it goes:
go to LAYERS > NEW ADJUSTMENT LAYER >> GRADIENT >>> and set the gradient like so - one side is #000000 and the other side is #FFFFFF, in the end it will give you a nicer look black and white look to your base

(if this is too confusing simply duplicate your base, drag it to the top, desaturate it and set it to softlight), you then set the layer to soft light - this way looks nicer than simply desaturating the image (much nicer!)
6. and voila! we're finished!
i have two other tuts back at my LJ but they're FRIENDS ONLY, they're not wonderful but i'd be more than happy to friend you if you just wanna check it out (you can un-friend me if you wish)
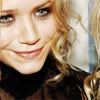
tutorial #1 where we will make:
to
Tutorial #1
1. Ok i have my picture, i crop it and resize it (all the basics) and i also sharpen it, it was very blurry.
2. Duplicate your base and set the duplicated layer to screen (if you have a bright base just lower the opacity to make it less harsh!)
3. Once again, duplicate your base (drag it to the top) and set the layer to softlight
4. You then make a new layer and fill it w/ #CDCDCD, set it to color burn @ 100%
5. You then make a new layer and fill it w/ #001033, set it to exculsion @ 100%
6. You then make a new layer and fill it w/ #A4DDF4, set it to color burn @ 100%
7. Once again, duplicate your base (drag it to the top) and set the layer to softlight
8. ok, this part is a little tricky but here it goes:
go to LAYERS > NEW ADJUSTMENT LAYER >> GRADIENT >>> and set the gradient like so - one side is #000000 and the other side is #FFFFFF, in the end it will give you a nicer look black and white look to your base (if this is too confusing simply duplicate your base, drag it to the top, desaturate it and set it to softlight), you then set the layer to soft light - this way looks nicer than simply desaturating the image (much nicer!)
AND WE'RE DONE!
and finally tutorial #2:
to
Tutorial #2
1. Ok, start w/ your base. Mine is very bright (normallY) so i'll skip the parts where you duplicate your layer set the layer to screen, then duplicate your base again, drag it to the top and set it to soft light (hm... well it wasn't REALLY skipping was it?) - just prep your base :D
2. You then make a new layer and fill it w/ #1B2E4F, set it to exculsion @ 100%
3. You then make a new layer and fill it w/ #87C0E7, set it to soft light @ 100%
4. Now select all (ctrl - A) and copy the image as a merged image (ctrl - shift - C) and then paste (ctrl - V). Or, if it is easier, merge everything and then duplicate your new base.
Once you have picked one of these options set your newest top layer to color burn.
5.ok, this part is a little tricky but here it goes:
go to LAYERS > NEW ADJUSTMENT LAYER >> GRADIENT >>> and set the gradient like so - one side is #000000 and the other side is #FFFFFF, in the end it will give you a nicer look black and white look to your base
(if this is too confusing simply duplicate your base, drag it to the top, desaturate it and set it to softlight), you then set the layer to soft light - this way looks nicer than simply desaturating the image (much nicer!)
6. and voila! we're finished!
i have two other tuts back at my LJ but they're FRIENDS ONLY, they're not wonderful but i'd be more than happy to friend you if you just wanna check it out (you can un-friend me if you wish)