Vibrant Images
I've recently learned how to do curves and have been experimenting a bit. I came up with a way to brighten up images and make them more vibrant.
Go from This:
to This:
I used Photoshop CS2 and I'm sure it's pretty translatable to earlier versions of Photoshop. I imagine it can also be done in other programs, but I'm not sure how.
For this tutorial you should have a basic understanding of curves, adjusment layers, and cropping. This is a short and simple tutorial (8 steps total).
1. Choose an image and using your crop tool, crop it to a 100x100 pixel icon. I used a hi-resolution image from Lost-Media. Here is my original image.
2. Sharpen your cropped image once. Filter >> Sharpen >> Sharpen.
3. Now we're going to adjust the saturation of the image. Go to Layer >> New Adjustment Layer >> Hue/Saturation. Change the Saturation to -40. Change the Lightness to -16. Depending on the image you choose, you might have to play around with settings a little.
4. To make the image "pop" a little more, we're going to adjust the contrast. Go to Layer >> New Adjustment Later >> Brightness/Contrast. Change the Contrast to +15.
5. Now duplicate the original image. Set the Blend Mode to Overlay from the Layers Palette. Set this duplicated layer to 80% Opacity. Drag the duplicated layer to the top of the Layers Palette.

6. It's time to play around with Curves. Go to Layer >> New Adjustment Layer >> Curves. Do two clicks on the grid in the RGB Channel so you have two points. Change the first point to Input: 76 and Output: 53. Change the second point to Input: 181 and Output: 197. Click OK. You will probably have to do a few adjustments here depending on your image.
7. Merge all the layers and flatten your image. 8. Duplicate the flattened image and set its Blend Mode to Screen. Change the Opacity to 20%. Flatten your image again and you're finished! You can add text, brushes, or keep it as is. Experiment a little!
Keep this in mind: depending on your image, your Adjustment Layer settings and Blend Modes might differ from mine. Play around with things a little. I've found this tutorial works best with lighter images. It can be done with darker ones, but you will need to adjust things.
Here are a few more examples of this technique (it works great on animation/cartoon images):
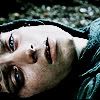
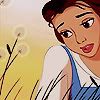

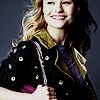
I hope someone finds this helpful! Comments/suggestions rock my world!
Go from This:

to This:

I used Photoshop CS2 and I'm sure it's pretty translatable to earlier versions of Photoshop. I imagine it can also be done in other programs, but I'm not sure how.
For this tutorial you should have a basic understanding of curves, adjusment layers, and cropping. This is a short and simple tutorial (8 steps total).
1. Choose an image and using your crop tool, crop it to a 100x100 pixel icon. I used a hi-resolution image from Lost-Media. Here is my original image.

2. Sharpen your cropped image once. Filter >> Sharpen >> Sharpen.

3. Now we're going to adjust the saturation of the image. Go to Layer >> New Adjustment Layer >> Hue/Saturation. Change the Saturation to -40. Change the Lightness to -16. Depending on the image you choose, you might have to play around with settings a little.

4. To make the image "pop" a little more, we're going to adjust the contrast. Go to Layer >> New Adjustment Later >> Brightness/Contrast. Change the Contrast to +15.

5. Now duplicate the original image. Set the Blend Mode to Overlay from the Layers Palette. Set this duplicated layer to 80% Opacity. Drag the duplicated layer to the top of the Layers Palette.

6. It's time to play around with Curves. Go to Layer >> New Adjustment Layer >> Curves. Do two clicks on the grid in the RGB Channel so you have two points. Change the first point to Input: 76 and Output: 53. Change the second point to Input: 181 and Output: 197. Click OK. You will probably have to do a few adjustments here depending on your image.

7. Merge all the layers and flatten your image. 8. Duplicate the flattened image and set its Blend Mode to Screen. Change the Opacity to 20%. Flatten your image again and you're finished! You can add text, brushes, or keep it as is. Experiment a little!

Keep this in mind: depending on your image, your Adjustment Layer settings and Blend Modes might differ from mine. Play around with things a little. I've found this tutorial works best with lighter images. It can be done with darker ones, but you will need to adjust things.
Here are a few more examples of this technique (it works great on animation/cartoon images):


I hope someone finds this helpful! Comments/suggestions rock my world!