(no subject)
Whee tutorial time! From 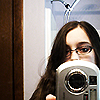
to
in PS CS2, but I'm sure you can figure it out in other programs.

1. Crop your base. Sharpen it as much as needed. I chose a picture of myself...
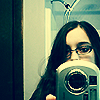
2. Create three new layers. Flood fill the first one (closest to your base) with #a5fef9 and set the layer on color burn. Flood fill the second with #fffcc9 and set it on multiply.
Flood fill the third with #000328 on exclusion.
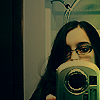
3. Paste in this light texture (by me) on multiply at 60% opacity. Then duplicate your base and
bring it above all your layers, set on soft light 25% opacity.
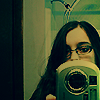
4. Paste in this (by me) on saturation at 30% opacity. Then this (by
krinklegraphics) on soft light at 30% opacity.

5. Merge visable, then copy a small strip on your icon. Paste it onto the icon and move it to one side, set it on 20% opacity. Then take this (by
__darkdreaming) and put it on screen 50%. Using the eraser tool, remove most of the texture except for around the corners. Add this (not sure who) on multiply. And you can add text or whatever you want!
Comments are nice, and I love to see what you guys make! If you have a question, please ask. x)

to

in PS CS2, but I'm sure you can figure it out in other programs.

1. Crop your base. Sharpen it as much as needed. I chose a picture of myself...

2. Create three new layers. Flood fill the first one (closest to your base) with #a5fef9 and set the layer on color burn. Flood fill the second with #fffcc9 and set it on multiply.
Flood fill the third with #000328 on exclusion.

3. Paste in this light texture (by me) on multiply at 60% opacity. Then duplicate your base and
bring it above all your layers, set on soft light 25% opacity.

4. Paste in this (by me) on saturation at 30% opacity. Then this (by

krinklegraphics) on soft light at 30% opacity.

5. Merge visable, then copy a small strip on your icon. Paste it onto the icon and move it to one side, set it on 20% opacity. Then take this (by

__darkdreaming) and put it on screen 50%. Using the eraser tool, remove most of the texture except for around the corners. Add this (not sure who) on multiply. And you can add text or whatever you want!
Comments are nice, and I love to see what you guys make! If you have a question, please ask. x)