Vibrant Colouring Tutorial (Made with Photoshop CS2)
go from 
to
Step One:
Image > Adjustments > Auto Contrast
Image > Adjustments > Auto Colour

Step Two:
Duplicate and set to screen at 100%

Step Three:
Layer > New Adjustment Layer > Hue/Saturation
set saturation +15

Step Four:
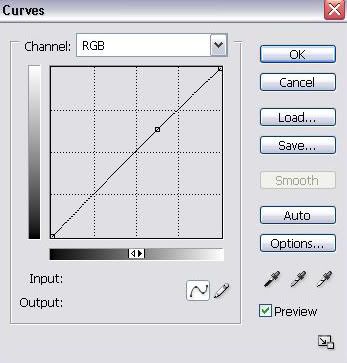
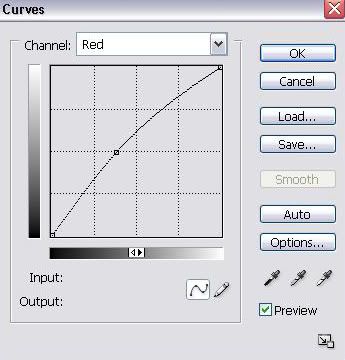
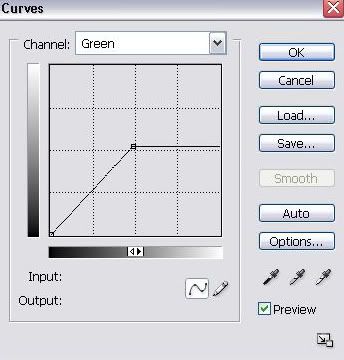
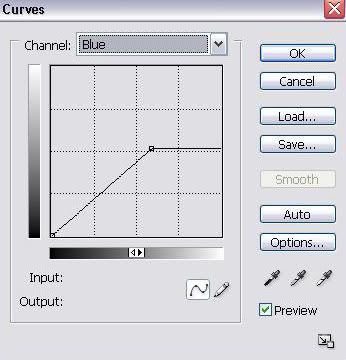
Layer > New Adjustment Layer > Curves
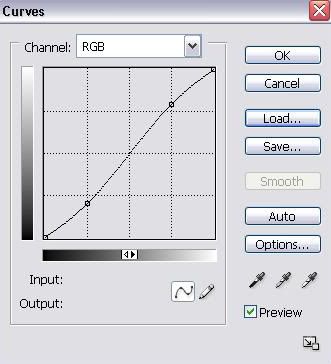
RGB - input: 159 output: 162
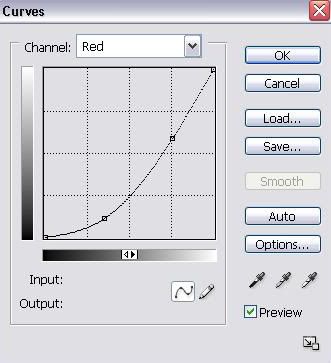
Red - input: 97 output: 126
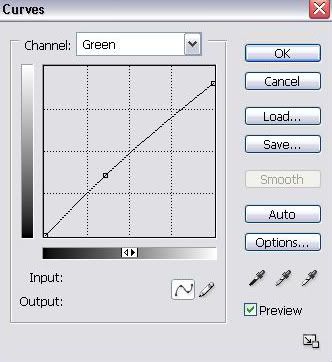
Green - input: 124 output: 134
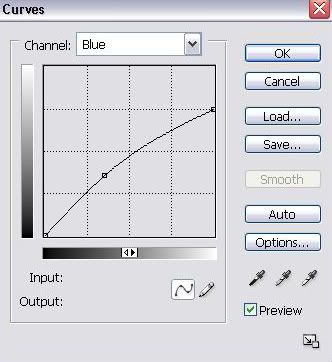
Blue - input: 156 output: 131
set to soft light at 100%

Step Five:
Layer > New Adjustment Layer > Curves
RGB:
first point:
input: 64 output: 52
second point:
input:191 output: 202
Red:
first point:
input: 90 output:29
second point:
input:193 output: 150
Green:
first point:
input: 91 output: 91
second point:
input: 255 output: 231
Blue:
first point:
input: 90 output: 91
second point:
input: 255 output: 191
set to normal at 75%

Step Six:
duplicate and set to soft light at 35%

add text and you're finished

Here are some examples using different colour caps:

to

to

to

to
thanks for viewing! :)
If the curves aren't working nicely for you here they are (please right-click and save as):
Curve 1
Curve 2
Screenshots:
Curve 1:
Curve 2:


to

Step One:
Image > Adjustments > Auto Contrast
Image > Adjustments > Auto Colour

Step Two:
Duplicate and set to screen at 100%

Step Three:
Layer > New Adjustment Layer > Hue/Saturation
set saturation +15

Step Four:
Layer > New Adjustment Layer > Curves
RGB - input: 159 output: 162
Red - input: 97 output: 126
Green - input: 124 output: 134
Blue - input: 156 output: 131
set to soft light at 100%

Step Five:
Layer > New Adjustment Layer > Curves
RGB:
first point:
input: 64 output: 52
second point:
input:191 output: 202
Red:
first point:
input: 90 output:29
second point:
input:193 output: 150
Green:
first point:
input: 91 output: 91
second point:
input: 255 output: 231
Blue:
first point:
input: 90 output: 91
second point:
input: 255 output: 191
set to normal at 75%

Step Six:
duplicate and set to soft light at 35%

add text and you're finished

Here are some examples using different colour caps:

to


to


to


to

thanks for viewing! :)
If the curves aren't working nicely for you here they are (please right-click and save as):
Curve 1
Curve 2
Screenshots:
Curve 1:


Curve 2:
