Tutorial 02 ; Carmelo Anthony
From 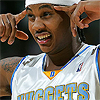
to
USING PS7 (MOST LIKELY TRANSFERABLE)
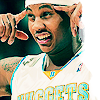
01. I used this image from NBA.com of Carmelo Anthony. Crop and resize it down to a 100x100 base. Then, sharpen once and use the Blur Tool (or Soften Tool) at 10% and go over the skin.
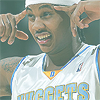
02. Create a new layer and fill with a light-green color. Set it to Screen and lower the opacity to 40%.

>
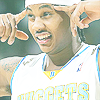
03. Duplicate the base, bring it to the top and set to Screen. Duplicate the screen layer.
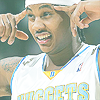
>
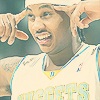
04. Create a new layer and fill with a dark-blue color. Set to Exclusion at 100%. Duplicate the Exclusion layer.

>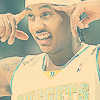
05. Duplicate the base, bring it to the top and set to Screen at 100%.
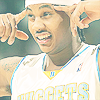
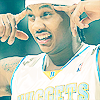
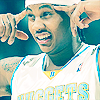
06. Create a new layer and fill with a sky-blue color and set to Color Burn (or Burn).Duplicate the Color burn layer once.

>
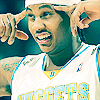
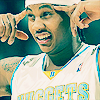
07. Create a new layer and fill with a tan. Set to Color Burn at 100%. Duplicate the layer, change the Blending Option to Multiply, and lower the opacity to 30%.

>
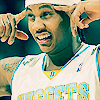
08. Next, create another new layer and fill with a light-grey. Set the layer to Color Burn.

09. Create another new layer and fill with a light gold. Set the layer to Soft Light and lower the opacity to 30%.

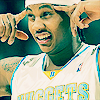
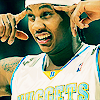
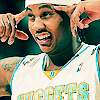
10. Duplicate the base image and bring it to the top. Set it to Soft Light at 80%. With the Soft Light layer active, go to Image > Adjustments > Hue/Saturation or Ctrl+U (on PS7).
My settings were: Hue (-55), Saturation (+20), Lightness (0).
>
11. Merge all and paste this mask brush and set to Screen.
>
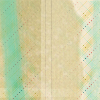
12. Use this texture by colorfilter. Rotate it 90° CCW.

>
13. Paste your masked base on the texture. Using the Paint Bucket Tool, set the mode to Clear and use it on the white area of the masked base. (Tolerance: 5)
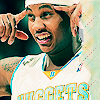
14. Use the Rectangular Marquee Tool and select a small area and fill it with #00E5EE. Set to Multiply.
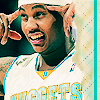
15. I repeated this step on either side of the blue multiply rectangle, except I filled with yellow (#FAEB8B). I left the Blending Mode at Normal.
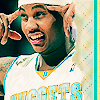
16. New layer under the blue rectangle layer. Select the Brush tool. I chose a rounded brush and set the spacing to 200%. I used a brown (#B07F53) and drew a swirly line. AND WE'RE FINALLY DONE! (Optional: You can add text).

This is definitely a time-consuming tutorial. However, I do hope it does not scare anyone away! I would love to see some results. :) OH. And other example of this technique is used in my icon.
to
USING PS7 (MOST LIKELY TRANSFERABLE)
01. I used this image from NBA.com of Carmelo Anthony. Crop and resize it down to a 100x100 base. Then, sharpen once and use the Blur Tool (or Soften Tool) at 10% and go over the skin.
02. Create a new layer and fill with a light-green color. Set it to Screen and lower the opacity to 40%.
>
03. Duplicate the base, bring it to the top and set to Screen. Duplicate the screen layer.
>
04. Create a new layer and fill with a dark-blue color. Set to Exclusion at 100%. Duplicate the Exclusion layer.
>
05. Duplicate the base, bring it to the top and set to Screen at 100%.
06. Create a new layer and fill with a sky-blue color and set to Color Burn (or Burn).Duplicate the Color burn layer once.
>
07. Create a new layer and fill with a tan. Set to Color Burn at 100%. Duplicate the layer, change the Blending Option to Multiply, and lower the opacity to 30%.
>
08. Next, create another new layer and fill with a light-grey. Set the layer to Color Burn.
09. Create another new layer and fill with a light gold. Set the layer to Soft Light and lower the opacity to 30%.
10. Duplicate the base image and bring it to the top. Set it to Soft Light at 80%. With the Soft Light layer active, go to Image > Adjustments > Hue/Saturation or Ctrl+U (on PS7).
My settings were: Hue (-55), Saturation (+20), Lightness (0).
>
11. Merge all and paste this mask brush and set to Screen.
>
12. Use this texture by colorfilter. Rotate it 90° CCW.
>
13. Paste your masked base on the texture. Using the Paint Bucket Tool, set the mode to Clear and use it on the white area of the masked base. (Tolerance: 5)
14. Use the Rectangular Marquee Tool and select a small area and fill it with #00E5EE. Set to Multiply.
15. I repeated this step on either side of the blue multiply rectangle, except I filled with yellow (#FAEB8B). I left the Blending Mode at Normal.
16. New layer under the blue rectangle layer. Select the Brush tool. I chose a rounded brush and set the spacing to 200%. I used a brown (#B07F53) and drew a swirly line. AND WE'RE FINALLY DONE! (Optional: You can add text).
This is definitely a time-consuming tutorial. However, I do hope it does not scare anyone away! I would love to see some results. :) OH. And other example of this technique is used in my icon.