(no subject)
Program: PSP9
Level: Easy/medium
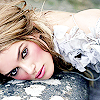
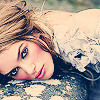
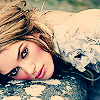
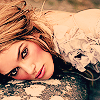
Go from
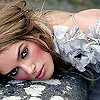
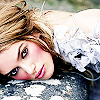
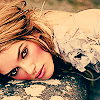
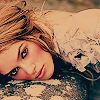
to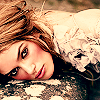
1) Take this base that I just got off google>sharpen twice
>>
2)Use your smudge tool and carefully on low opacity smoothen out her skin. Be sure to avoid her eyes and lips.
3)Duplicate>set to Screen at 100%
4)Duplicate base>drag to top>set to Soft Light at 100%
5)Create new raster layer>Fill it with a dark blue>set to exclusion at 50%
6)Create new raster layer>Fill it with #8cc088>set to burn at 35%
7)Merge all your layers
8)Goto> Adjust > Brightness&Contrast > Curves
Set Curves at
RGB: Input:158 Output102
Red: Input: 61 Output:142
Green: Input: 67 Output:111
Blue: Input 126 Output:151
9)Merge all your layers> Create new raster layer> Fill it with a dark blue (#191e31)>set to exclusion at 35%
10)Create a new layer> fill with dark peach brown (#b98071)>set to multiply at 30%
11)Duplicate the base>drag to top>set to Luminance
12)Adjust>Contrast>Bias: Darker Strength:Normal Apperance:Bold
Level: Easy/medium
Go from
to
1) Take this base that I just got off google>sharpen twice
>>
2)Use your smudge tool and carefully on low opacity smoothen out her skin. Be sure to avoid her eyes and lips.
3)Duplicate>set to Screen at 100%
4)Duplicate base>drag to top>set to Soft Light at 100%
5)Create new raster layer>Fill it with a dark blue>set to exclusion at 50%
6)Create new raster layer>Fill it with #8cc088>set to burn at 35%
7)Merge all your layers
8)Goto> Adjust > Brightness&Contrast > Curves
Set Curves at
RGB: Input:158 Output102
Red: Input: 61 Output:142
Green: Input: 67 Output:111
Blue: Input 126 Output:151
9)Merge all your layers> Create new raster layer> Fill it with a dark blue (#191e31)>set to exclusion at 35%
10)Create a new layer> fill with dark peach brown (#b98071)>set to multiply at 30%
11)Duplicate the base>drag to top>set to Luminance
12)Adjust>Contrast>Bias: Darker Strength:Normal Apperance:Bold