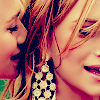
mka icon for psp7
from 
to
image heavy-ish.
i made this icon quite some time ago so i don't really remember what i may have done to prep the base. however, i remade the icon and it looks pretty close (to me). the steps are still the same, though.
so here goes.
oh and i use psp7. but it should be translatable. it's just layers.
1. crop your picture to basic 100x100 icon size. sharpen.

->
2. duplicate your base and set to soft light. merge all (flatten).

->
3. new raster layer. fill with #6DCFF6, a light blue. set blend mode to burn, opacity 41.

->
4. new raster layer. fill with #FFFF00, a yellow. set blend mode to darken, opacity 9. it's not obvious but it gives the icon a yellow tinge.

->
5. new raster layer. fill with #FF97B4, a pink. set blend mode to burn, opacity 26.

->
6. new raster layer. fill with #E1B7A0, a beige-y colour. set blend mode to soft light, opacity 100.

->
7. new raster layer. fill with #000040, a dark blue. set blend mode to exclusion, opacity 100. drag it down so its just right above the background layer.

->
8. new raster layer. fill with #D7B36D, a brown-yellow. set blend mode to multiply, opacity 20.

->
9. it's too dark now. duplicate the base and set the blend mode to screen. drag it in between the multiply and exclusion and multiply layers and set the opacity to 68.

->
hopefully, your layers will look like this:

original:
remake:
i dunno, it looks close to me.
this is my first tutorial so if it's not clear or you have any questions, don't hesitate to ask. results vary because every picture is different. try messing with the opacities. nothing ventured, nothing gained. =)

to

image heavy-ish.
i made this icon quite some time ago so i don't really remember what i may have done to prep the base. however, i remade the icon and it looks pretty close (to me). the steps are still the same, though.
so here goes.
oh and i use psp7. but it should be translatable. it's just layers.
1. crop your picture to basic 100x100 icon size. sharpen.

->

2. duplicate your base and set to soft light. merge all (flatten).

->

3. new raster layer. fill with #6DCFF6, a light blue. set blend mode to burn, opacity 41.

->

4. new raster layer. fill with #FFFF00, a yellow. set blend mode to darken, opacity 9. it's not obvious but it gives the icon a yellow tinge.

->

5. new raster layer. fill with #FF97B4, a pink. set blend mode to burn, opacity 26.

->

6. new raster layer. fill with #E1B7A0, a beige-y colour. set blend mode to soft light, opacity 100.

->

7. new raster layer. fill with #000040, a dark blue. set blend mode to exclusion, opacity 100. drag it down so its just right above the background layer.

->

8. new raster layer. fill with #D7B36D, a brown-yellow. set blend mode to multiply, opacity 20.

->

9. it's too dark now. duplicate the base and set the blend mode to screen. drag it in between the multiply and exclusion and multiply layers and set the opacity to 68.

->

hopefully, your layers will look like this:

original:
remake:

i dunno, it looks close to me.
this is my first tutorial so if it's not clear or you have any questions, don't hesitate to ask. results vary because every picture is different. try messing with the opacities. nothing ventured, nothing gained. =)