(no subject)
This is my very first tutorial, so please bare with me :) If you've got
any questions, feel free to ask and I'll answer them to the best of my
abilities. I'm no pro, but I'll try. Here we go!
From
to
or
Note: This tutorial was designed for PSP7 users.
1. Start with your base. Go to Effects > Sharpen > Sharpen. Then, using your Retouch tool set to Soften, go over her skin to smooth it out.
Result:
2. Go to Layers > New Adjustment Layers > Colour Balance and set your values to the following:
Shadows: -56, 35, 27
Midtones: 20, -13, 45
Highlights: -27, 24, -41
...and uncheck the box at the bottom that says Preserve Luminosity.
Note: This are just guidelines. Depending on your image, you'll have to adjust them accordingly.
Result:
3. Then go to Layers > Merge > Merge All (Flatten). Select the entire image, and copy it onto a new layer. Set the layer properties to 30% Multiply.
Result:
4. Next, make a new layer set to 40% Exclusion and flood fill it with the colour #001222.
Result:
5. Now, take the very first layer (or background), paste it as a new layer, and move it to the top. Set the layer properties, again, to 30% Multiply.
Result:
6. Now, paste the gradient below as a new layer on 100% Soft Light.
Gradient:
Result:
7. Copy the background once more, and bring it to the top set to 100% Screen. This lightens up the image a little bit. If your image is relatively dark, you might want to repeat this step a second time.
Result:
8. Again, copy the background. However, don't put this layer on the very top. Put it one layer down, so that the layer from Step 7 is on the top with this one below it. Set the layer properties to 100% Soft Light. Go to Colours > Adjust > Brightness/Contrast and set your values to the following:
Brightness: -88
Contrast: 0
Result:
9. Copy the background again (Seeing a pattern :P) paste it on the very top. Go to your Eraser Tool and erase everything on that layer except for her eye and lips. If you hide all your layers except for this one, you should get something like this:
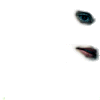
As you can tell, it's not perfect, and is slightly blurred around the edges. You want it to gradually fade out so it won't have such a stark contrast against the rest of the face on the finished product. Next, go to Effects > Sharpen > Sharpen More, and then Effects > Sharpen > Sharpen.
Result:
Finally, set the layer properties to 100% Soft Light.
Result:
10. Lastly, copy the background layer and paste it as a new layer on the top. Set the layer properties to 50% Screen. Desaturate this layer (Shift + H) to the following settings:
Hue: 0
Saturation: -100
Lightness: 0
Result:
11. (Optional) Create a new layer set to 100% Screen with the brush below (by me, omgitskrissy). Go to Colours > Negative Image and viola!
Brush: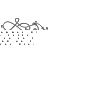
Result:
I hope that was easy enough to follow. I tried my best to explain in as much detail as possible :D Feel free to use the avatar I made in this tutorial (just be sure to credit omgitskrissy, please). And I'd love to see anything anyone comes up with, as well.
Other avatars credited similarly:


From

to

or

Note: This tutorial was designed for PSP7 users.
1. Start with your base. Go to Effects > Sharpen > Sharpen. Then, using your Retouch tool set to Soften, go over her skin to smooth it out.
Result:

2. Go to Layers > New Adjustment Layers > Colour Balance and set your values to the following:
Shadows: -56, 35, 27
Midtones: 20, -13, 45
Highlights: -27, 24, -41
...and uncheck the box at the bottom that says Preserve Luminosity.
Note: This are just guidelines. Depending on your image, you'll have to adjust them accordingly.
Result:

3. Then go to Layers > Merge > Merge All (Flatten). Select the entire image, and copy it onto a new layer. Set the layer properties to 30% Multiply.
Result:

4. Next, make a new layer set to 40% Exclusion and flood fill it with the colour #001222.
Result:

5. Now, take the very first layer (or background), paste it as a new layer, and move it to the top. Set the layer properties, again, to 30% Multiply.
Result:

6. Now, paste the gradient below as a new layer on 100% Soft Light.
Gradient:

Result:

7. Copy the background once more, and bring it to the top set to 100% Screen. This lightens up the image a little bit. If your image is relatively dark, you might want to repeat this step a second time.
Result:

8. Again, copy the background. However, don't put this layer on the very top. Put it one layer down, so that the layer from Step 7 is on the top with this one below it. Set the layer properties to 100% Soft Light. Go to Colours > Adjust > Brightness/Contrast and set your values to the following:
Brightness: -88
Contrast: 0
Result:

9. Copy the background again (Seeing a pattern :P) paste it on the very top. Go to your Eraser Tool and erase everything on that layer except for her eye and lips. If you hide all your layers except for this one, you should get something like this:

As you can tell, it's not perfect, and is slightly blurred around the edges. You want it to gradually fade out so it won't have such a stark contrast against the rest of the face on the finished product. Next, go to Effects > Sharpen > Sharpen More, and then Effects > Sharpen > Sharpen.
Result:

Finally, set the layer properties to 100% Soft Light.
Result:

10. Lastly, copy the background layer and paste it as a new layer on the top. Set the layer properties to 50% Screen. Desaturate this layer (Shift + H) to the following settings:
Hue: 0
Saturation: -100
Lightness: 0
Result:

11. (Optional) Create a new layer set to 100% Screen with the brush below (by me, omgitskrissy). Go to Colours > Negative Image and viola!
Brush:

Result:

I hope that was easy enough to follow. I tried my best to explain in as much detail as possible :D Feel free to use the avatar I made in this tutorial (just be sure to credit omgitskrissy, please). And I'd love to see anything anyone comes up with, as well.
Other avatars credited similarly:


